How do I create an invoice for custom work?
The following steps demonstrate how to invoice custom work from completed field records.
Things to Know
Before starting, make sure you create your contacts. They must be assigned as a "Landlord" and a "Customer" in order to invoice them. How do I add a contact?
Make sure you add a farm that includes all the fields for entering the custom work field records. These fields do not have to be owned or rented by you. You can learn more by visiting this Knowledge base article - How do I add my farm and fields?
There are two steps: Creating the appropriate land agreement and creating the invoice. If you have the land agreement set up you can scroll down to the Invoicing section of this guide.
Creating the Land Agreement
1. Using the navigation menu on the left hand side, open the Resources menu and select Land Agreements.

2. Select New Agreement.

3. Select the Farm/ Fields you are doing the custom work on.

4. Select the Lessee. This will likely be the farm entity.
5. Click the grey box Add Landowners.
6. Select the landowner contact that was created earlier and fill out details accordingly.

In this example "Neighbour" owns 100% of the land, inputs and harvest. The 100% of Input Shares is important in this step because the inputs are completely handled by the land owner; therefore, entering 100% will not impact your inventory.
7. Turn on Bill Landowner to be able to generate an invoice for the machine usage.
8. Click Save.
With the above steps completed, you will be able to generate an invoice for machine usage based on the completed field records.
Invoicing the Landowner
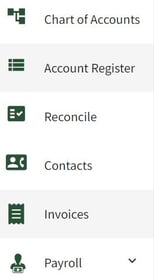
1. Navigate to Accounting and select Invoices.

2. Click + New Invoice
3. Complete seller and customer information
In this scenario; select your business as the seller and the landlord as the customer.
4. Select the Bill Landowner option above the information section and select the field record(s) you would like to invoice that landowner for. Toggle to Bill Equipment to select the field records to include machine usage.

5.Enter details and ensure that amount's are correct. Please note you might have to remove input rows if they do not pertain to the invoice. Click the red trash can to remove the row.

6. Final page is a preview of your custom work invoice. If any changes need to be made you can go back to previous pages. When correct, select Save.
7. The invoice will now appear in the invoices tab under accounting.