If you do not see the harvest product you need to assign to a field, please make sure you have it added it to your Crops by following the steps outline in the KB article regarding Crops and Harvest Product Management.
Harvest Products can be assigned individually or copied over from a Previous Crop Year. Jump to these instructions by clicking here.
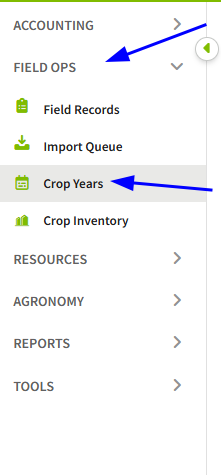
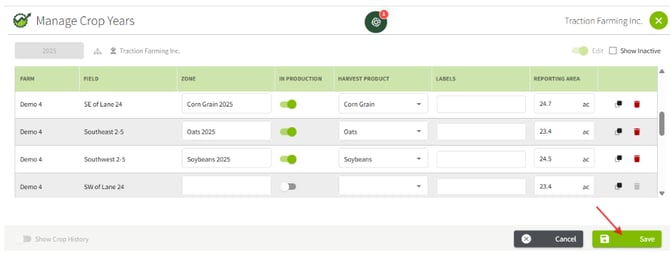
1. Using the navigation menu on the left of your screen, expand the Field Ops menu and then select Crop Years.
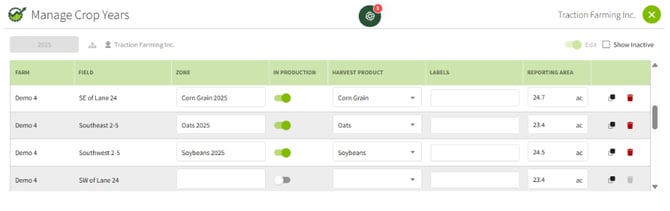
2. Confirm the Year is correct and assign the proper Harvest Product to each field.

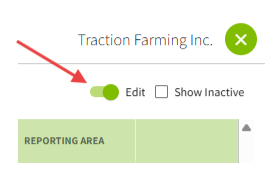
3. Enable Editing
4. Select the appropriate Harvest Products from your list. Make any adjustments to the Zone name, In Production status, and Labels.
Need double cropping on a Field? Learn how in our KB article.
The Crop Zone(s) with In Production enabled will have all data from your John Deere Operations Center or Climate FieldView integrations applied to it.
If multiple Crop Zones are marked as In Production for the same field, duplicate records will appear in your Import Queue.
5. After you have reviewed the information, click the Save button.
Fill Crop Zones with Previous Year Crop
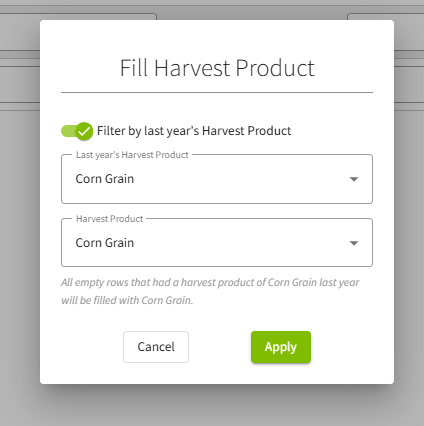
Managing crop zones across a large operation just got easier. With the new Fill Harvest Product option, you can quickly assign crop zones to fields using the previous year's harvest information.
Instead of updating fields one by one, Traction Ag allows you to select last year's harvested crop and automatically assign the new crop across your fields, saving valuable time during setup.
1. Within the Manage Crop Years page, click on the Fill Harvest Product button.
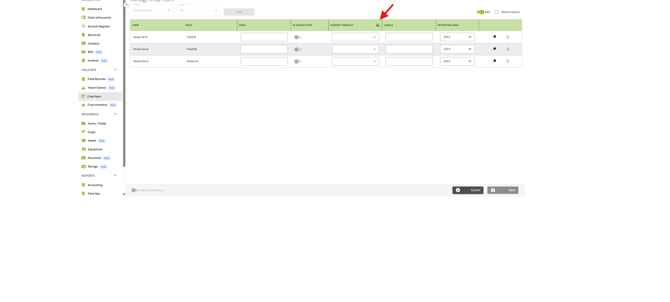
2. Select a Harvest Product to apply to all fields at once by choosing the product and clicking Apply.
Note: Once you click Apply, the product selection is locked in. To make changes, you can either select the dropdown for any individual field to modify its assignment, or delete field selections entirely to start over.

or slide on the button next to Filter by last year's Harvest Product to automatically assign this crop year's zones based on each field's previous crop.
Note: Once you click Apply, the product selection is locked in. To make changes, you can either select the dropdown for any individual field to modify its assignment, or delete field selections entirely to start over.