Jump to a Section
Definitions
| Crops |
The high level grouping for a set of Harvest Products. You can only have one of each unique Crop and these are not editable. Our list originated from the USDA's list of Crops. |
| Harvest Product |
The product you will be growing and harvesting on a field. You can add as many different Harvest Products to a crop and are completely customizable. You will now assign a Harvest Product to a field's Crop Year. |
In Field Ops and Resources, we will manage all of your Crops and Harvest Products.


Adding a New Crop
⚠️ Once you add a crop, it cannot be deleted or archived at this time.
📓 If you would like to assign Fallow to some of your fields, you first must add the Fallow crop to your account using the steps outline below.
1. Using the navigation menu on the left of your screen, open the Resources menu and then select Crops. Next, click on the + Add Crop button.
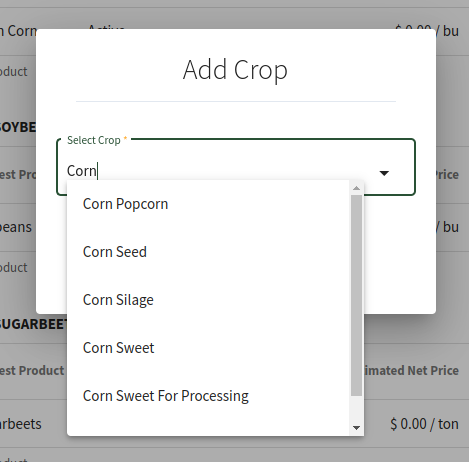
2. Select the appropriate crop for the Harvest Products you would like to add.
This list is filterable. Simply type the full or partial crop name to filter the list.
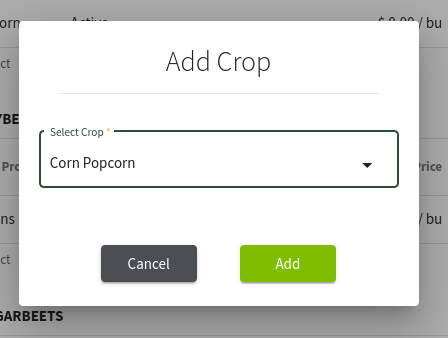
3. Verify you have selected the correct crop and then click Add.
⚠️ Once you add a crop, it cannot be deleted or archived at this time.
And that's it. As soon as you add the new crop, you will be taken through the New Harvest Product process.
Adding a New Harvest Product
After you have added a new Crop or want to add a new Harvest Product.
1. Using the navigation menu on the left of your screen, open the Resources menu and then select Crops. Next, click on + Add Product below the Crop you would like to add a new Harvest Product to.

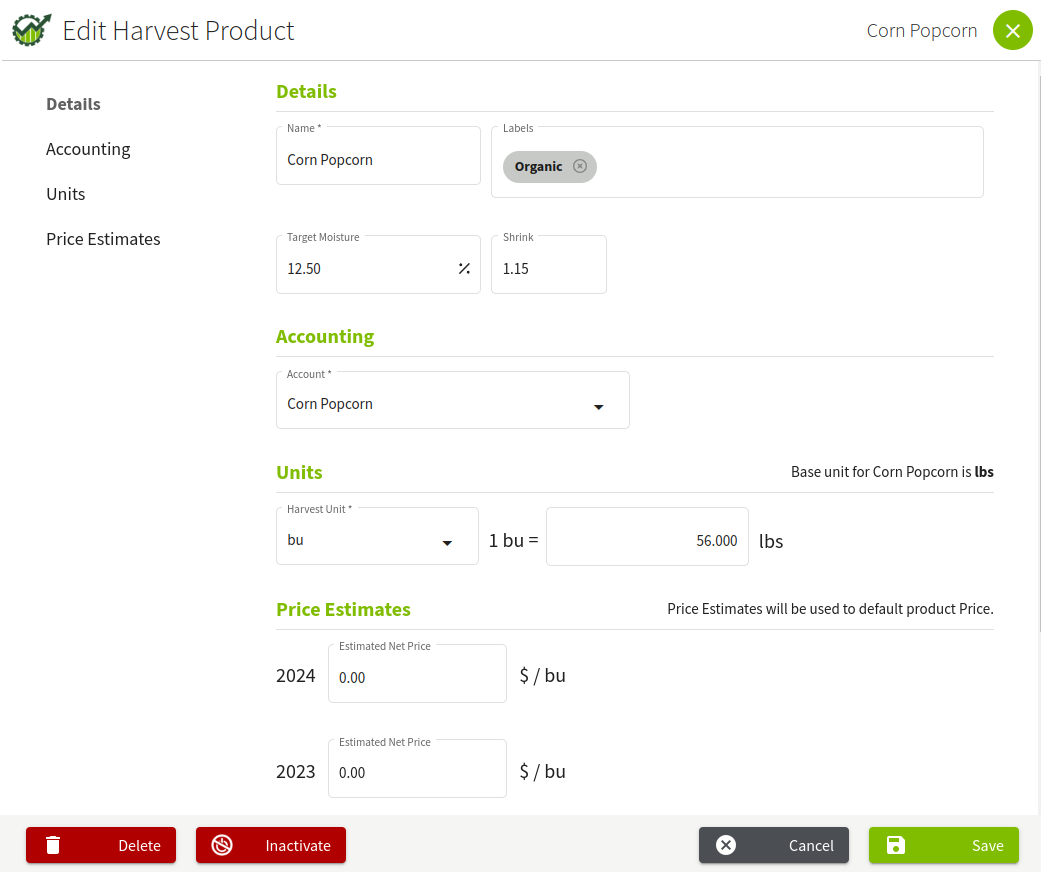
2. Each Harvest Product contains information about its details, accounting, units, and price estimates. All are configurable for each Harvest Product.
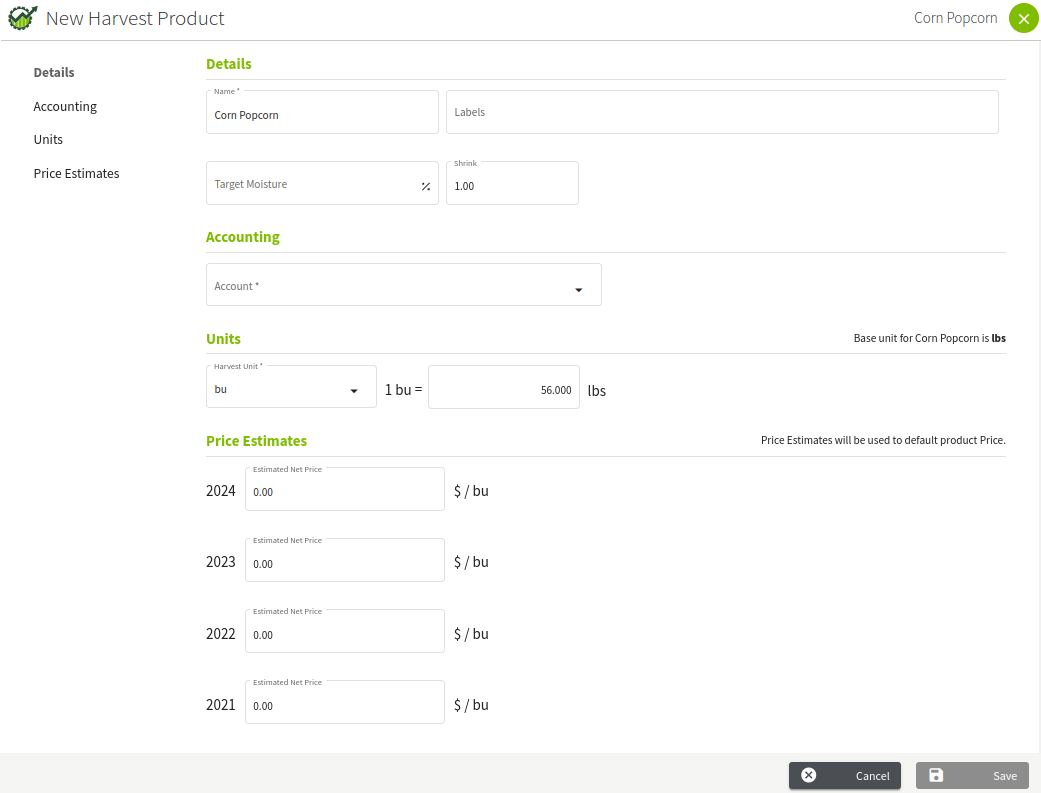
3. We'll start by filling in the Details section.
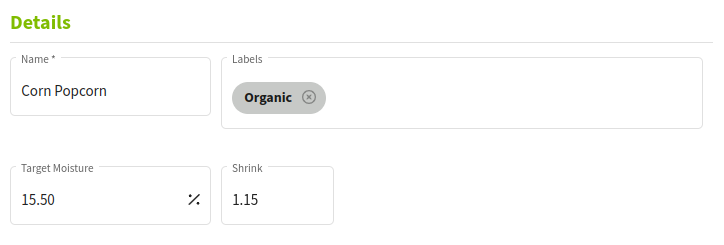
| Name | Name of the Harvest Product. Will be used in various areas of Traction to reference this particular product. |
| Labels | User defined taxonomy. Not currently utilized in Traction, but will allow greater precision with future functionality. |
| Target Moisture | The moisture at the time of harvest. Not currently utilized in Traction, but will be available once scale tickets are available. |
| Shrink | The shrink ratio after drying. Not currently utilized in Traction, but will be available once scale tickets are available. |
4. Next, we'll add the Accounting information. Each Crop has its own unique account in your Chart of Accounts. Simply select the appropriate one and you're all set.
If you currently do not have one available, you will have an option to create one.
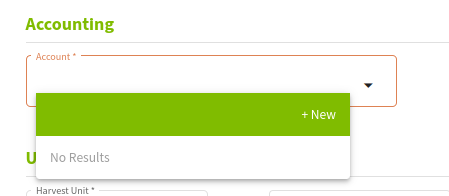
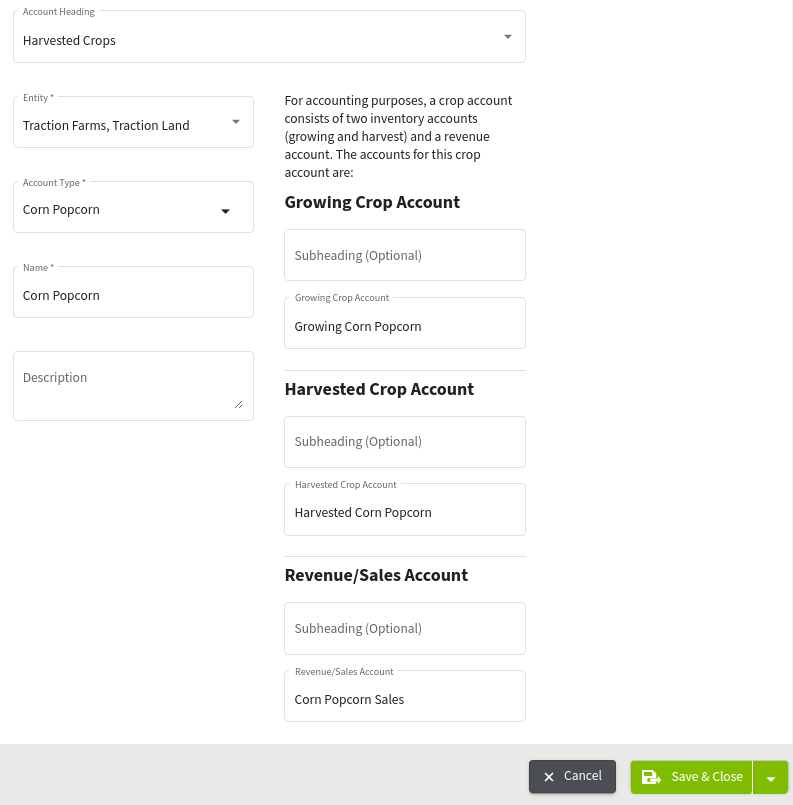
If you click on + New, the Add Account screen will open, automatically selecting the appropriate Account Heading, all of your Entities (each Entity has its own unique Chart of Accounts), Account Type (the Crop), and Names.
Make any updates as necessary and click Save & Close.
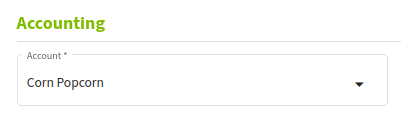
The Account should be selected and you're all set.
5. Now, we'll setup the Harvest Product Units. The base unit is set by the system, but you can update the Harvest Unit to any unit in the drop down:
bag, bale, bin, bu, dt, fl oz, g, gal, kg, l, lbs, ml, oz, pt, qt, t, ton, unit
Choose your Harvest Unit and then enter in the conversion between the unit and the Base Unit.

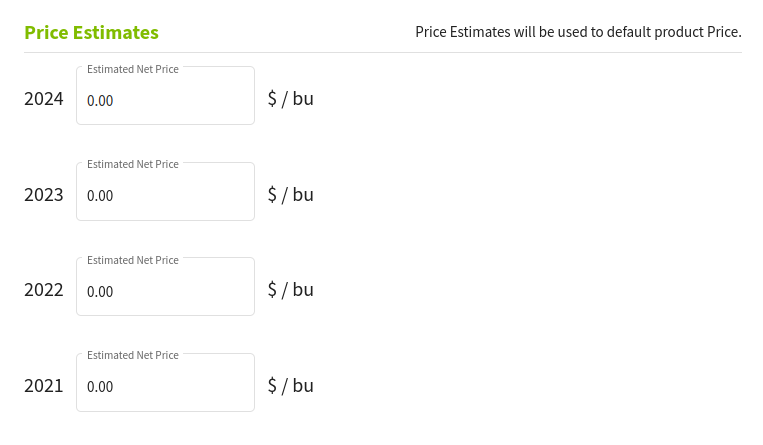
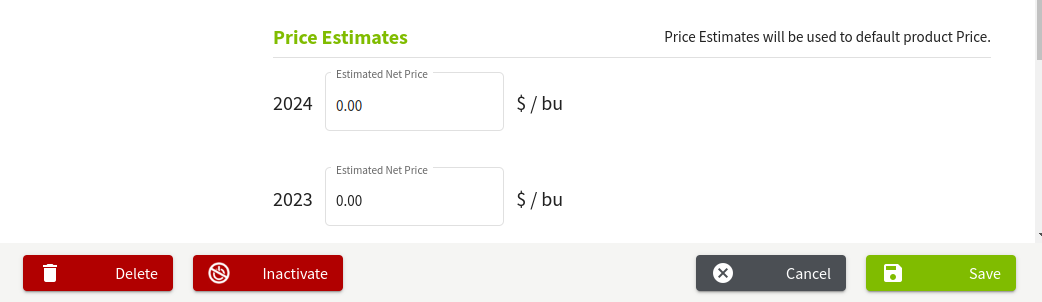
6. Finally, we'll setup the Price Estimates. These are used when a default price is needed for a particular Harvest Product, such as Field Records. If you do not have estimates, you can leave them with a value of $0.00.
These values can be updated at any time.
7. Review your Harvest Product information and if everything looks good, click Save.
And that's it. You have now successfully added a new Harvest Product for a Crop.

Editing a Harvest Product
1. If you need to edit a Harvest Product, you can do so by navigating to Resources and click on Crops from the menu. Next, select the Harvest Product you want to update, followed by the pencil icon.

2. Make any adjustments to the Harvest Product information. Review your changes and then click Save.
⚠️ Any adjustments to the Units will be applied to all previous records (e.g. Harvest Records, Crop Sale Transactions, etc.) inside the system.
Inactivating or Deleting a Harvest Product
1. If you need to Inactivate or Delete a Harvest Product, you can do so by navigating to Resources and click on Crops from the menu. Next, select the Harvest Product you want to update, followed by the pencil icon.
2. If the Harvest Product has not been used yet, you will have the option to delete it. Otherwise, you can only inactivate the Harvest Product, making it unavailable for future selections.
Current Fields that have been designated as that particular Harvest Product will retain their selection regardless of the product's activate state.
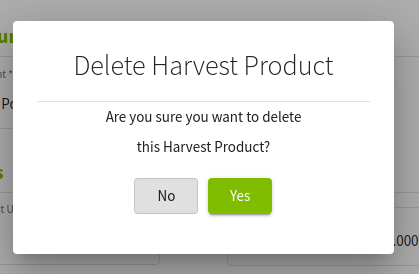
Delete
2a. To delete, click Delete and then confirm that you want to remove the Harvest Product from your account.
Inactivate
2b. To inactivate, click Inactivate, changing the button to Activate, followed by Save.

3. You will return to the Crops screen and the status for the Harvest Product will now be listed as inactive.
