After you’ve reviewed and edited the bill to your satisfaction, select Save & Import to complete the process and import the bill into the system.
Jump to a Section
Creating a Bill
⚠️ Do not enter your Notes Payable invoices as Bills.
You will need to utilize the Notes Payable type when creating a new Payment transaction. This KB article walks you through that process.
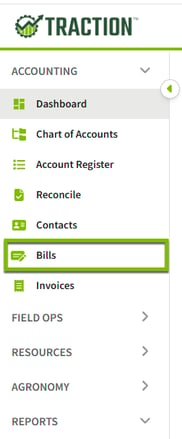
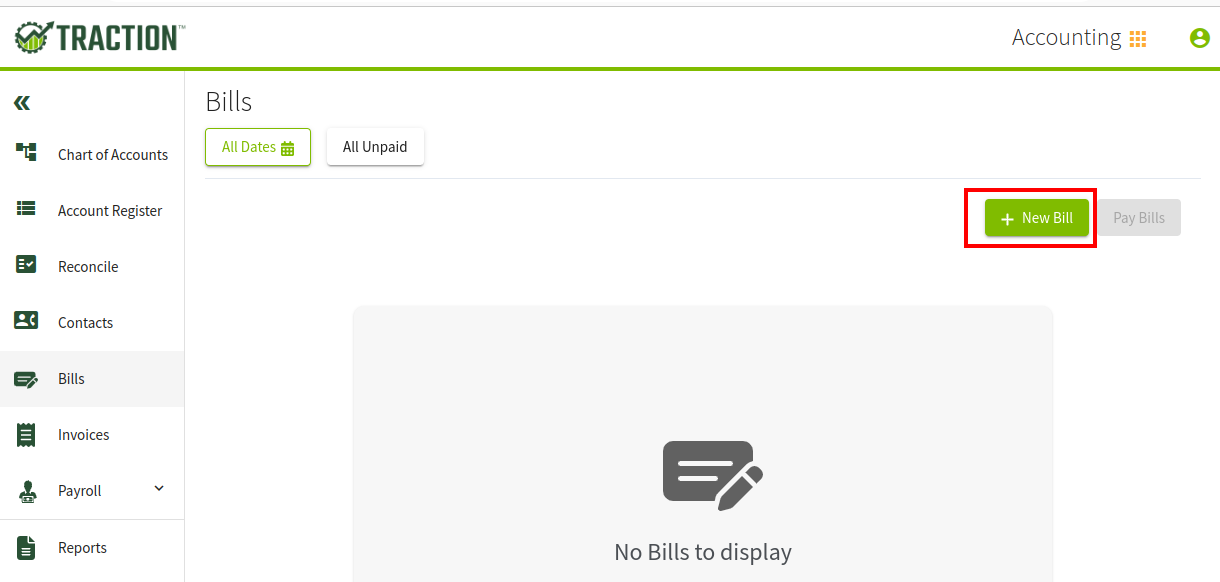
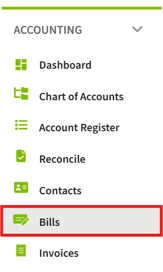
1. Using the navigation menu on the left of your screen, open the Accounting menu and then select Bills. Click the + New Bill button.
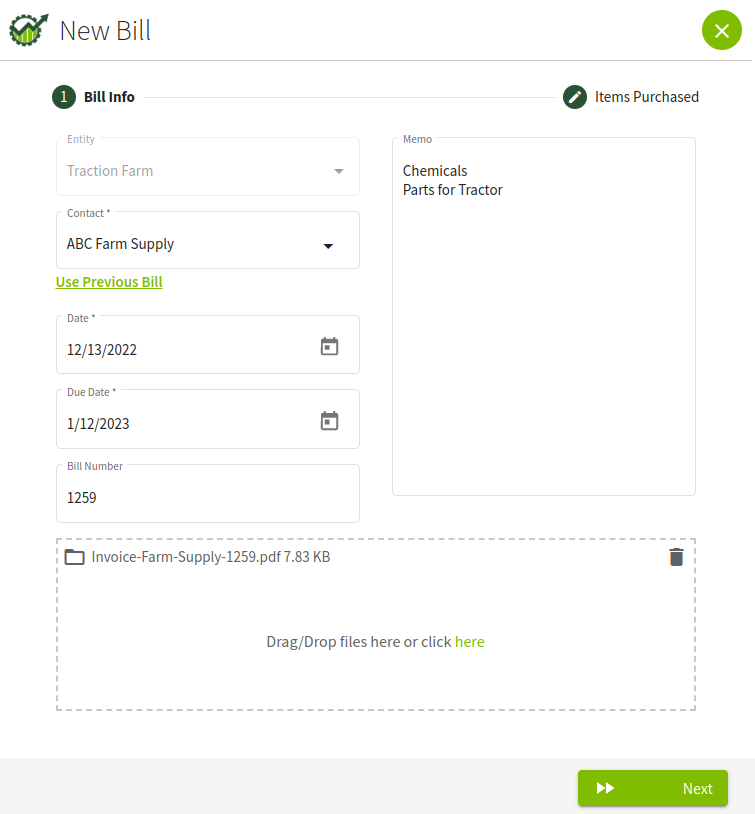
2. Fill in as much information as you can and click the Next button. Fields marked with an * are required.
Tip: Do you have a similar bill from the same vendor? Select the Use Previous Bill option to use the line items and attachments from a previous bill.
3. Add your Supplies and Other Products that are listed on your Invoice.
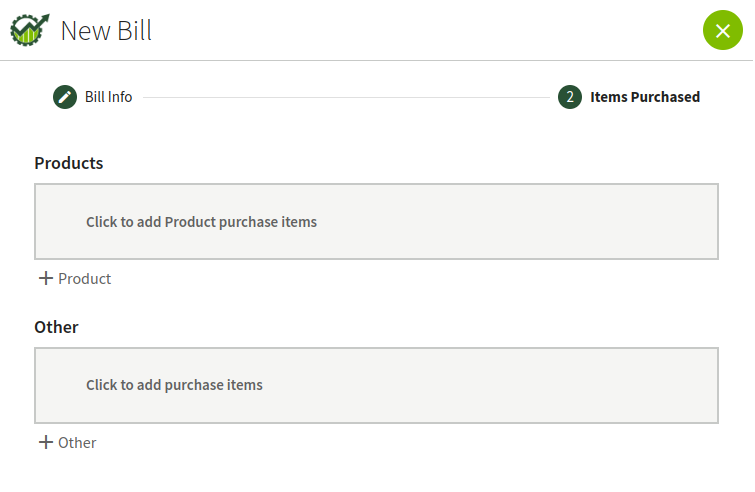
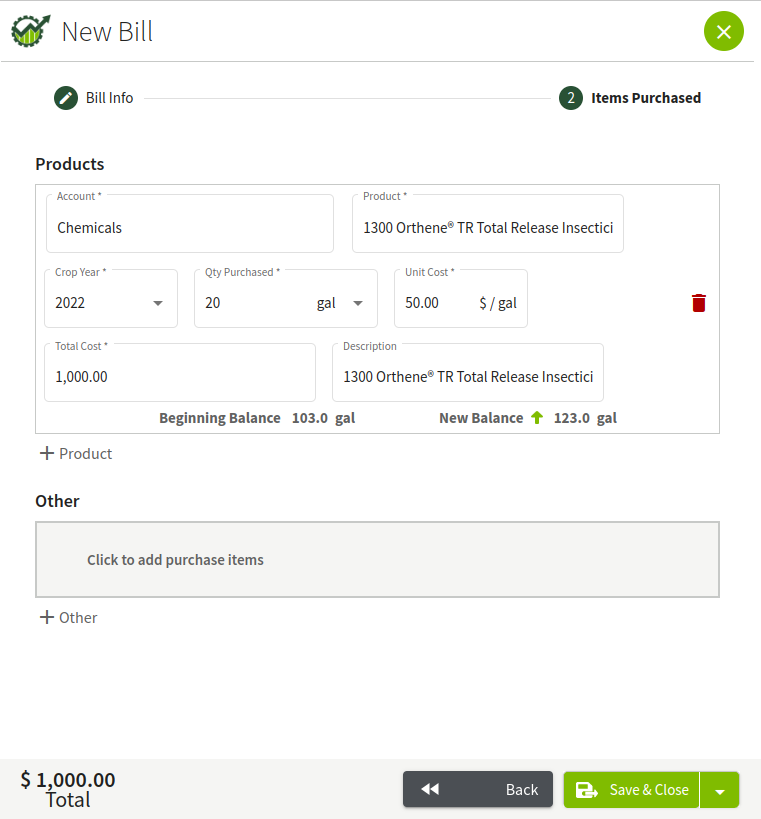
3a. To add a new Product click the + Product button. In my example, I selected my Chemicals account and purchased 20 gallons of 1300 Orthene TR at $50 a gallon.
The Product section will automatically update to the product type after you select your Account.
3b. To add a new a non-Supply item, click the + Other button and fill out the appropriate information. In my example, I purchased $5,412.23 in Tractor Parts.
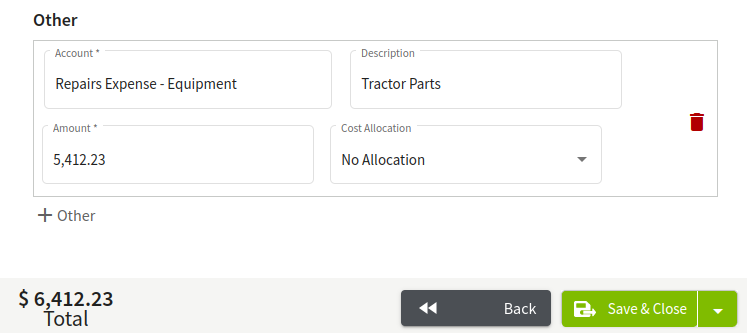
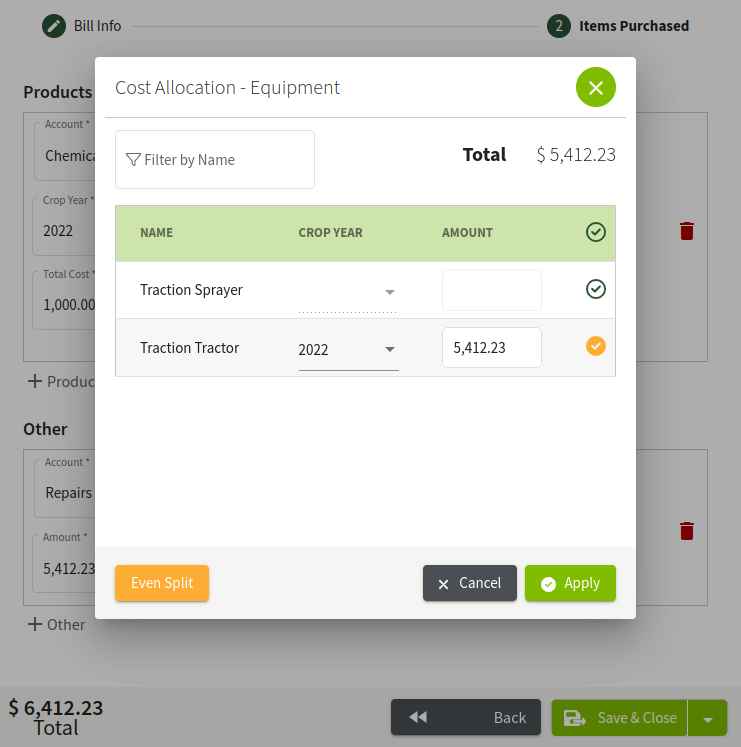
You also have the ability to apply these costs directly to an individual or group of Fields or Equipment. Select the appropriate one from the Cost Allocation dropdown and distribute the cost as needed.
If you need to apply a cost over multiple crop years, you will need to enter an Other item for each crop year. Make sure that the totals are correct for each year.
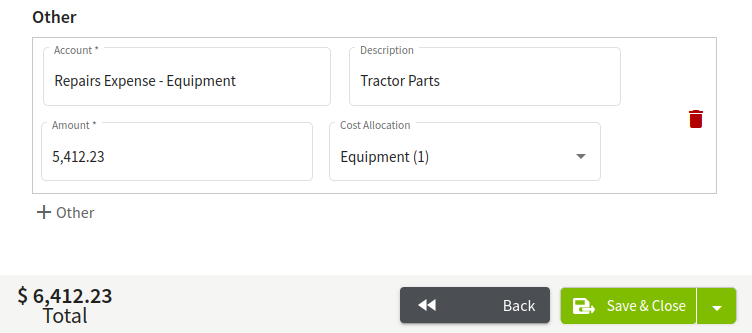
4. Review your entry. If everything looks good, click the Save & Close button to create the Bill.
Paying Bills
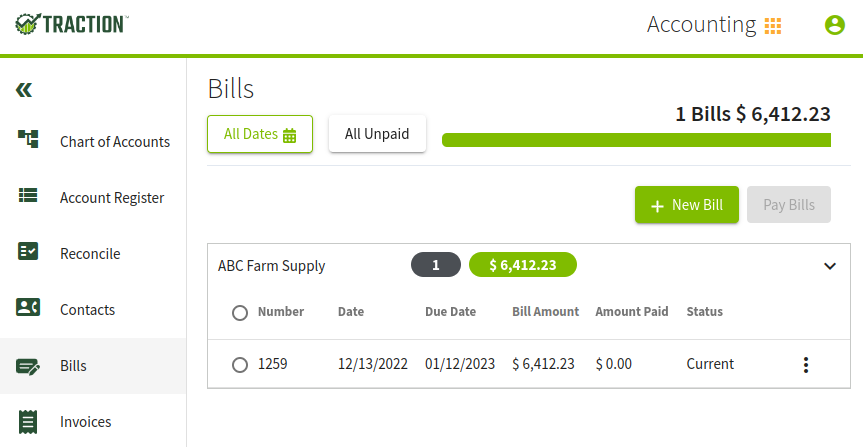
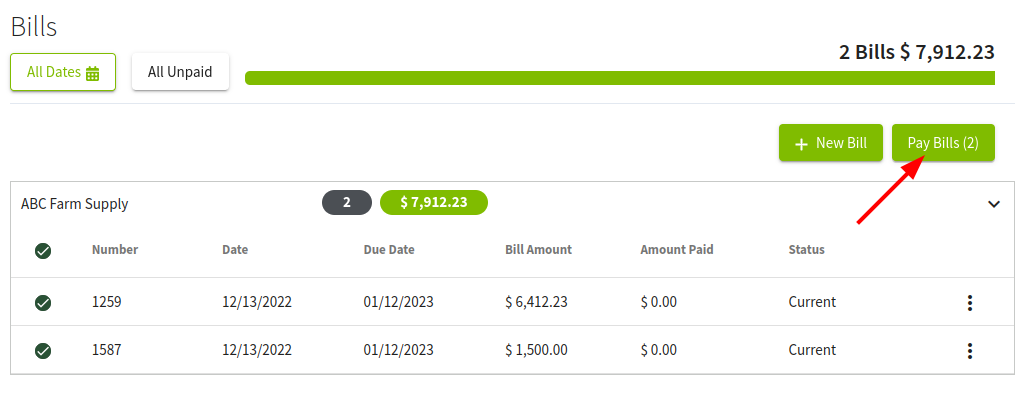
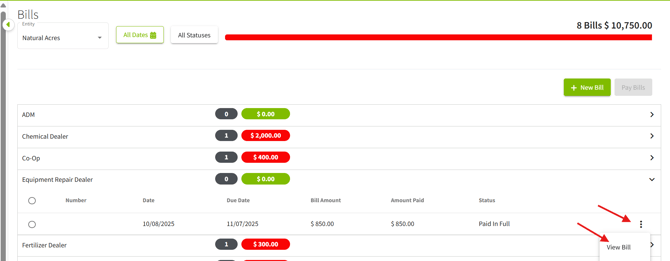
1. Open the Accounting module, click on Bills from the left-hand sidebar. A listing of your vendors will display.
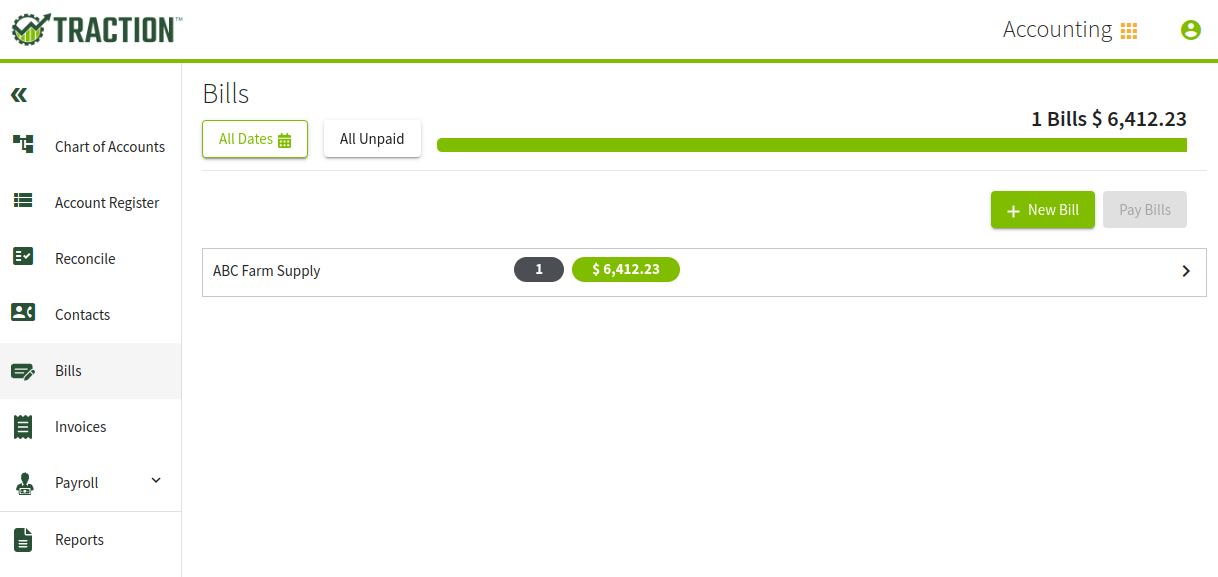
2. Expand the Vendor row to reveal their list of outstanding bills.
3. You can either pay a single bill by clicking the three dot menu icon and selecting Pay Bill.

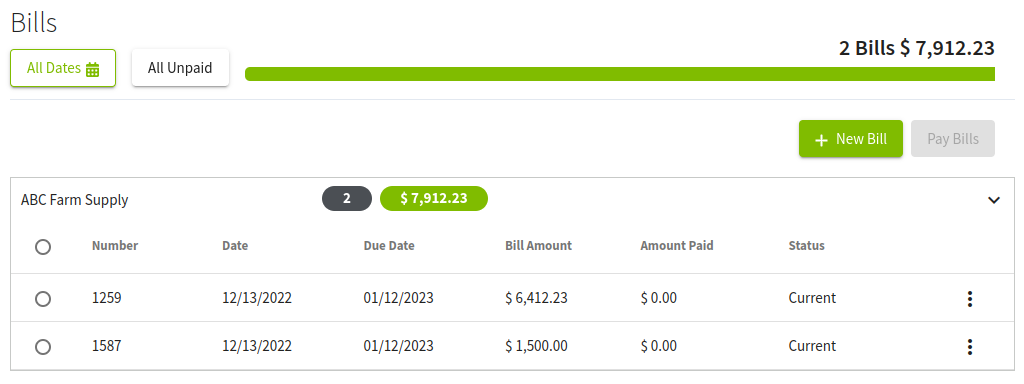
Or you can check off multiple bills and click the Pay Bills button in the upper-right hand corner.
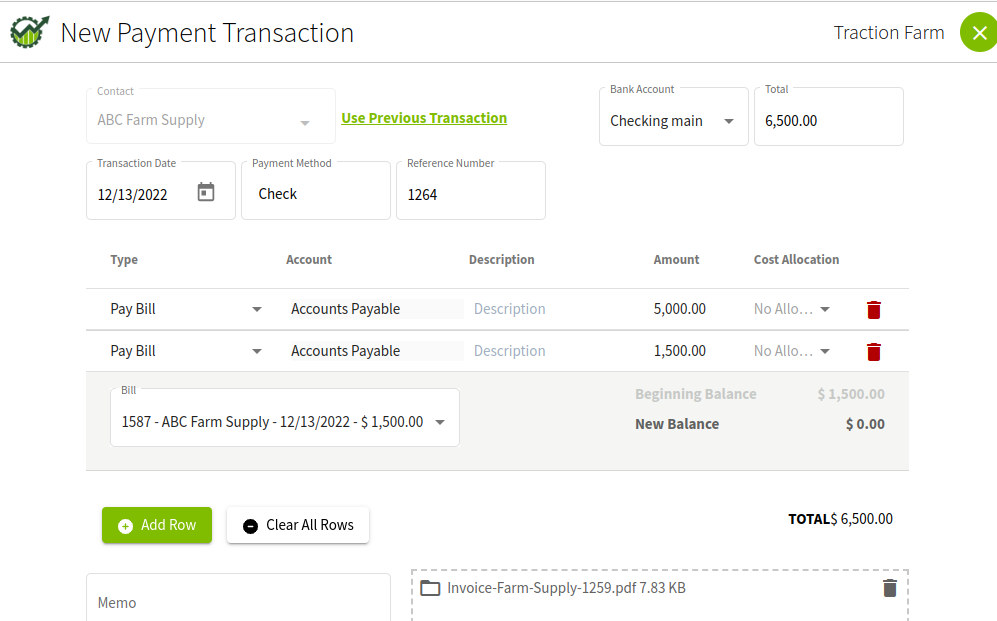
4. The New Payment Transaction screen will open, prepopulated with the information related to the bill(s) you have selected to pay. You will need to at least select the bank account you want these bills to be paid from. Similar to other Payment Transactions, you can also enter the payment method, reference number, and line-item descriptions for each bill.
You can also adjust the values here to their appropriate amounts. By default, the remaining balance of each bill will be automatically populated.
In my example, we are making a partial payment of $5,000 for the first invoice and a full payment on the second one.
Review the transaction and click the Save & Close button when ready.
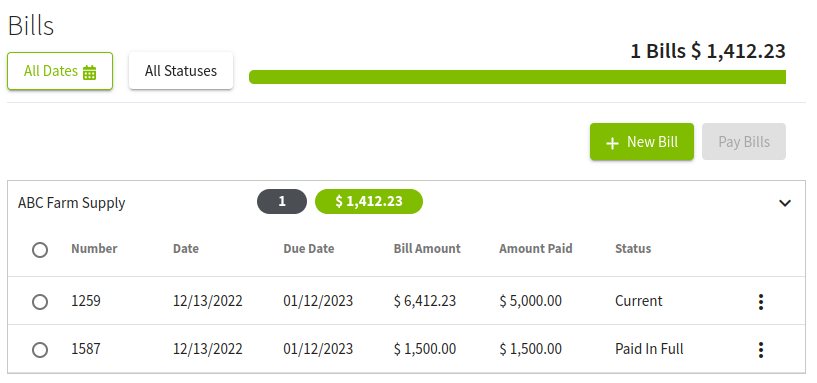
5. You will return to the Bill screen, showing only your vendors where there is an open invoice. To see all invoices, regardless of status, you can use the filter button and choose All Statuses. The status will be listed for each row's invoice. You can also filter by a date range as well.
Managing Discounts
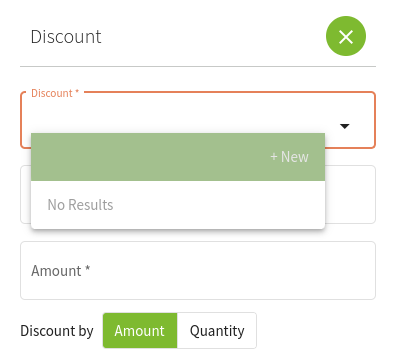
Adding a new discount type
From the Discount drop down, you can select + New, and add a new type of discount.
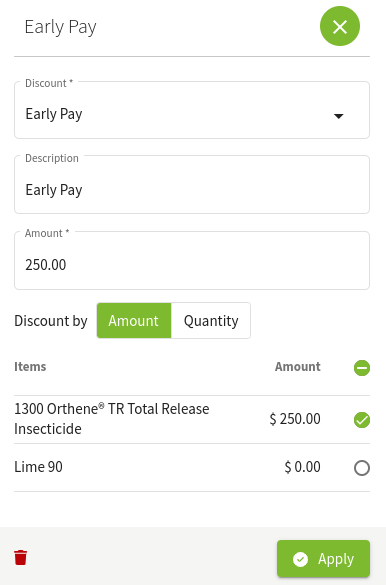
Adding a Discount
Select your Discount type, enter a description, an amount, how the discount should be applied, along with which products it applies to.
Once everything is set correctly, click Apply.
Managing Fees and Taxes
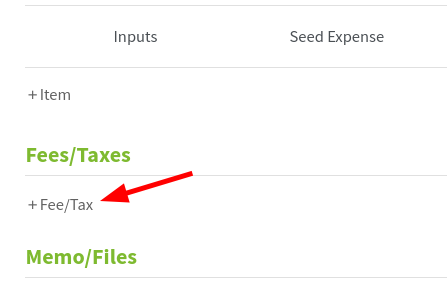
Adding a new tax or fee
Click the + Fee/Tax button to open the new screen
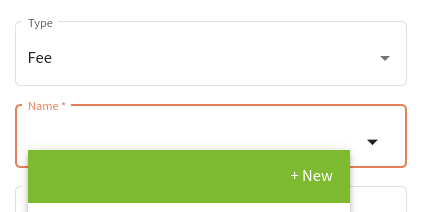
Select the appropriate Type
From the Name drop down, you can select + New, and add a new option depending on what you have selected in Type.
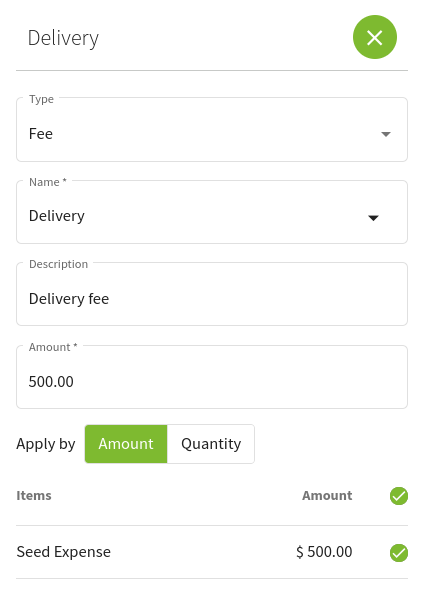
Adding a Tax or Fee
Select your Tax or Fee Type, select the Name, enter a Description, an amount, how the tax or fee should be applied, along with which items it applies to.
Once everything is set correctly, click Apply.
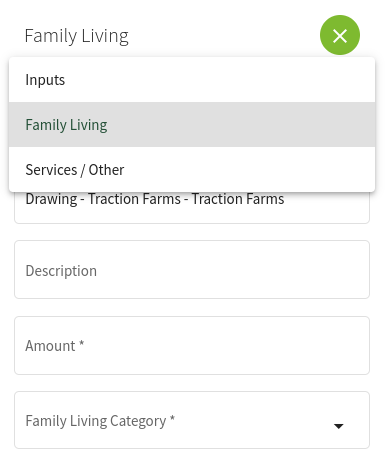
Family Living Bills
If you are adding a Bill that is associated with a Family Living expense, you can now add this as an Item category from the Type drop down.
Prepays
When you add a new Prepay line item, you can choose either Pay with Prepay or Prepay Expense.
You can add multiple Prepay line items in a single Bill.
Pay with Prepay offsets the total amount on your bill by an amount you specify from a Prepay account.
Prepay Expense is for an expenditure that creates a new or adds an amount to an existing Prepay account. Prepay accounts are specific to each vendor contact and expense type (e.g. Seed).
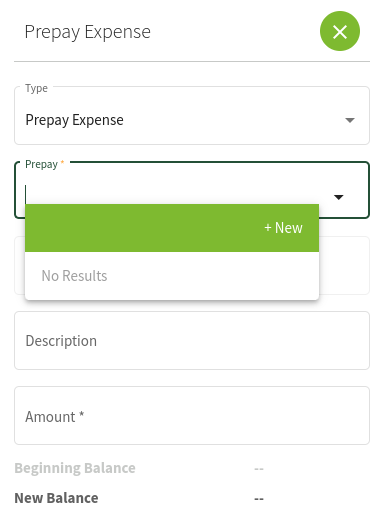
Prepay Expense
After adding a Prepay line item, select Prepay Expense as the Type.
Under Prepay, you will see a list of available Prepay Accounts. If this is your first account, you will need to create a new one.
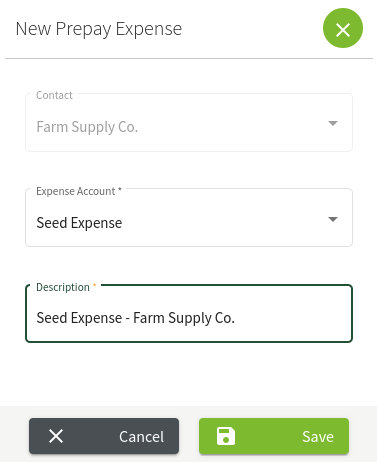
New Prepay Expense Account
Enter the appropriate information for this Prepay Expense, including the Account and Description.
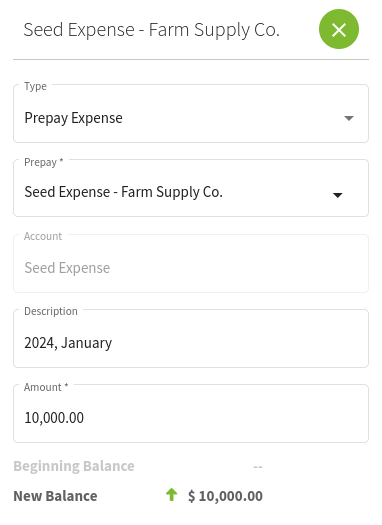
Finalize Prepay Expense Line Item
Once you have selected a Prepay account, enter in a Description and an Amount that you will be adding to this account.
The balances (beginning and new) will be shown at the bottom.
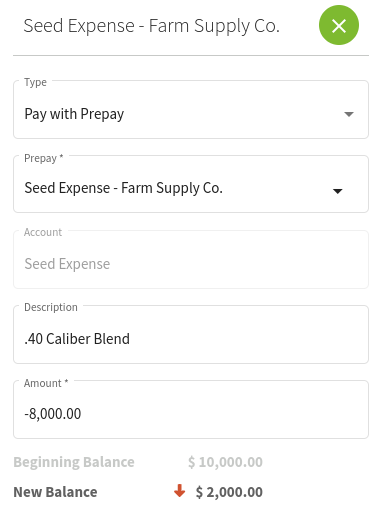
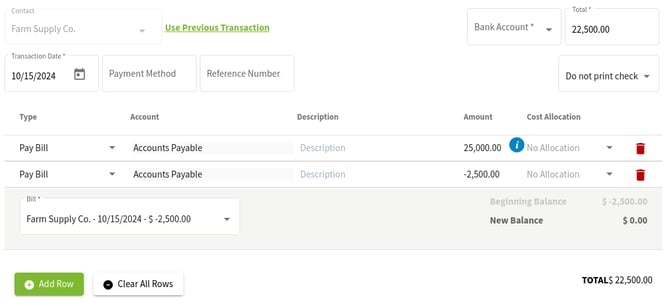
Pay with Prepay
After adding a Prepay line item, select Pay with Prepay as the Type.
Under Prepay, you will see a list of available Prepay Accounts, select the one you wish to apply to this Bill.
Enter a description and an amount.
You will see the beginning and new balance of the Prepay account at the bottom.
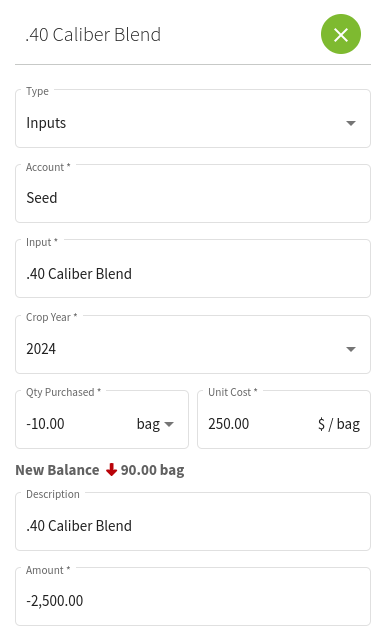
Credit Balance / Negative Amounts / Returns
Sometimes you will have a return or a credit you need to apply to a vendor you manage in Bills. For this, you can simply enter a negative quantity for the same item on a bill.
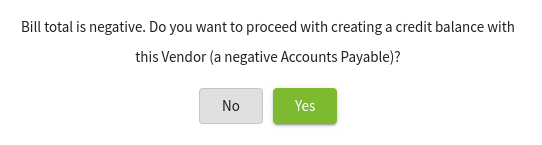
If the total amount for the bill is negative, you will receive this warning about creating a Credit Balance with the selected Vendor.
Verify your entry and proceed as appropriate.
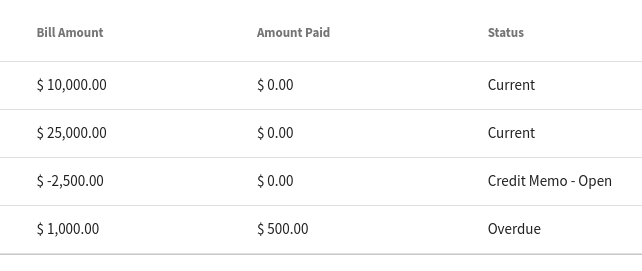
You will now see the Credit Memo listed in the Bills for the Vendor.
When you want to apply the Credit Memo to a bill, simply select both the Credit Memo and the Bill and choose Pay Bill.
The credit memo will automatically be added to the transaction.
View Cost Allocations on Paid Bills
To view cost allocations on Paid Bills, follow these simple steps.
Navigate to Accounting and then click on Bills.
Find the desired bill and click the three dots to the right, then click on View Bill.
Once you have opened the bill for viewing, locate the line item and click the arrow to the far right
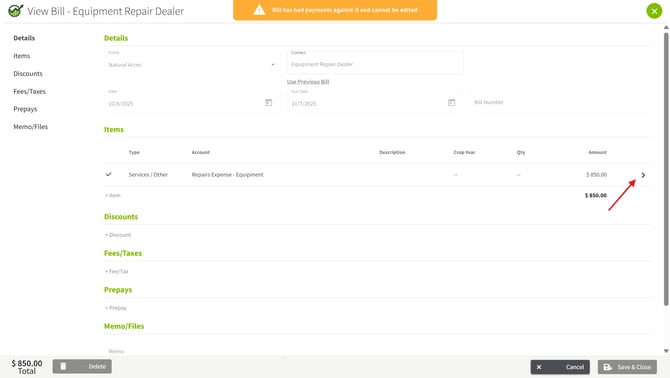
Once you see a box populate to the right hand side displaying the line item details, click the cost allocation drop down as shown below.
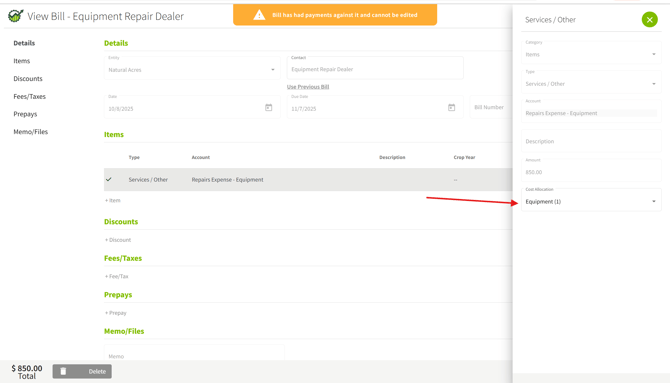
For demonstration purposes, I am able to see the Equipment I allocated a cost to as shown below.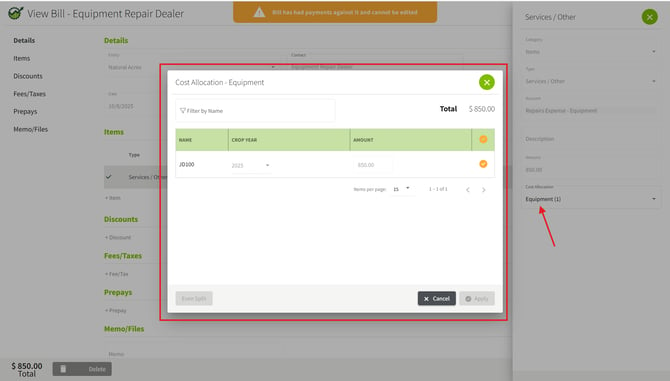
Importing a Bill using FS Billing Integration
To import a bill into your system using the FS Billing Integration, follow these simple steps.
Make sure you have connected your FS account to your Traction Business Account by entering your Patron/Customer ID. If you need assistance with this, refer to the article How do I connect my FS account(s) to my Traction Business Account?.
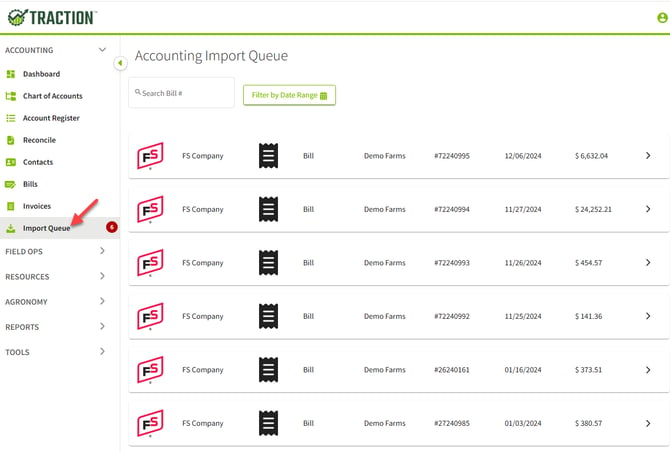
Navigate to Accounting and then select the Import Queue.
The system will display any bills that have populated into the queue. You’ll notice a red circle with a number inside it. This number represents how many bills are in the Import Queue awaiting review.
Display a Bill
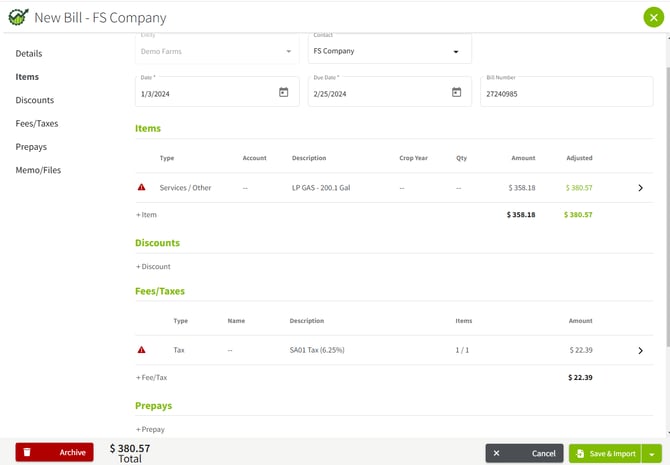
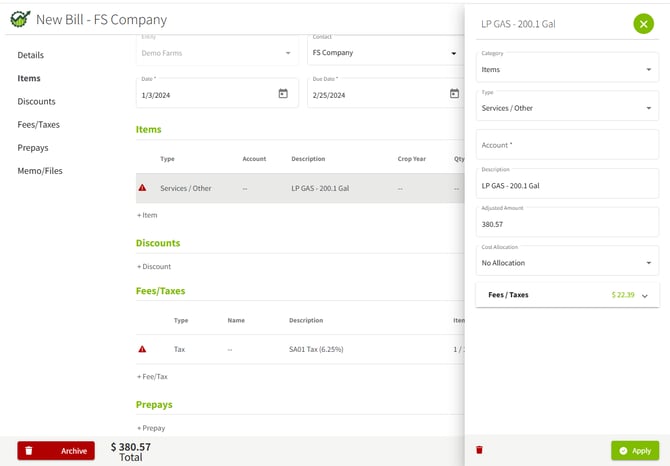
Click on a row containing the bill you’d like to review. The data imported from FS will be displayed. Take a moment to review this information to ensure it's correct and complete.
You can edit or remove line-items as needed.
Edit Bill Information (as needed)
- To add additional information to an item within the bill, simply click the row where you'd like to make the change.
- A box will appear on the right, offering you options to:
- Choose the type of purchase
- Add an Account
- Add an Allocation
- Add a Name for Discounts/Fees/Taxes
- Make any necessary changes.
- Remove
- Once the changes are made, click Apply to save them.
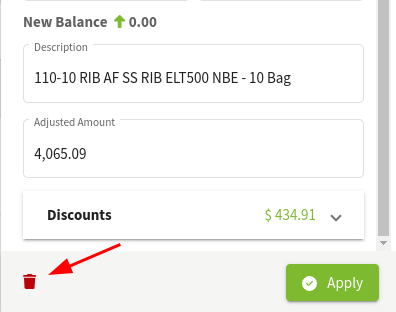
Remove Items (if needed)
- If you need to remove an item from the bill, click on the corresponding row and then locate the red trash can icon in the lower left corner of the box that appears. Click it to remove the item.
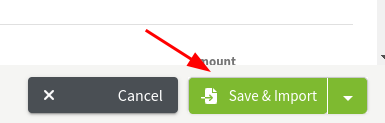
Save & Import
After you’ve reviewed and edited the bill to your satisfaction, select Save & Import to complete the process and import the bill into the system.
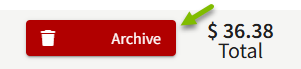
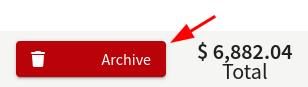
Archiving a Bill (if not importing)
- If you decide that you do not wish to import a particular bill, you can archive it instead.
- To do this, click the Archive button located in the lower left corner of your screen. This will remove the bill from the Import Queue without importing it into your system.
Importing a Bill using Keystone Billing Integration
To import a bill into your system using the Keystone Billing Integration, follow these simple steps.
Make sure you have connected your Keystone account to your Traction Business Account by entering your Customer ID and an Invoice Number from one of your last three invoices. If you need assistance with this, refer to the article How do I Connect my Keystone account to my Traction Business account?
Navigate to Accounting and then select the Import Queue.
The system will display any bills that have populated into the queue. You’ll notice a red circle with a number inside it. This number represents how many bills are in the Import Queue awaiting review.
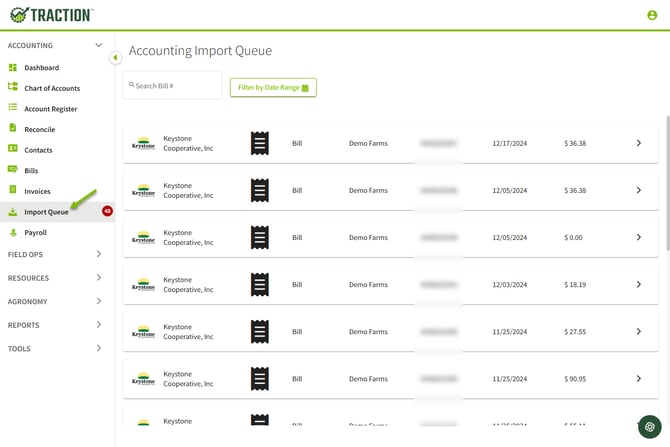
Display a Bill
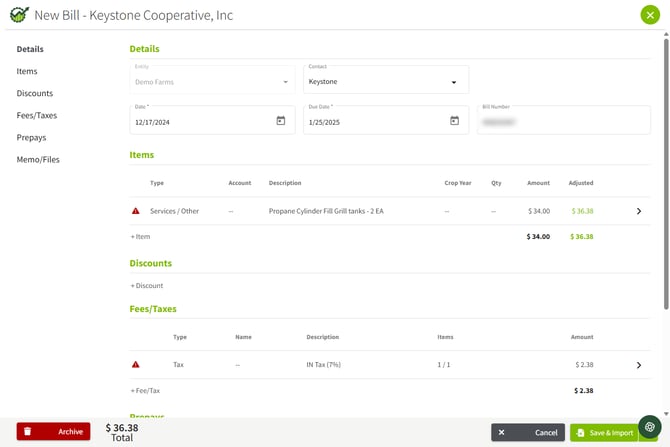
Click on a row containing the bill you’d like to review. The data imported from Keystone will be displayed. Take a moment to review this information to ensure it's correct and complete.
You can edit or remove line-items as needed.
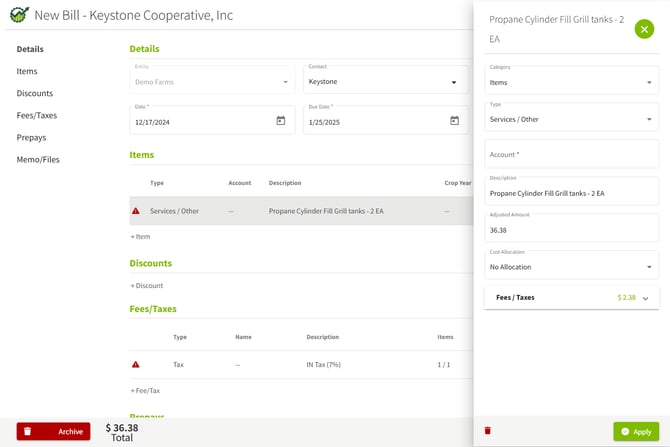
Edit Bill Information (as needed)
- To add additional information to an item within the bill, simply click the row where you'd like to make the change.
- A box will appear on the right, offering you options to:
- Choose the type of purchase
- Add an Account
- Add an Allocation
- Add a Name for Discounts/Fees/Taxes
- Make any necessary changes.
- Remove
- Once the changes are made, click Apply to save them.
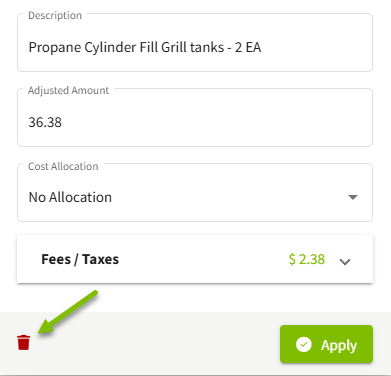
Remove Items (if needed)
- If you need to remove an item from the bill, click on the corresponding row and then locate the red trash can icon in the lower left corner of the box that appears. Click it to remove the item.
Save & Import
After you’ve reviewed and edited the bill to your satisfaction, select Save & Import to complete the process and import the bill into the system.

Archiving a Bill (if not importing)
- If you decide that you do not wish to import a particular bill, you can archive it instead.
- To do this, click the Archive button located in the lower left corner of your screen. This will remove the bill from the Import Queue without importing it into your system.