The Traction Field app is now available in the App Store. Please contact Traction at 1-888-305-3839 or success@tractionag.com for more information.
|
1. Follow the instructions for uploading Zones. Zones will then show in Traction Field |
 |
|
2. You can start sampling either from the Farms/Fields menu or from the Sample Events menu. Farms/Fields -
This will remove the color theme and get your zones ready for sampling. Sample Events -
|
 |
|
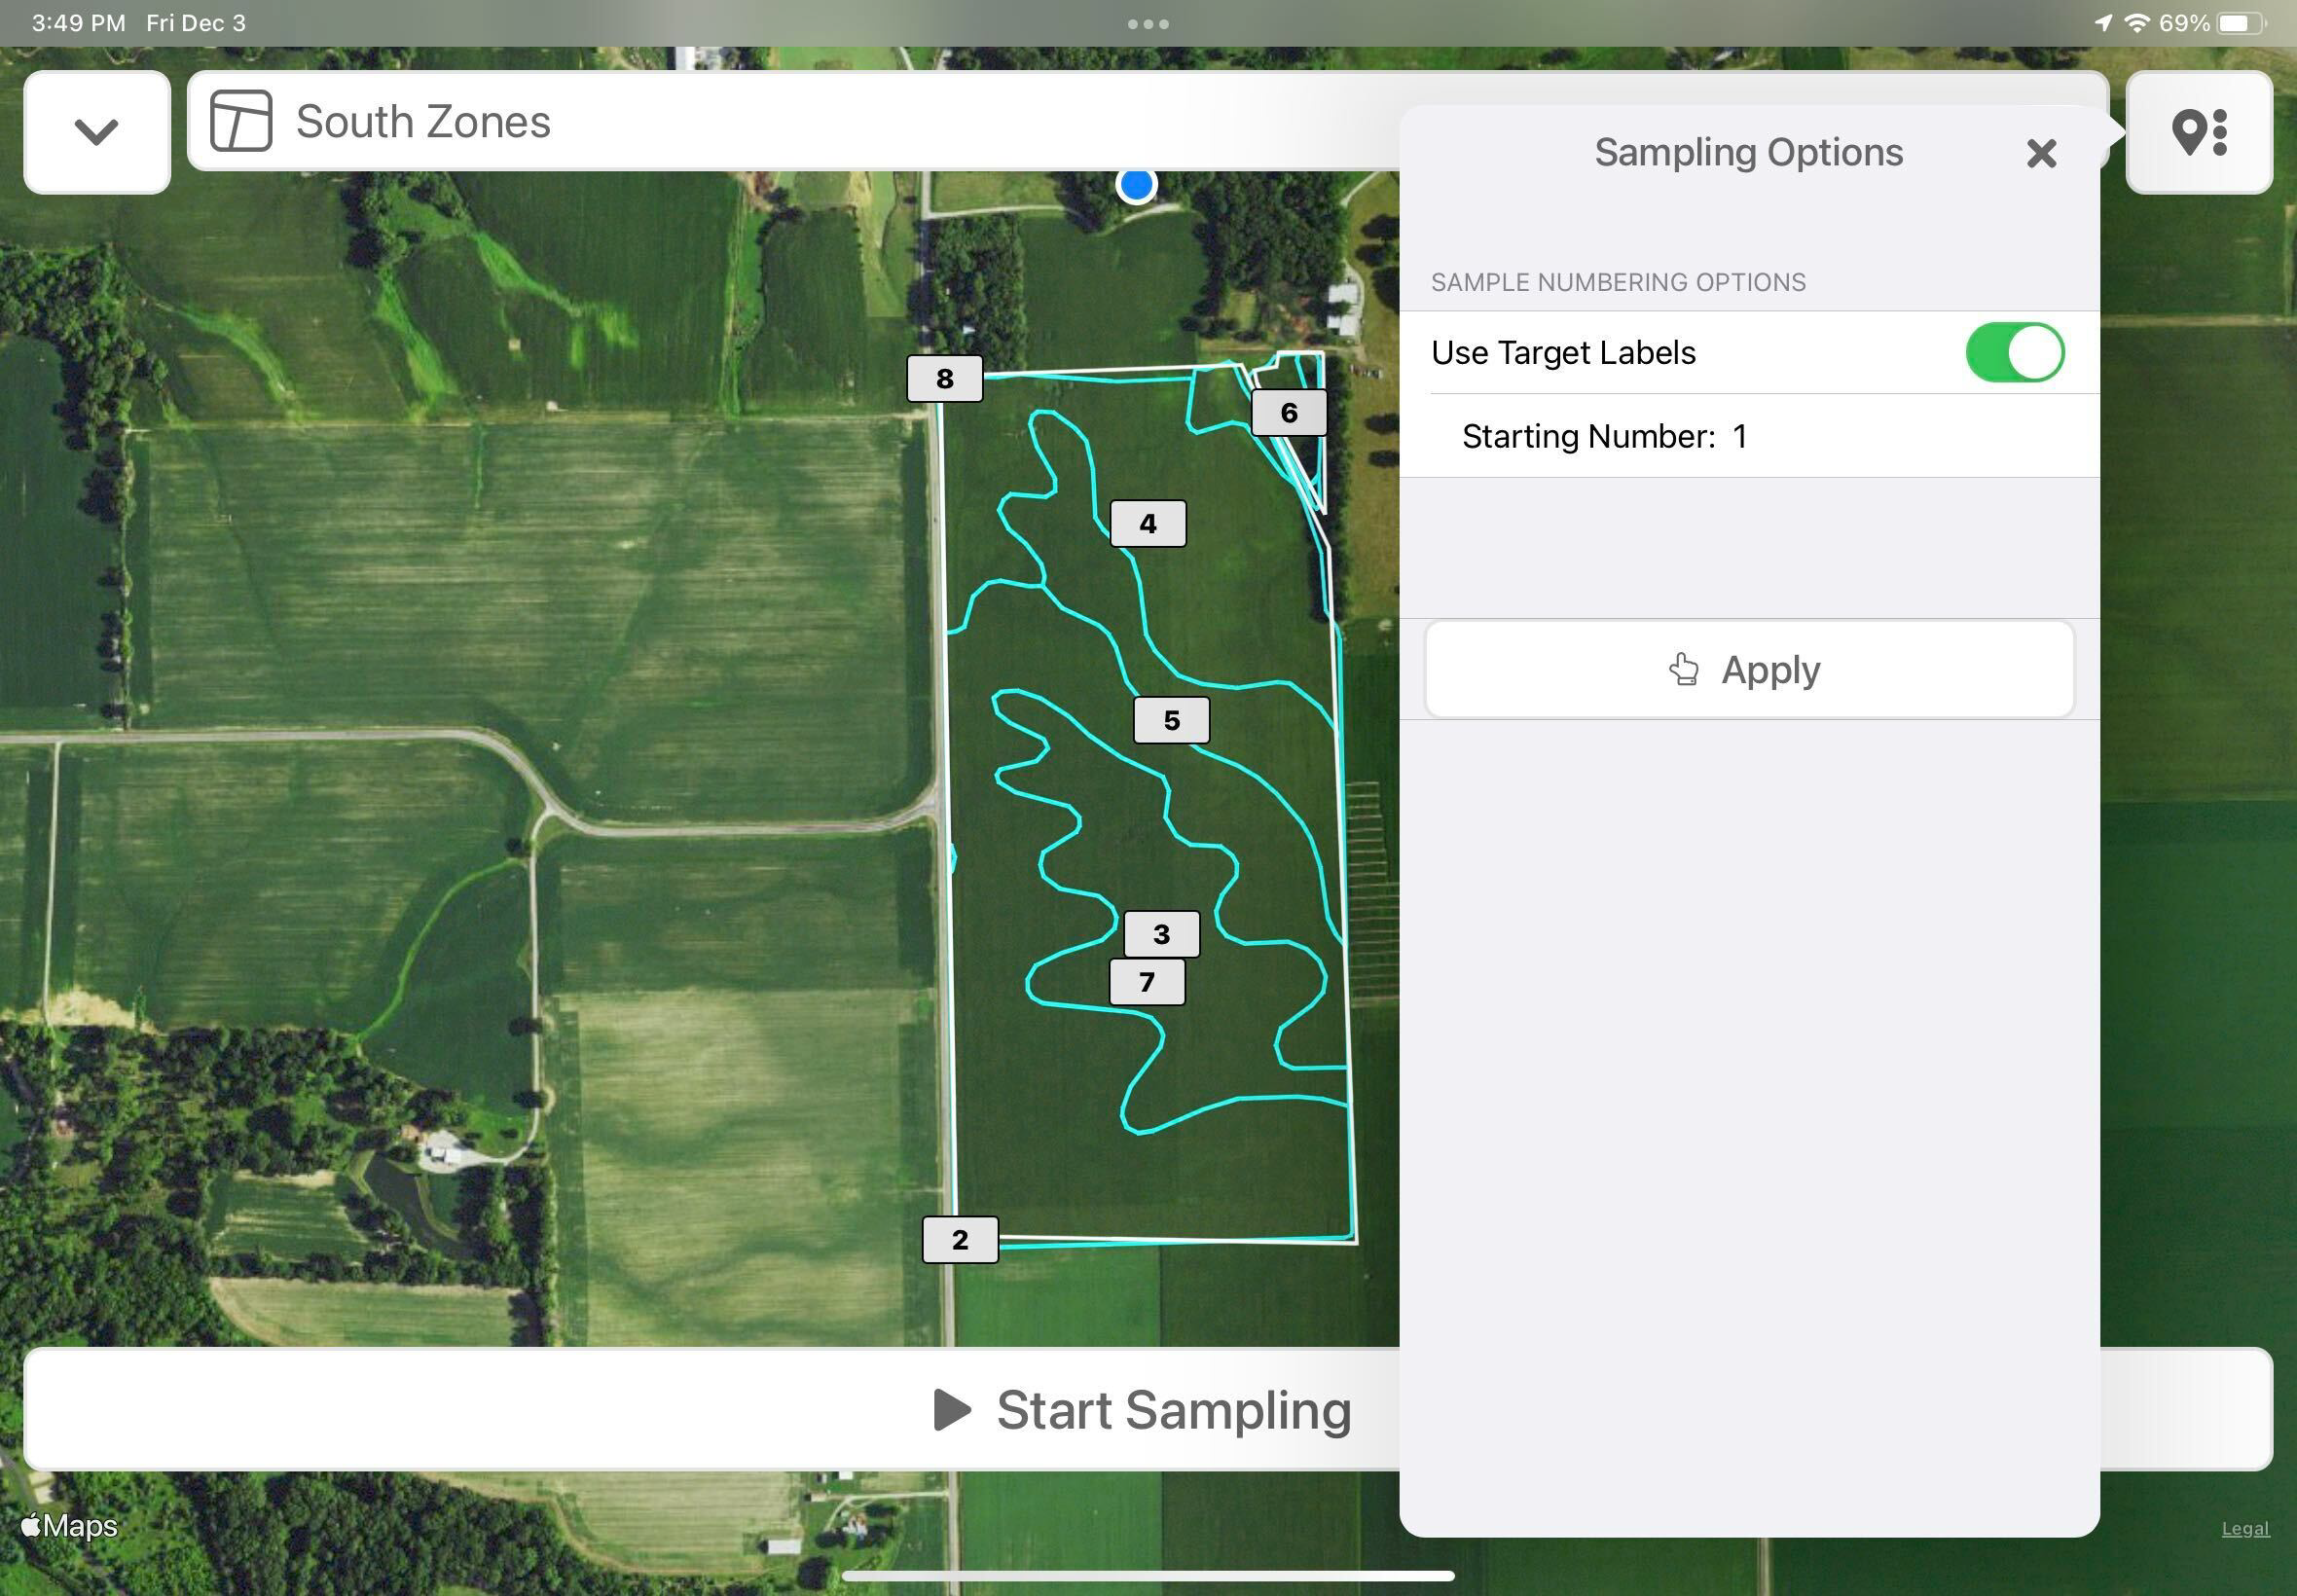
3. Prior to Start Sampling you have an option to turn off the Target Labels and/or to start sampling at number 1 or an alternate number. To do this click on the icon for Sampling Options in the upper right hand corner of the screen.
Choose Apply to accept your options. Choose Start Sampling to begin Sampling. |
 |
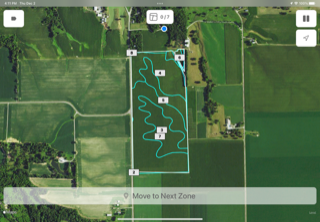
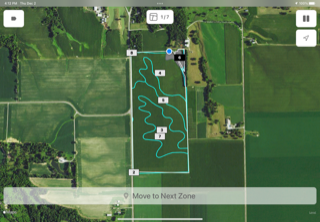
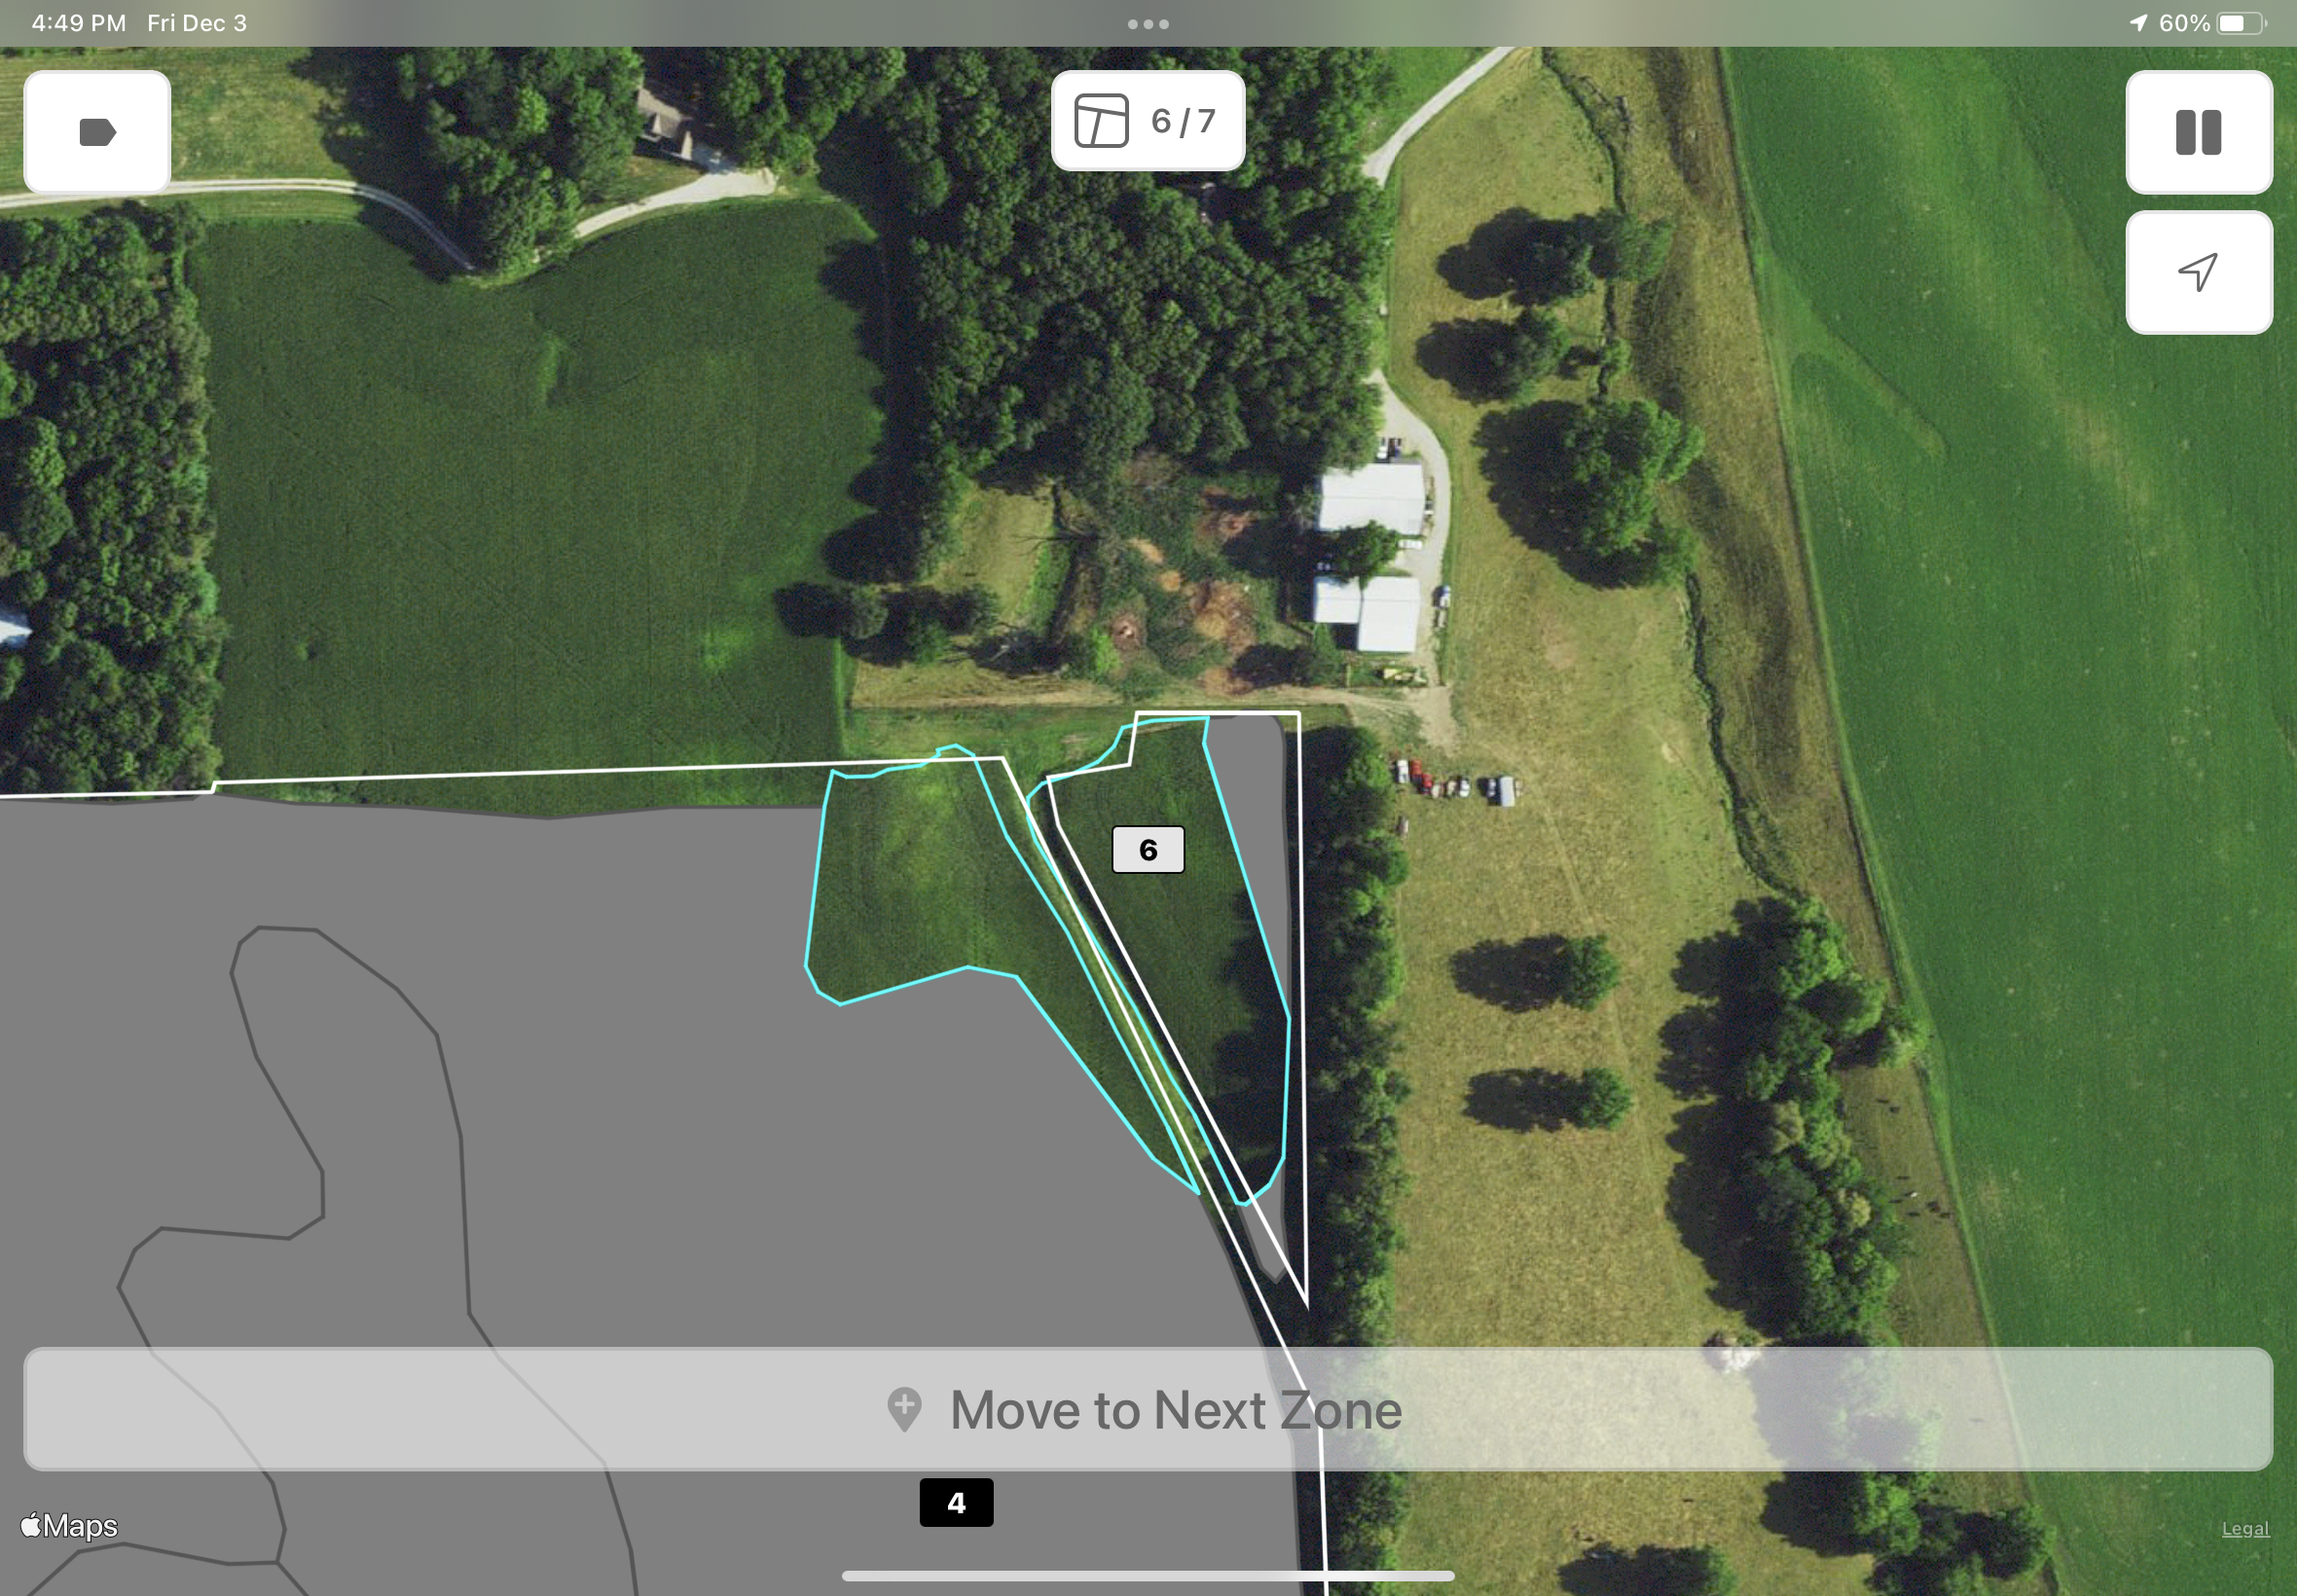
| 4. Proceed to the first zone to be sampled. Once you are in that zone, the zone will show red on your screen and the Mark Sample button will go active. Mark Sample when ready to mark the zone as sampled. |  |
|
The sampled zone will change to gray and the label box to black to indicate the zone has been sampled. The app will indicate to Move to Next Zone, but the next zone and the Mark Sample button will not become active until you are in the next zone. Once you are located in the next zone the zone will go red as shown earlier and the next Mark Sample button will become active. In the middle of the screen at the top, the app will indicate the number of zones sampled/ versus the number of zones to be sampled.
|
 |
|
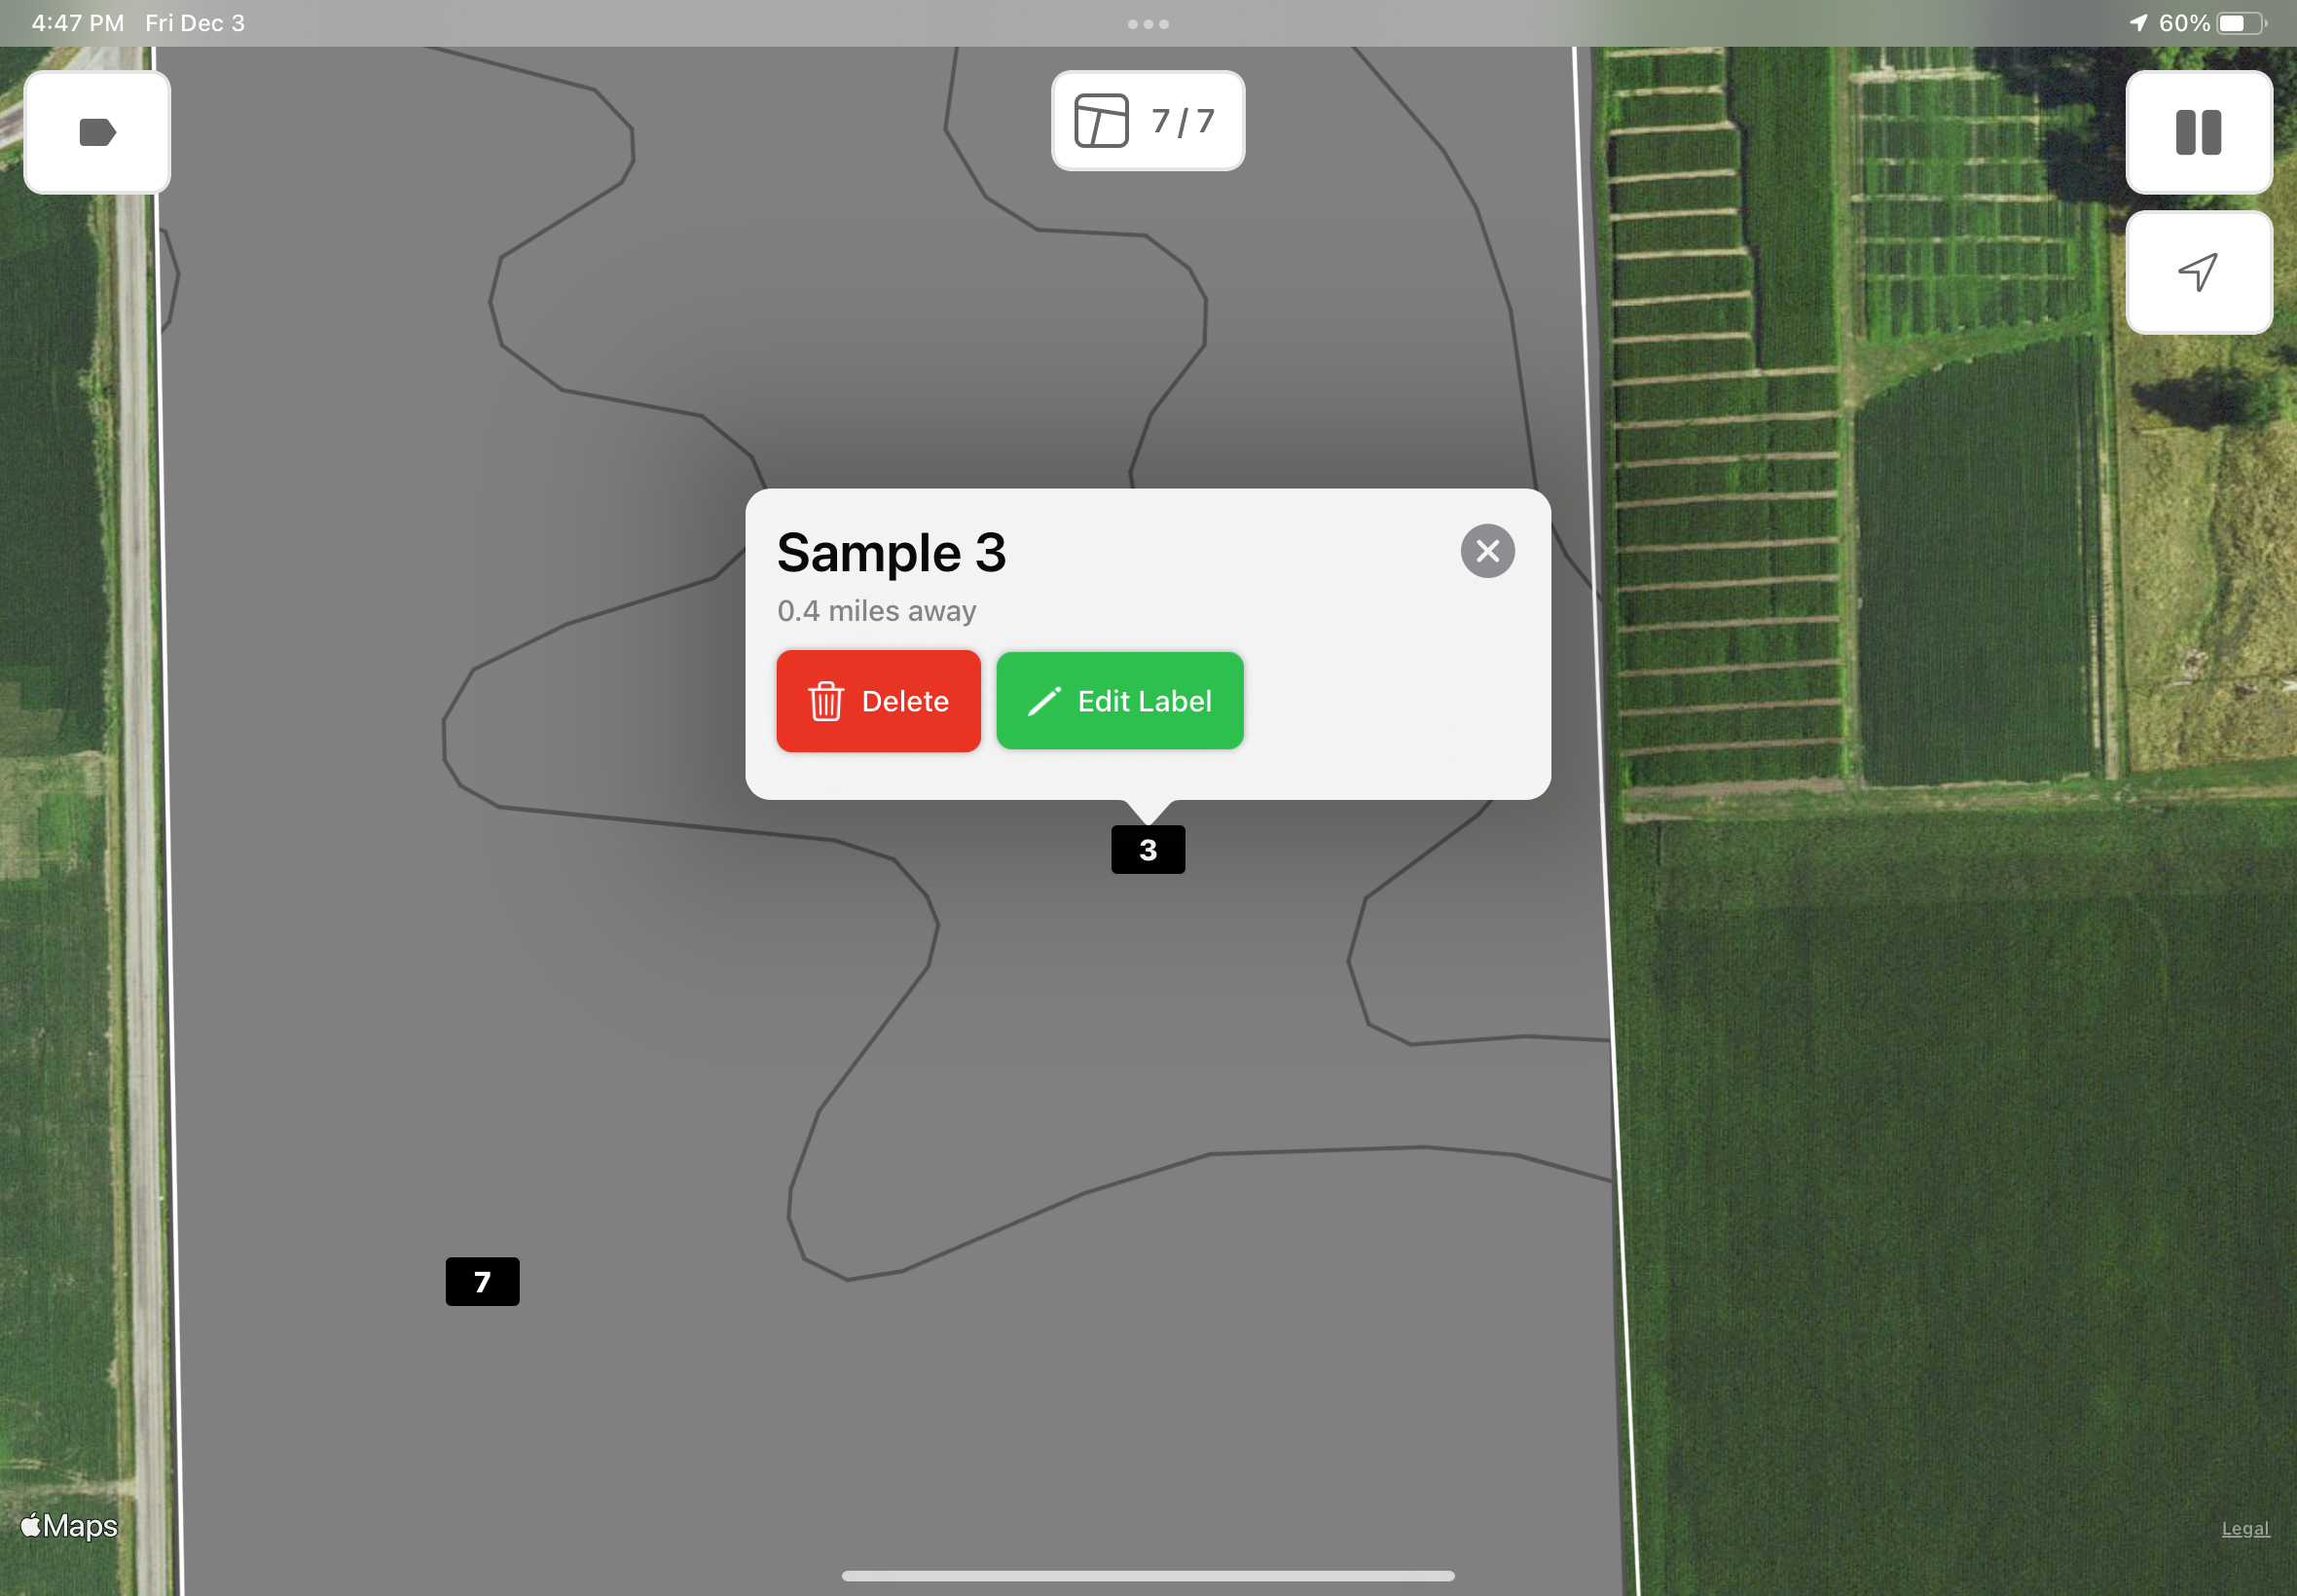
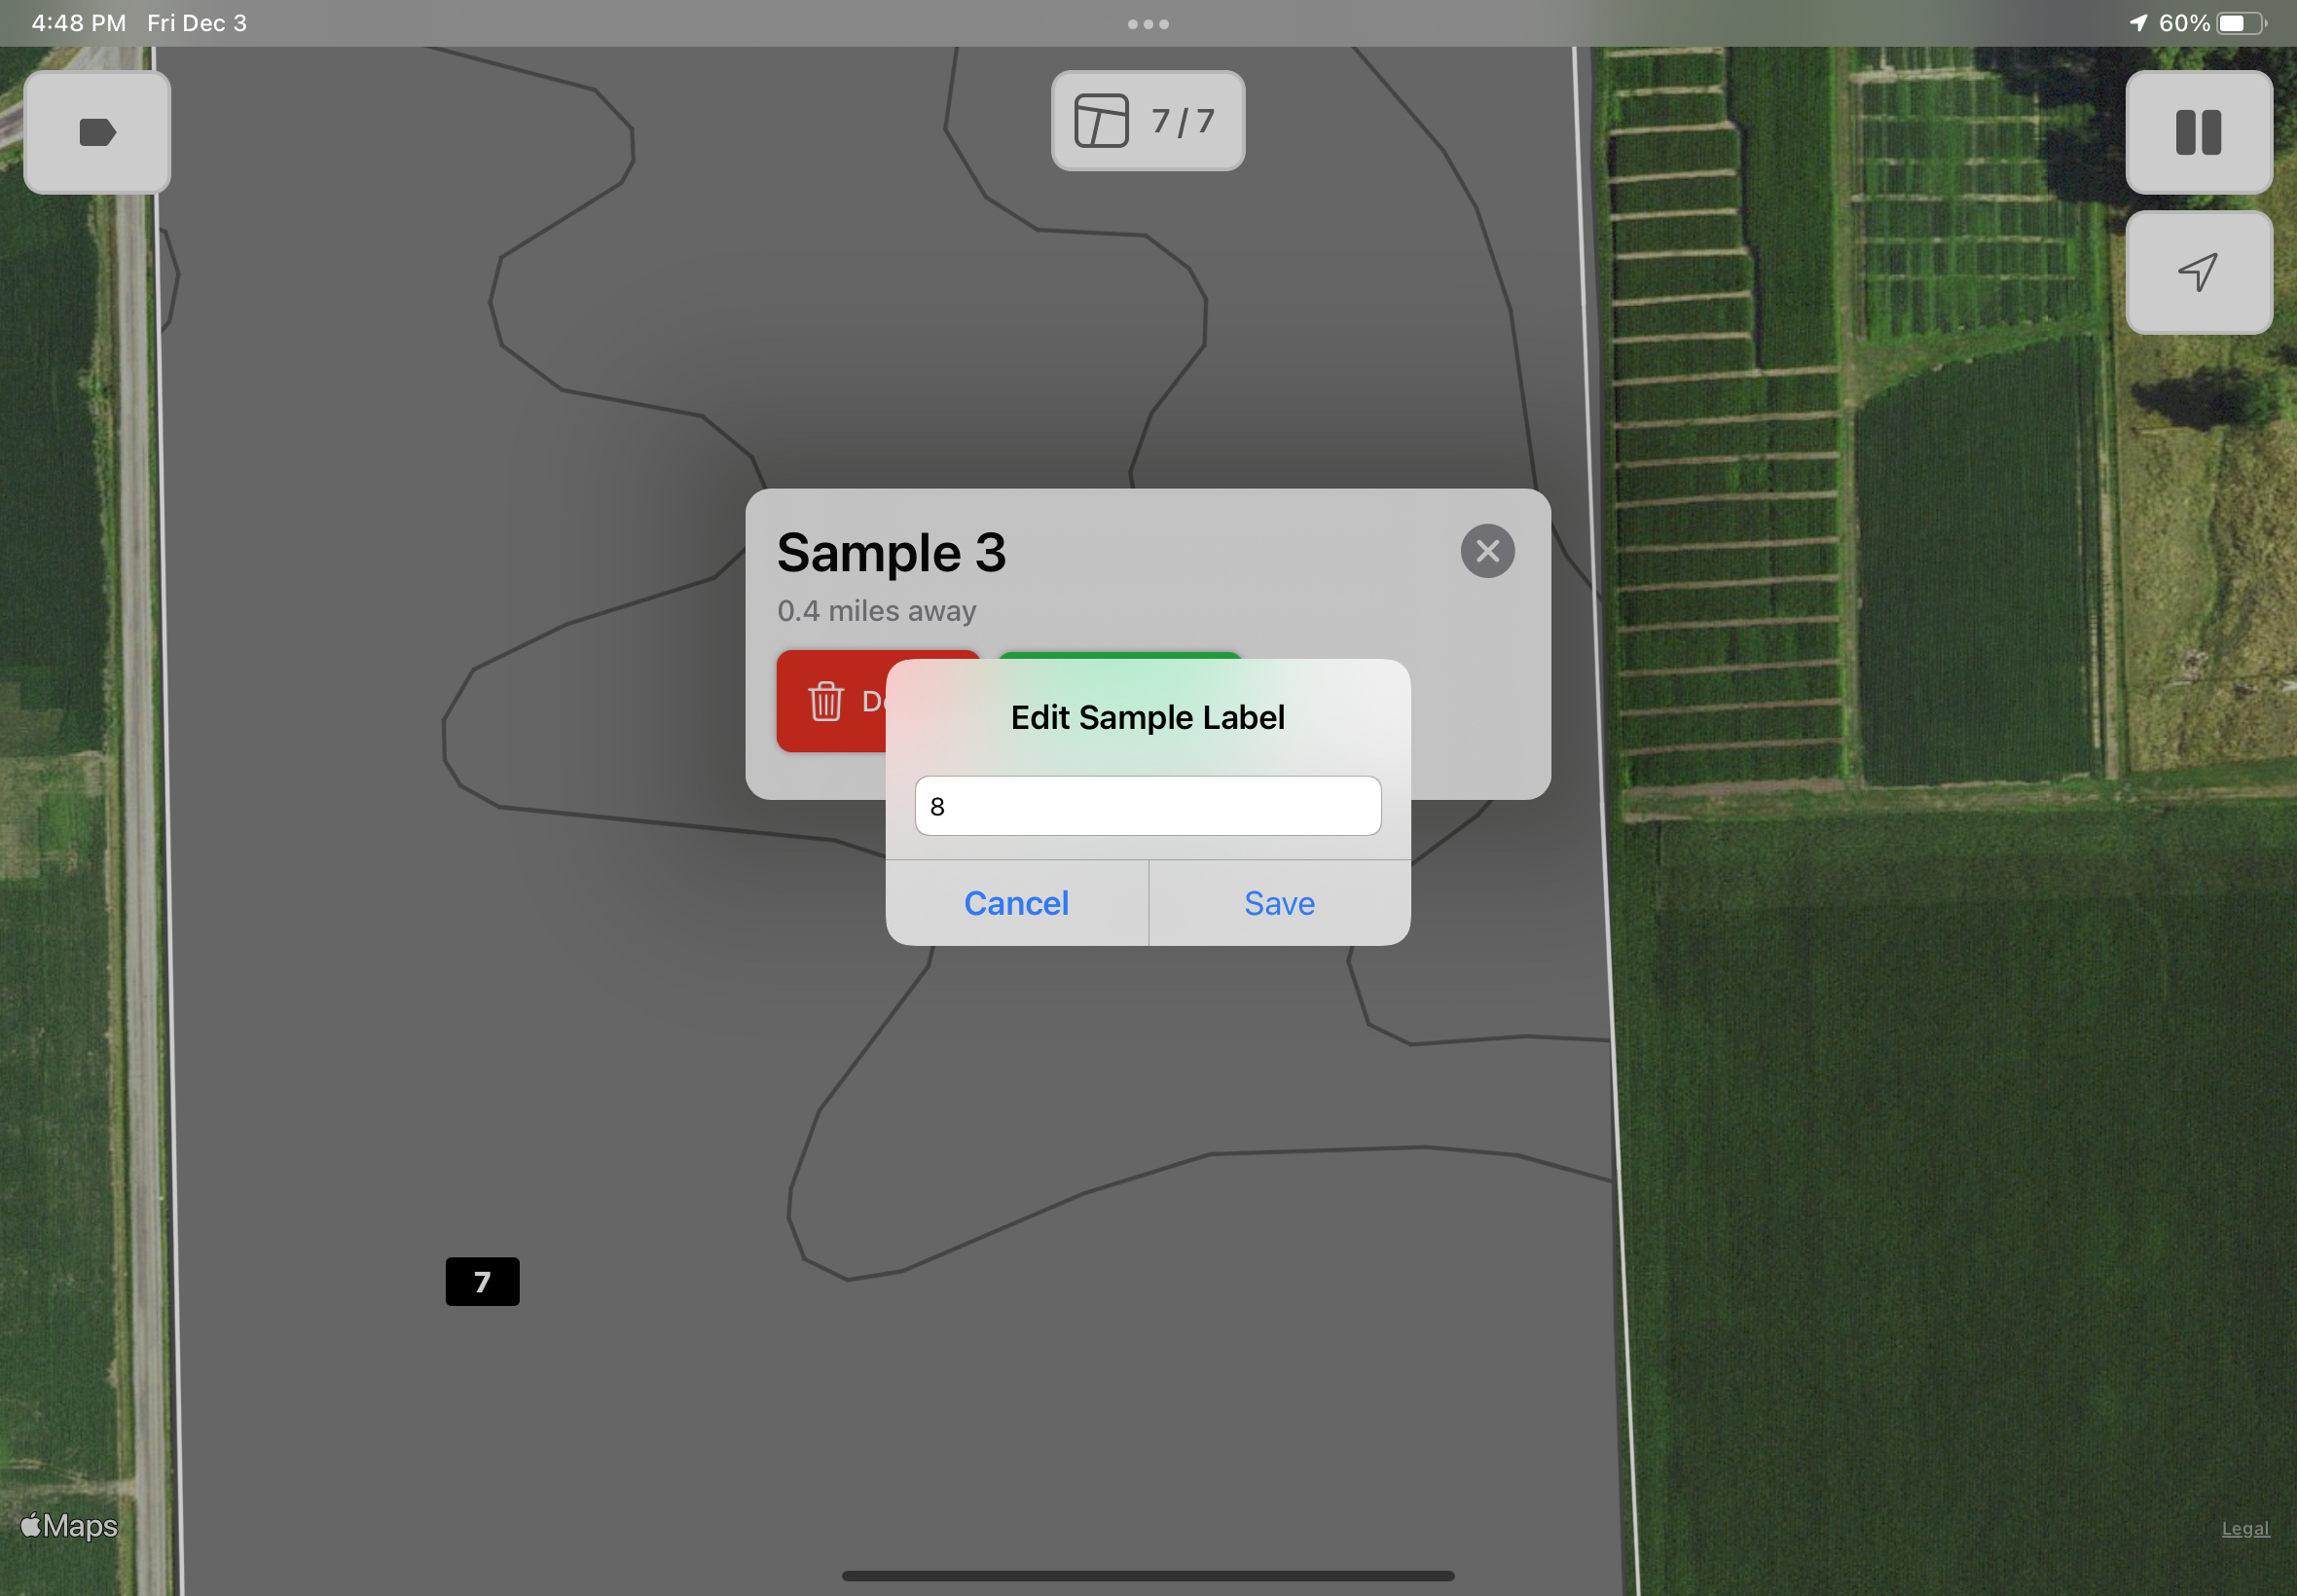
As you are sampling if you need to make changes such as changing the sample label or deleting the zone, tap on the zone to make the changes. To Edit Label simply tap on the Edit Label button and the keyboard and a text box will appear for you to change the sample label. Choose Save to keep your changes or Cancel to remove changes. |
|
|
If you choose Delete from the menu, the zone will change to display the zone as not sampled and revert back to it's original settings. When you choose to Finish Event by choosing the pause icon
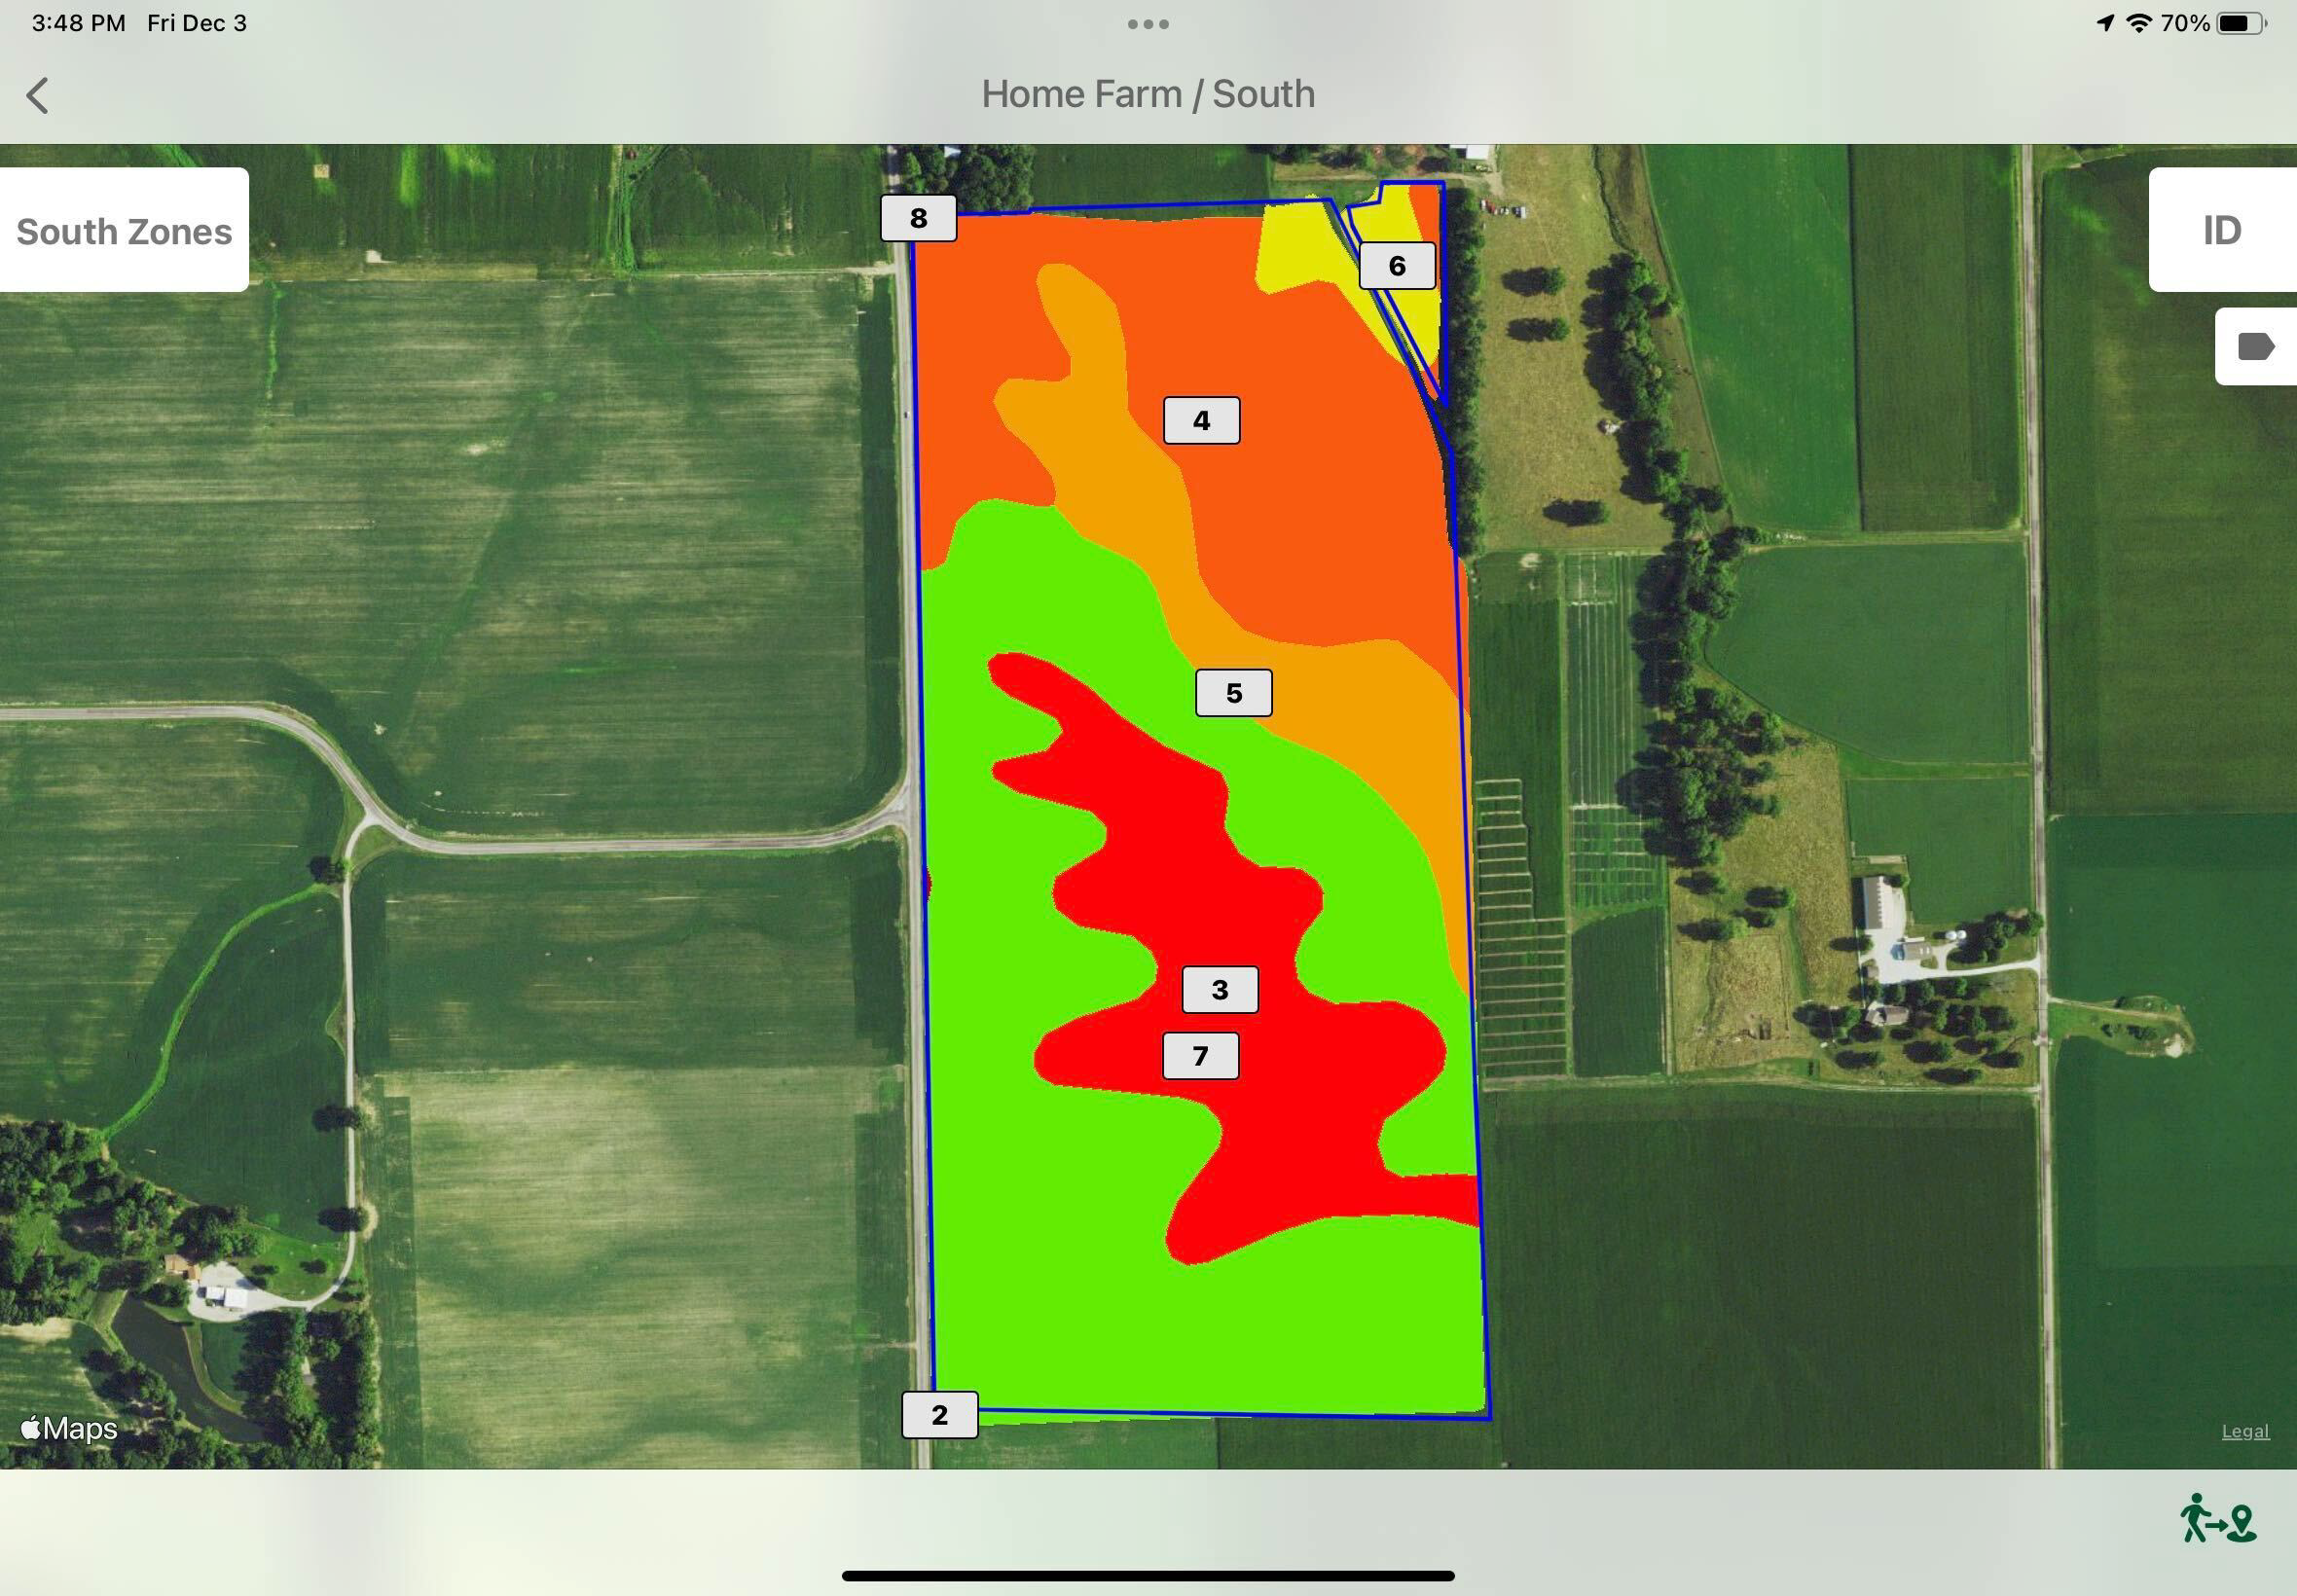
the event will display as zones sampled are in blue and the zones not sampled or deleted are in White. |
 |
|
5. Once the sampling is complete, choose the pause icon to Finish Event. Enter your Event Name, the Lab Account, and choose Save. You will then see the completed sample event and you can tap on the Share icon in the middle of the bottom of your screen to share a zipped shapefile of the boundary and zones and/or have the finished file sync to Traction for results from the lab. |
 |