This article will walk through the process of adding paychecks to employees.
This article only applies to Traction Payroll users.
|
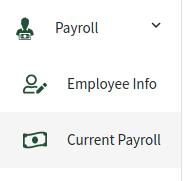
1. Navigate to Accounting->Payroll->Current Payroll A list of your active and onboarded employees will be shown. If you are missing an employee, please make sure you have followed the steps to setup and onboard your employees. |
 |
|
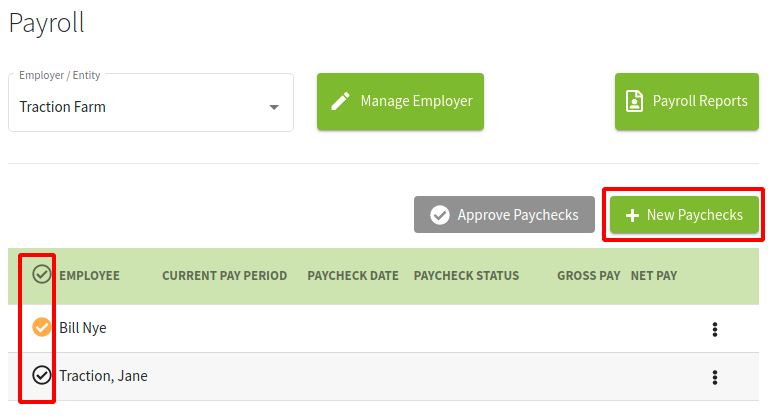
2. Add New Paychecks Select the employees you would like to add a new paycheck to by marking them checked and then clicking the New Paychecks button.
You can either add a new paycheck for an employee or you can select multiple employees and batch the creation of their checks.
|
 |
|
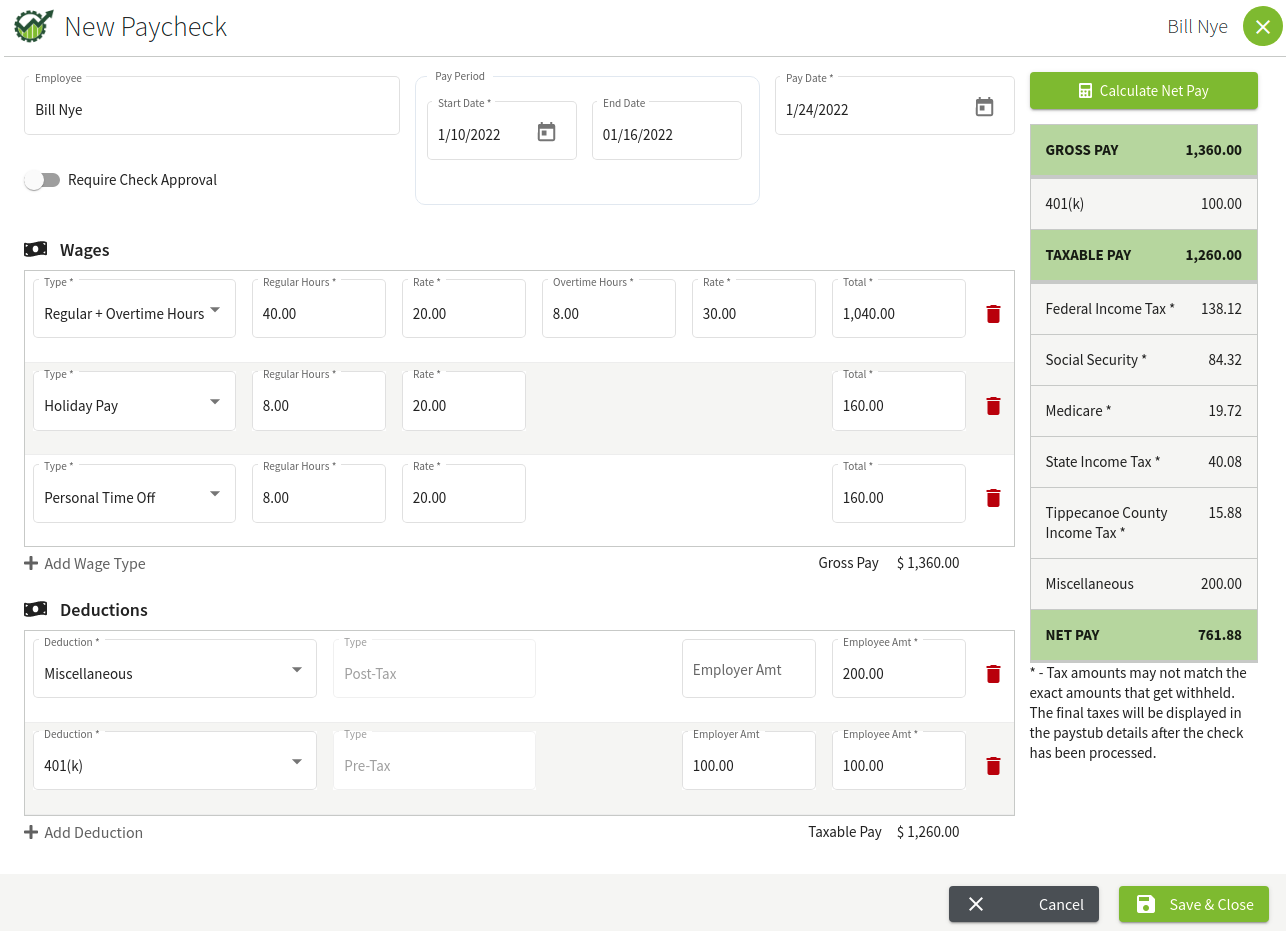
3. Enter the Paycheck Information There are a lot of options on this screen. Following from top to bottom, you will enter:
If you enable Require Check Approval, you will need to approve the paycheck before it will be processed. Unapproved checks are not processed by the system. |
 |
|
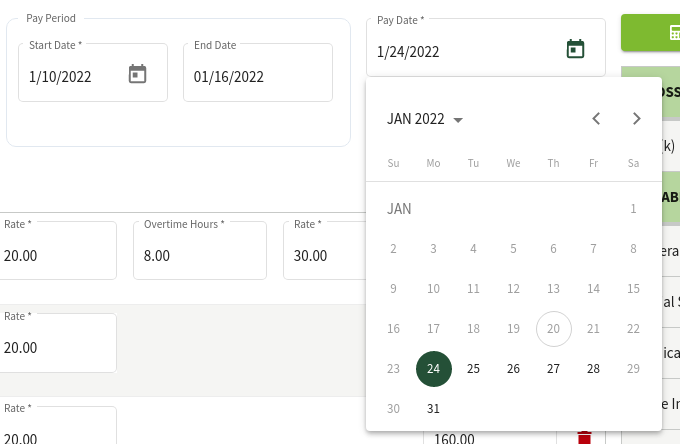
4. Dates Select the Start Date for the pay period, and based on the information you entered for the pay schedule during the employees setup, the End Date will be automatically populated. The Pay Date will also be automatically populated with the first available deposit date.
The cut-off for a two day deposit is 4pm EST. In this example, since I am entering a paycheck before 4pm EST on January 20th, the first available date is January 24th. If I was entering this paycheck after 4pm EST on January 20th, the first available date would be January 25th. Bank holidays are also removed as potential options. |
 |
|
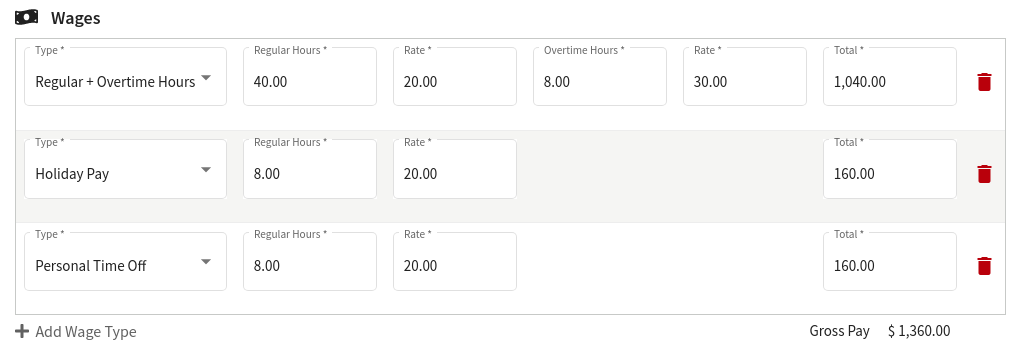
5. Wages You will need to select the type of Wage you would like to include on the Paycheck and then enter in the appropriate hours or total.
For Salary, enter in the hours and total, and the hourly rate will be calculated. |
 |
|
6. Deductions You will need to select the type of Deduction you would like to include on the Paycheck and then enter in the appropriate hours or total.
At this time, you cannot add custom deductions. If you need a post-tax deduction, please use the Miscellaneous type. |
 |
|
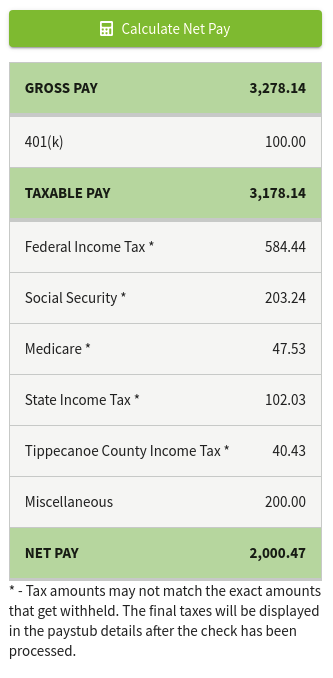
7. Review with the Net Pay Calculator Once you have entered in the paycheck details, you can click the Calculate Net Pay button to see an estimate of the taxes and net pay. Tax amounts may not match the exact amounts that get withheld. The final taxes will be displayed in the paystub details after the check has been processed.
|
 |
|
8. Save Once everything is verified for the paycheck, you are ready to save. If you are only working on a single paycheck, your save button will state Save & Close. If you are working on a batch of paychecks, it will say Save & Next. |
|
|
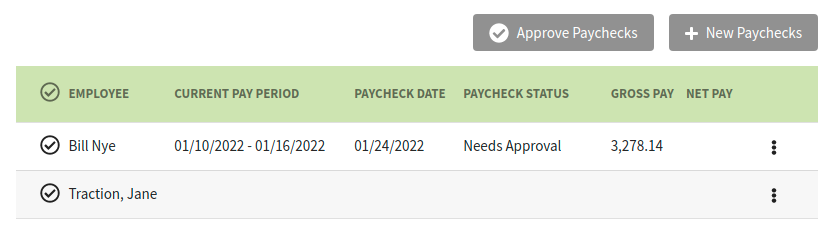
9. Review If you enabled Require Check Approval for any of the checks, they will be in the Needs Approval status. Any paycheck in this status WILL NOT BE PROCESSED. To approve a paycheck, select the paycheck(s) you would like to approve and then click the Approve Paychecks button.
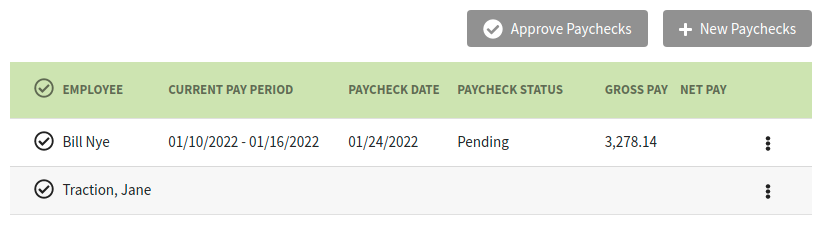
Once you approve a paycheck (or did not require the paycheck to be approved), it will be in the Pending status and will be processed 2-days before the Pay Date. There is no further action required on your part once the check is in the Pending status. |
|
And that's. You payroll is ready to run and be processed by our payroll partner Zeal.