In this article, we'll walk through the process of onboarding your employees, along with deactivating them if they no longer work for you.
This article only applies to Traction Payroll users.
Jump to Section
3. Setting Up Additional Exemptions and Reporting Configurations
Information required for Employee Setup
- Valid employee e-mail
- Pay schedule
- Job Title
- Start Date
- Primary Work State
- Hourly Wage
- Does this employee require their wages on a 943/941
Information required for Employee Onboarding
- Tax and Identity Documents
- W4
- I-9
- State W4
- Direct Deposit Bank Information
Onboarding an Employee
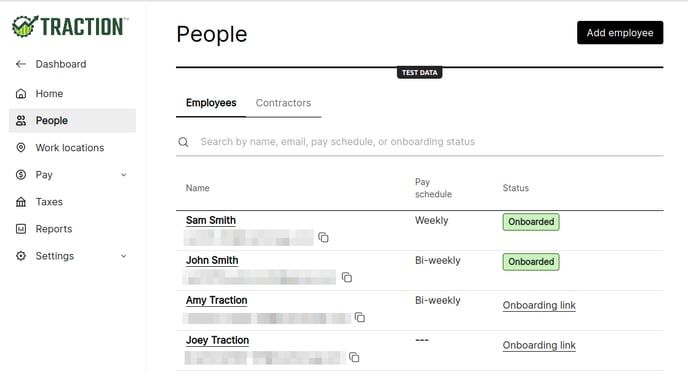
1. Employee Information
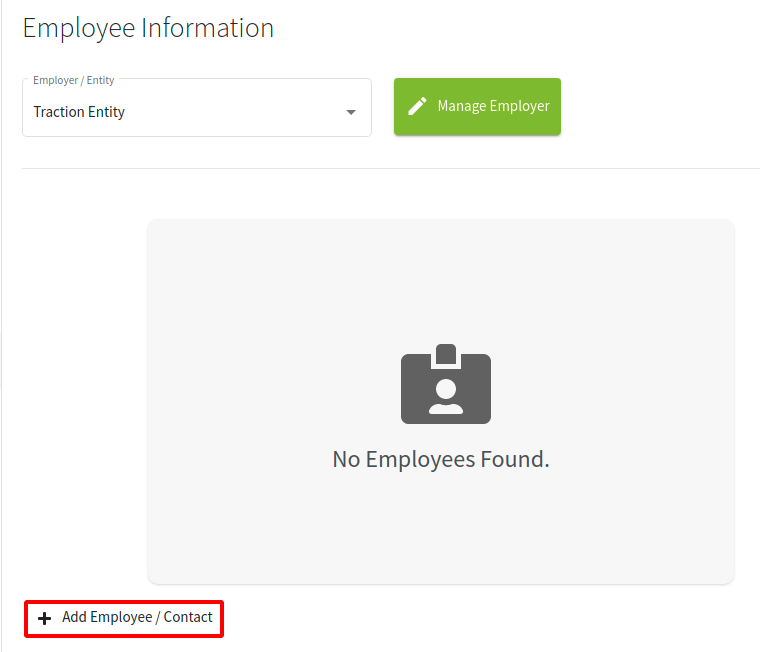
Now that your Employer is setup, you are ready to add Employees to your payroll.
This list will contact all of your contacts who were assigned the Employee category.
If you need to add additional employees, you can click the Add Employee / Contact link.
2. Adding an Employee
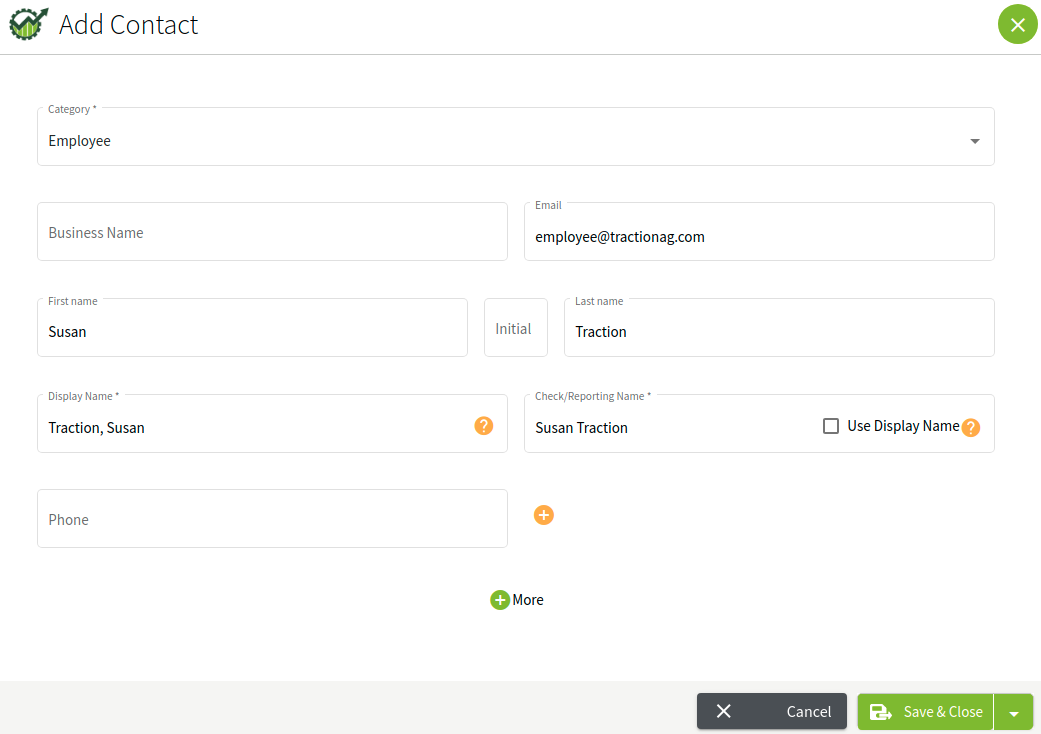
- If you click the Add Employee / Contact link, the Add Contact wizard will appear.
- Fill in all of the pertinent information
- Click Save & Close
3. Employee Setup
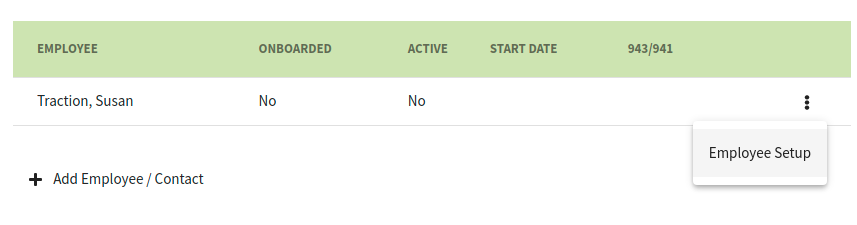
Once you have your employee contracts setup and displaying in the Employee Information screen, you are now ready to move on to the next phase of the payroll setup.
- Click the More (three dots) button and select Employee Setup.
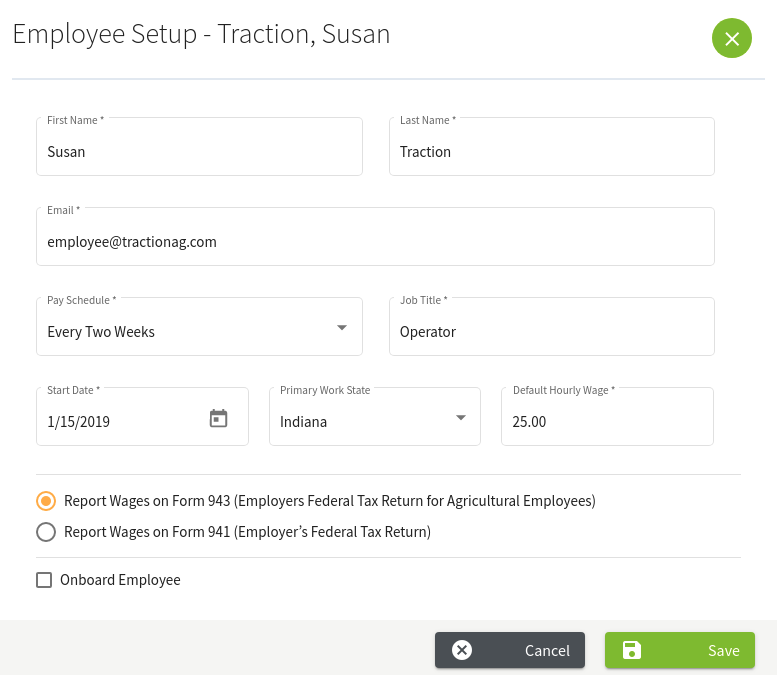
4. Employee Setup - Individual
In this example, we will not perform the Employee Onboarding until after we save. In the future, if you are adding a new employee, you can check this box and choose the appropriate option.
- Fill in all pertinent information
- When ready, click the Save button
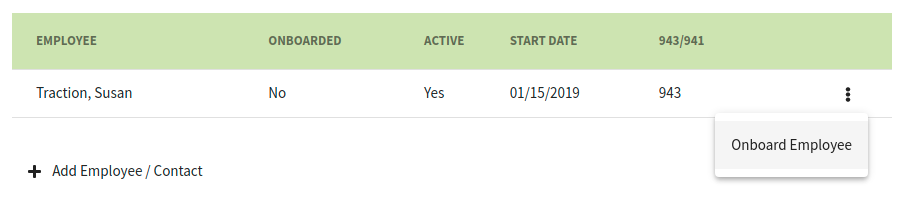
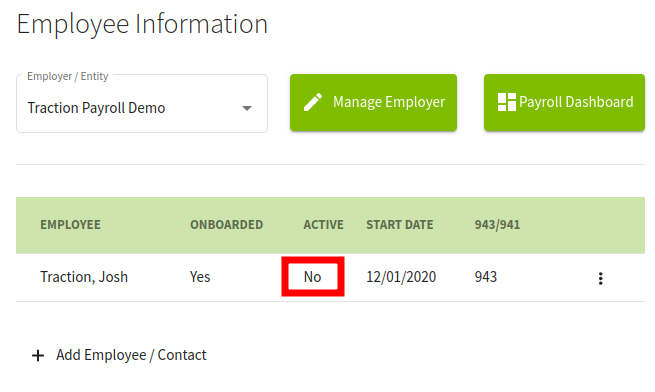
5. Active but not Onboarded Employee
- The employee you just setup is now shown as Active
- Each employee in an Active status is counted towards your Payroll License limit
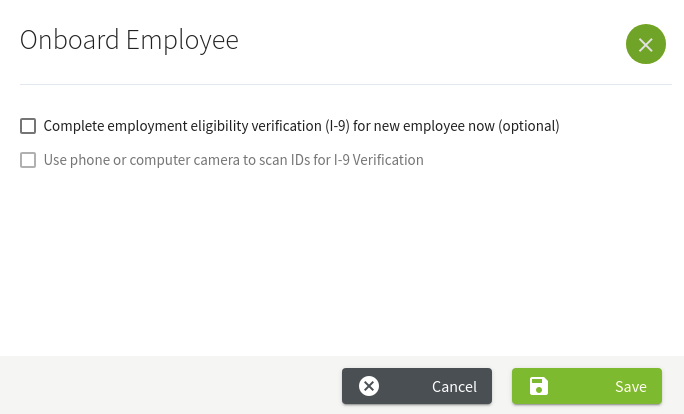
- Click the More (three dots) button and select Onboard Employee.
If this employee has already been verified, you can choose the first option.
If the employee is new and needs to be verified, you can choose the second option which will allow you to take pictures of identification for I-9 verification.
In this KB article, we'll choose just the first option.
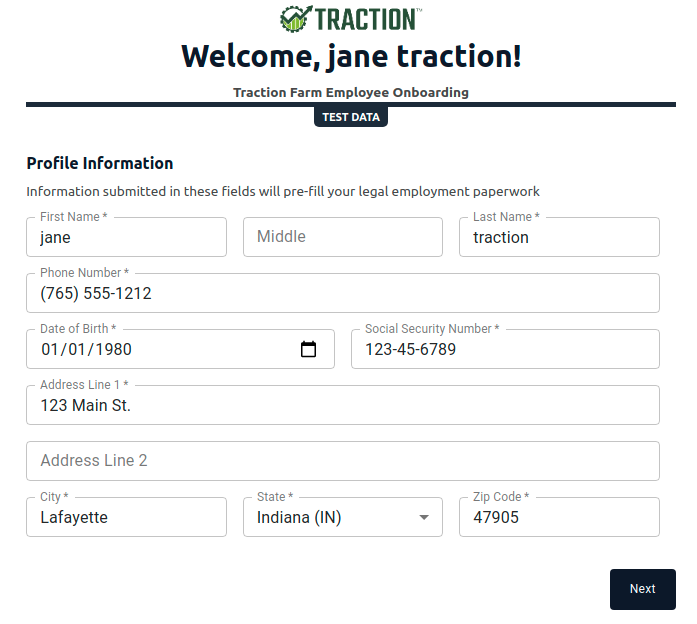
6. Onboard Employee, Completed Verification
- Fill out the Profile Information for your employee or have your employee fill this out with you
- Review the information
- Click Next when ready
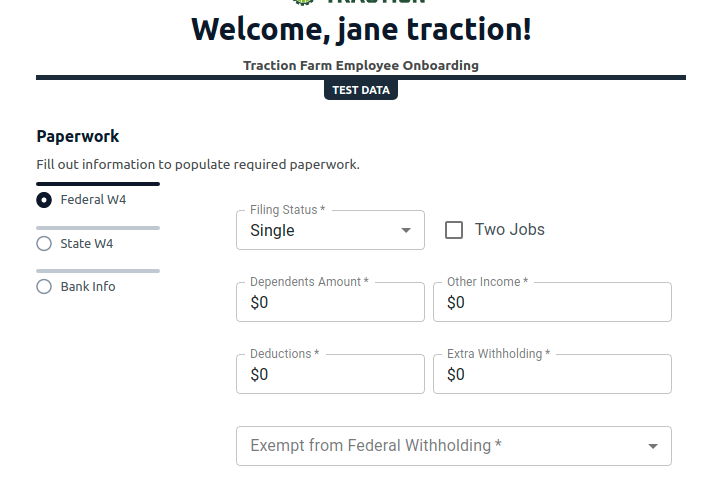
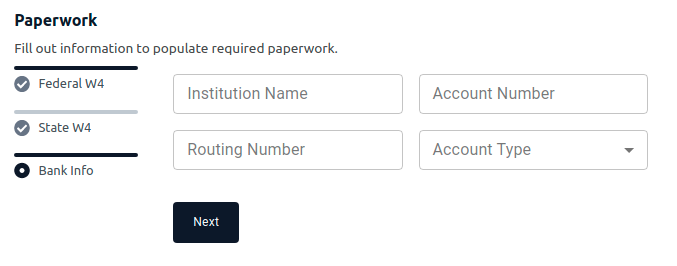
7. W4 and Direct Deposit Paperwork
The next screen will ask you to fill out your Federal W4, State W4 (if applicable), and Bank Information for direct deposit
The initial screen is for your Federal W4
Fill in the details
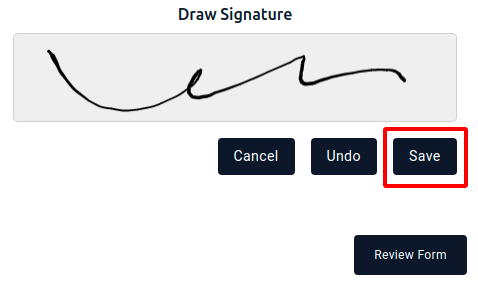
Add a digital signature and click Save
Click Review Form
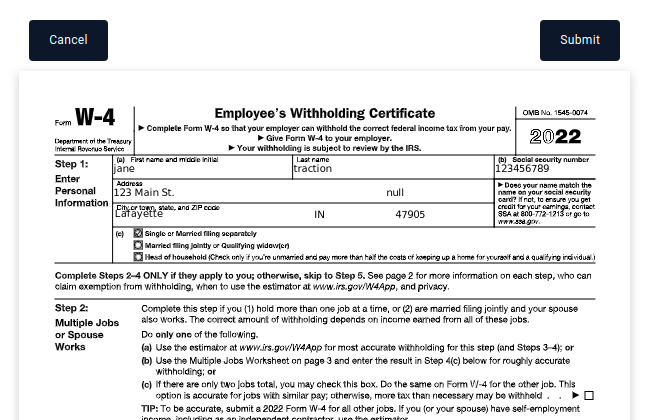
The document will then be rendered with the values you provided.
Please review the document
If you need to make changes, click Cancel, otherwise, click Submit
NOTE: If you need to make future changes to a W4, we will need to create a support ticket with Zeal to update this information.
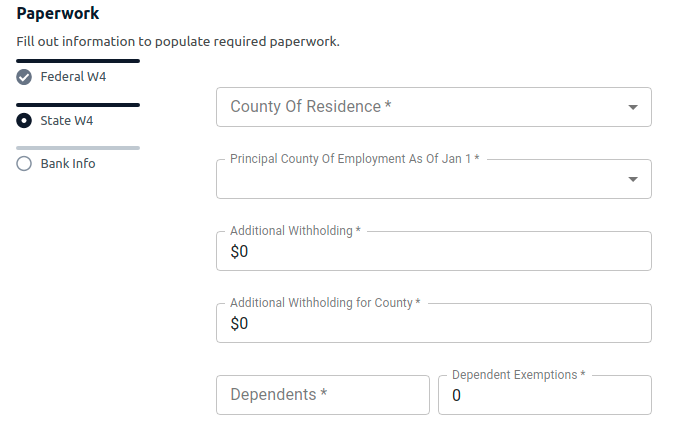
8. State W4
Follow the same steps as before, entering the appropriate information in each field, signing, reviewing, and submiting.
9. Direct Deposit
Enter the appropriate information for the employee's direct deposit, review, and then
10. Final Confirmation
- Once the paperwork has been signed and submitted, your employee's onboarding is complete.
- Close the tab that was opened for onboarding and return to your Traction Ag account tab

11. Setup and Onboarding are now complete.
- The employee you just walked through the onboarding with will now be listed with Yes in both the Onboarded and Active columns.
- As long as all of your other paperwork and verification (including micro-deposits) has gone through, you are all set to run your first payroll.

Deactivating an Employee
1. Navigate to the Payroll Dashboard, click on People, and then click on the name of the Employee you would like to deactivate.
2. On the Employee Profile page, click on Employment Settings, followed by the Edit button to turn this screen into edit mode.
Change the Employment Status to On Leave or Terminated. If you are selecting Terminated, enter the termination date, and click OK.
Verify the information and if everything looks good, click the Save changes button.
3. This employee will now be terminated and no longer show as an active employee in your employee list.
Setting Up Additional Exemptions and Reporting Configurations
If an employee is exempt from Federal Income Tax or State Income Tax, be sure to use the W4 Exemption option for those taxes.
1. Navigate to the Payroll Dashboard, click on People, click on the menu option for the Employee you would like to deactivate, and then click View Employee.

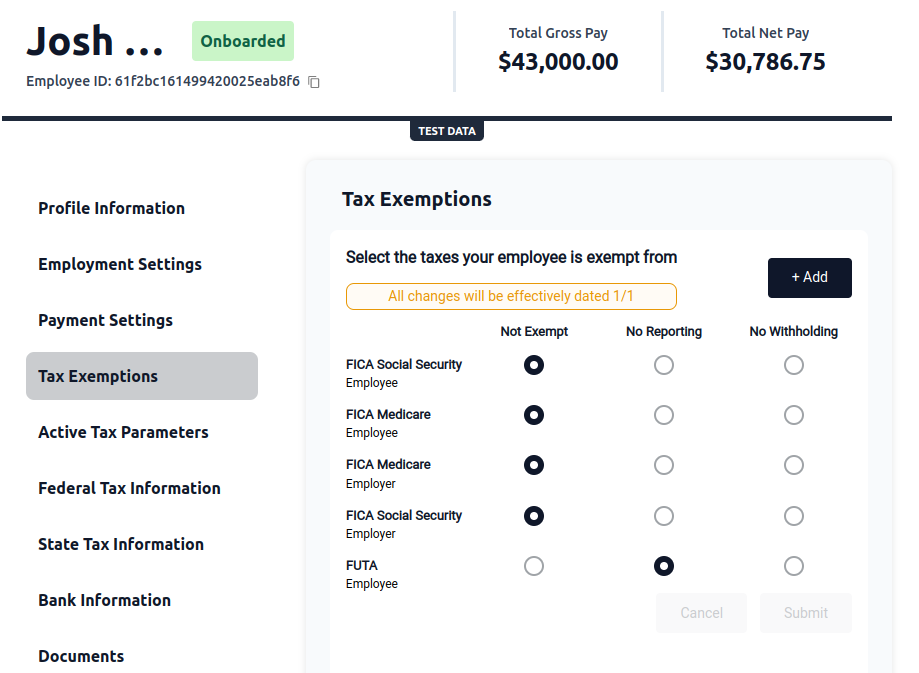
2. Click on Tax Exemptions from the side menu to see a current listening of taxes and exempt statuses.
From here, you can adjust the exemption and reporting status for this individual employee.
Definitions
Not Exempt: The employee's income is reported in tax filings, along with the tax being withheld from their paycheck.
No Reporting: The employee's income is NOT reported in tax filings and the taxes are NOT withheld.
No Withholding: The employee's income is reported in tax filings and the taxes are NOT withheld.
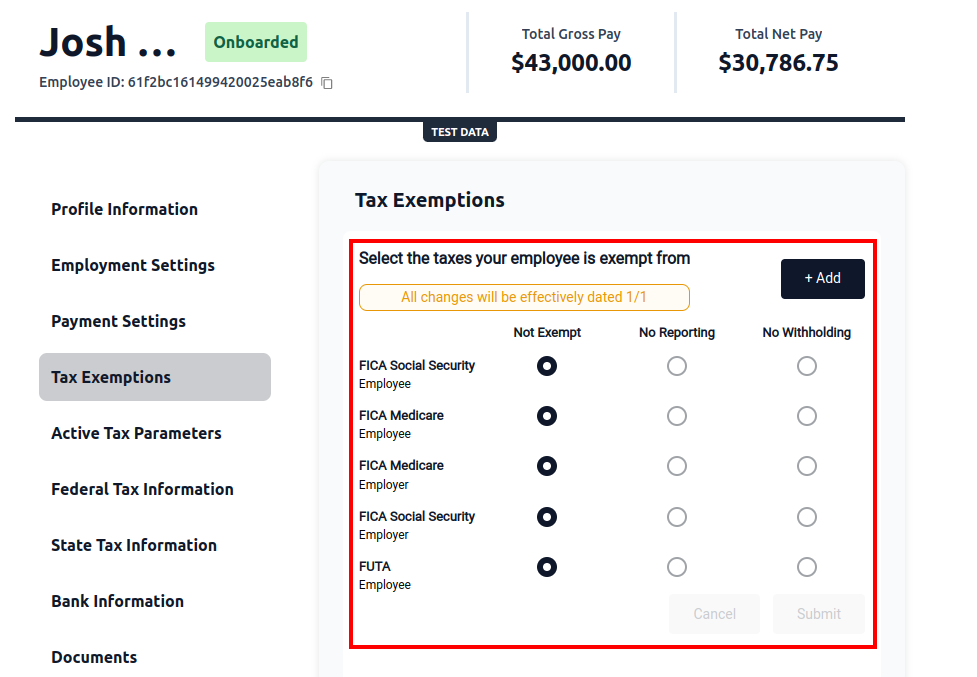
3. Choose the appropriate options for the employee and then click the Submit button.
You will receive a warning about the adjustment you are making. If you are sure you want to make this change, click the Submit button again. You can click Cancel to stop the changes.
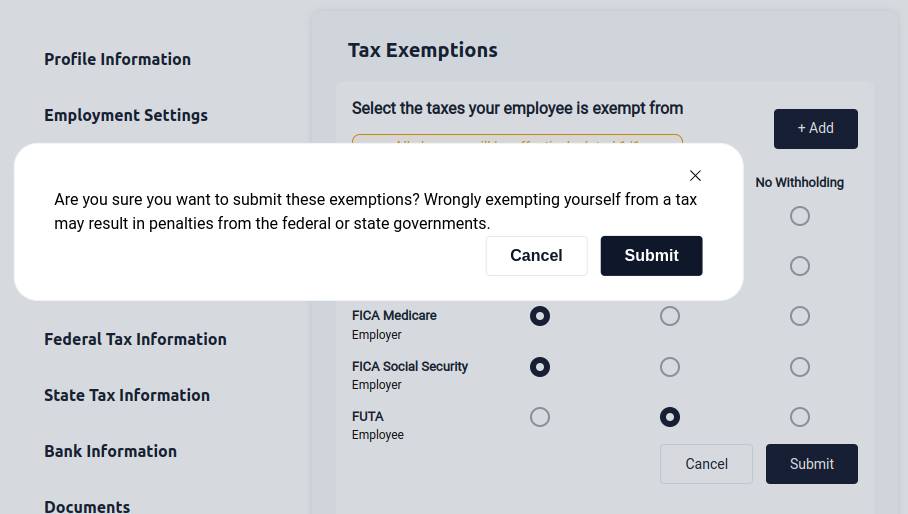
The next paycheck will be ran using the new parameters you have set.