How do I create a soil sampling Work Order?
This article explains how to create a new soil sampling Work Order from the web application. Soil samplers will see these assigned Work Orders on their Field app.
Note: A database is allowed 2 managers/users. If you need assistance setting up more managers/users for samplers in your database, please reach out to our Traction Success team at (888) 305-3839 or success@tractionag.com. We will need the names and email addresses of the new managers/users. Please note these managers/users will have full access to your Traction database.
Note: When using Work Orders your soil sampler must also use the Work Order work flow in the Field App.
| 1. Choose Field Ops from the menu in the upper right corner of your screen. | 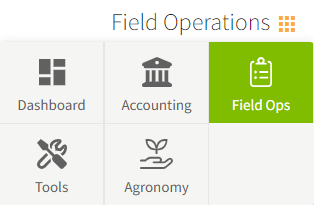 |
| 2. Choose Work Orders from the menu on the left side of your screen. |  |
| 3. To create a new work Order, choose +New Work Order. | 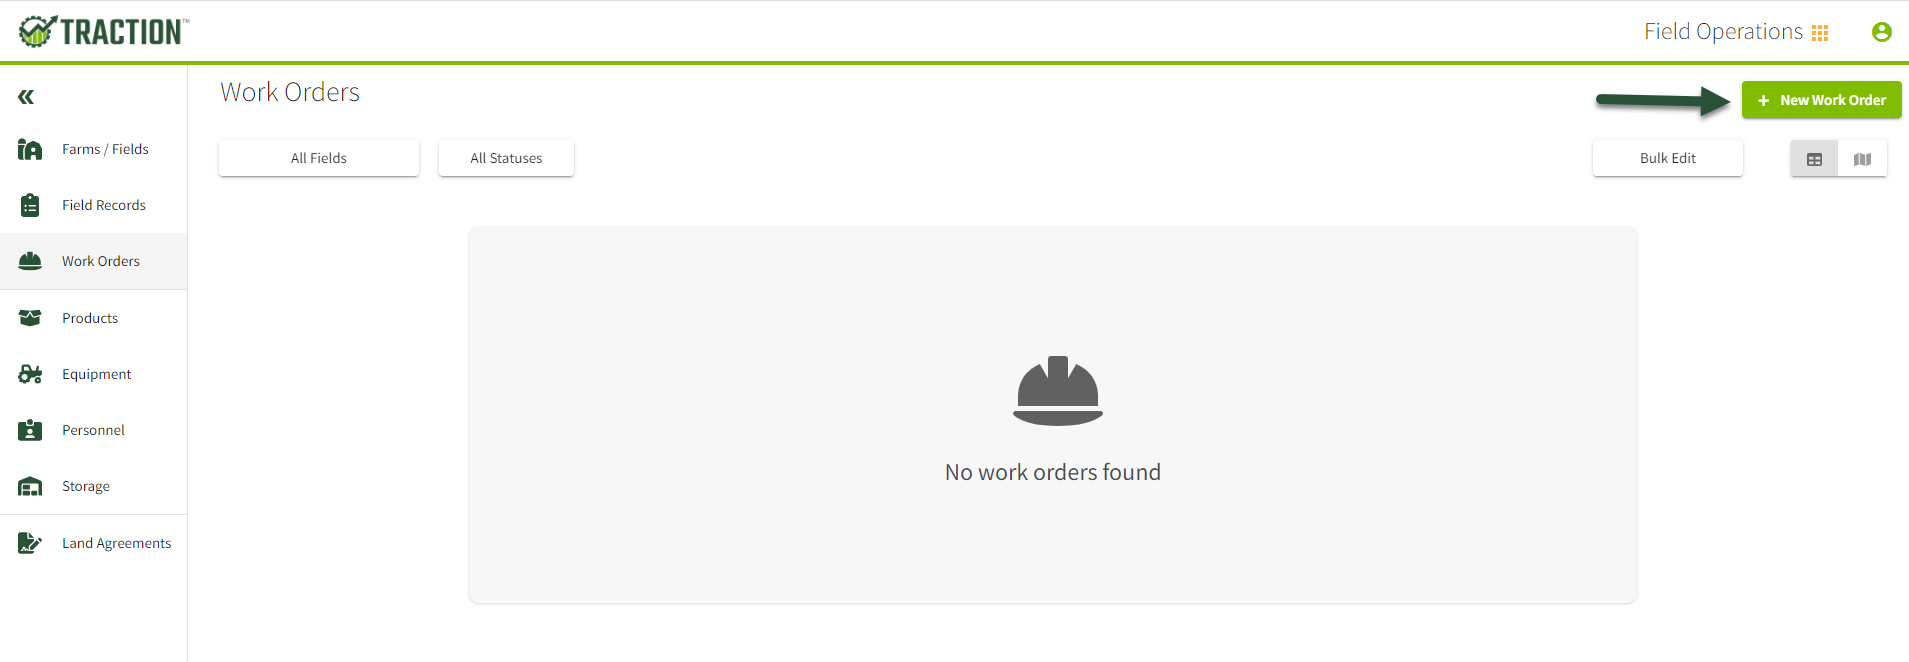 |
| 4. In the Grower box choose the Grower from the list that appears. | 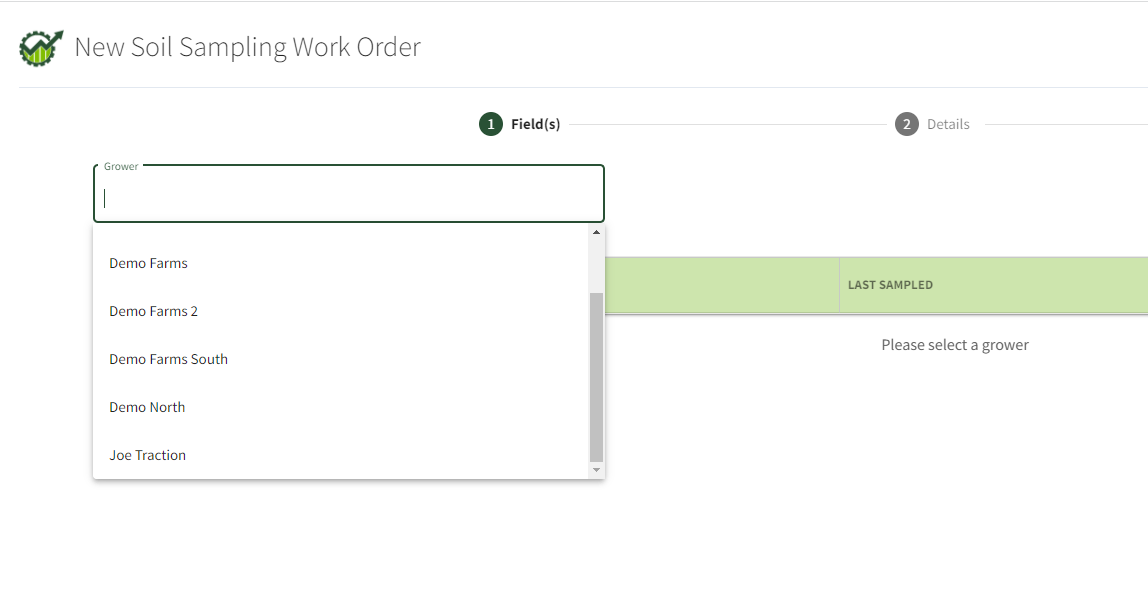 |
|
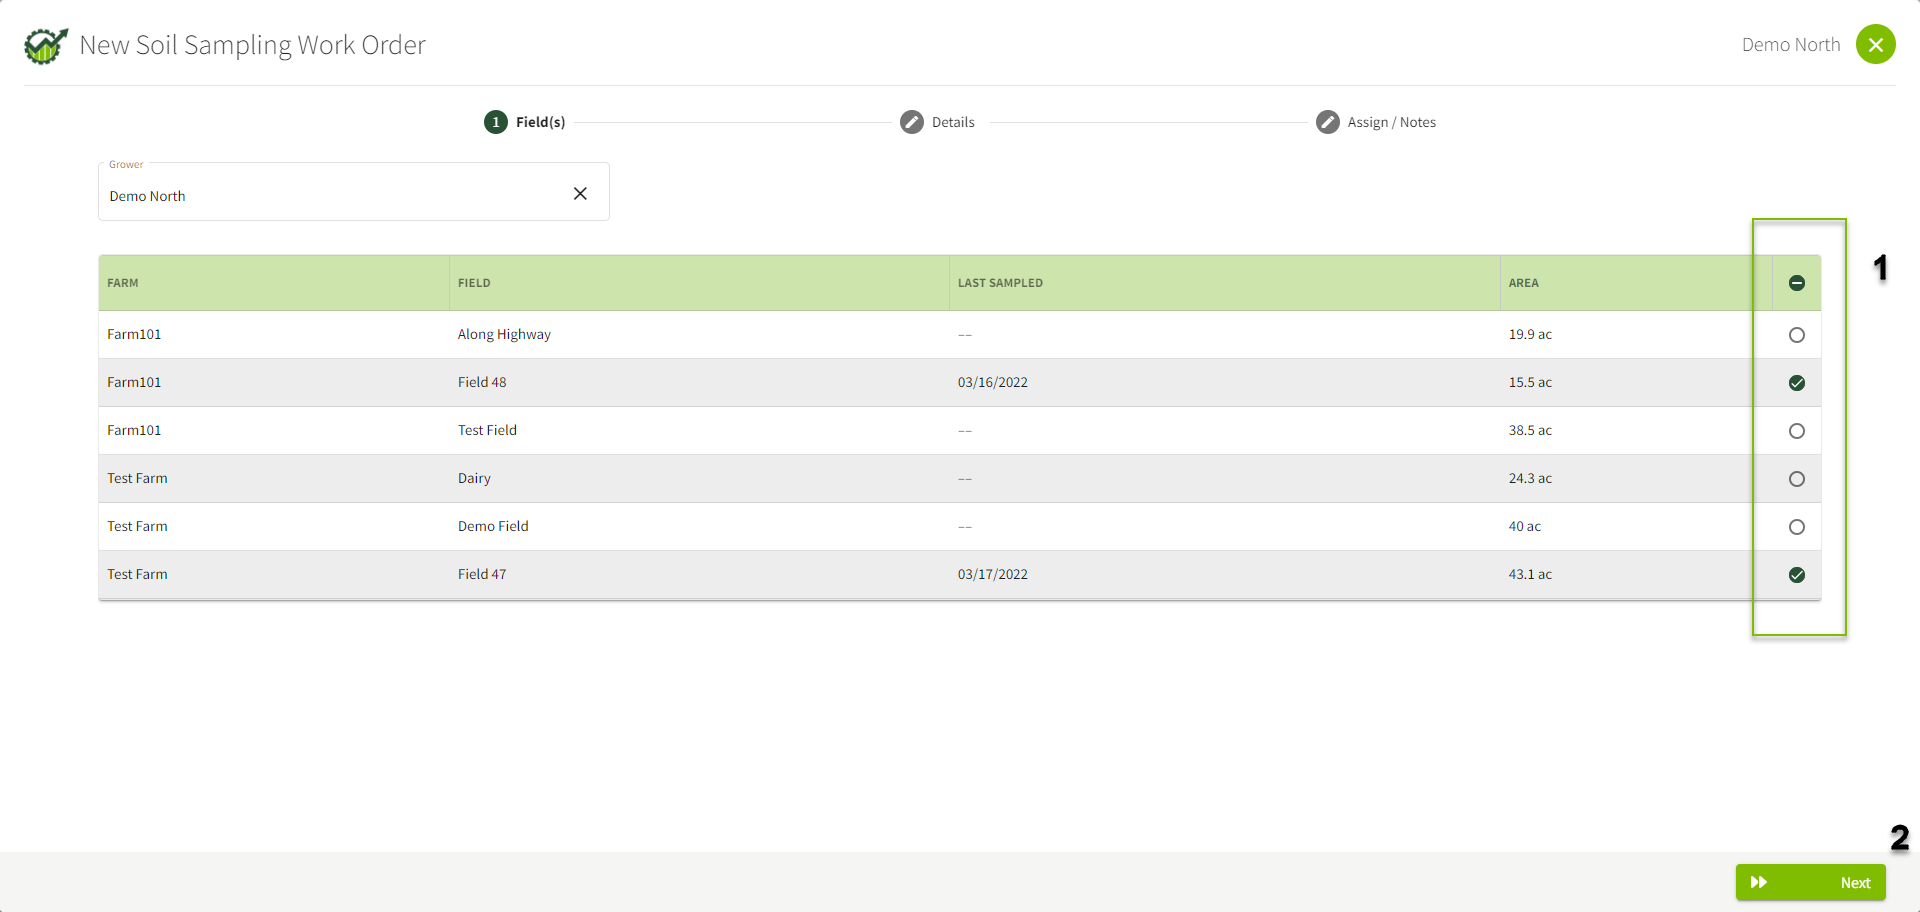
5. Select the field(s) you need to have work orders for.
|
 |
|
6. Fill in the Details information.
Collect Boundary - toggle this to green if you need your sampler to run the boundary for the field. Otherwise leave it untoggled or gray. Click Next in the lower right corner of your screen to proceed to the next step. |
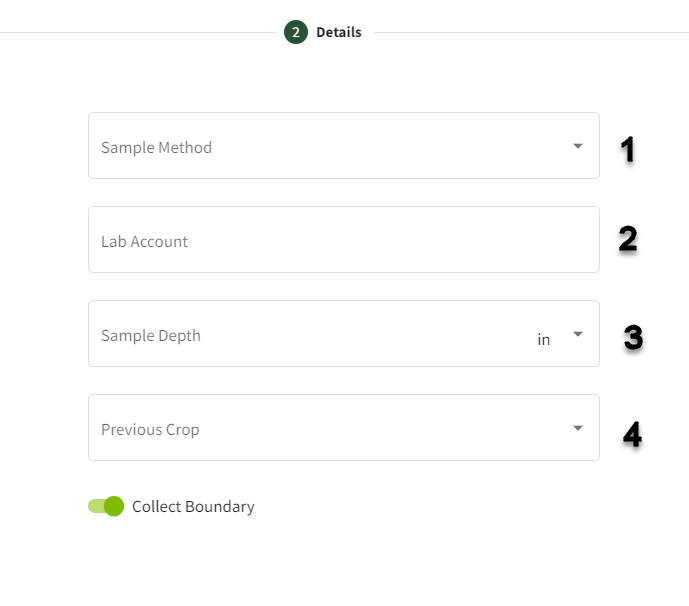 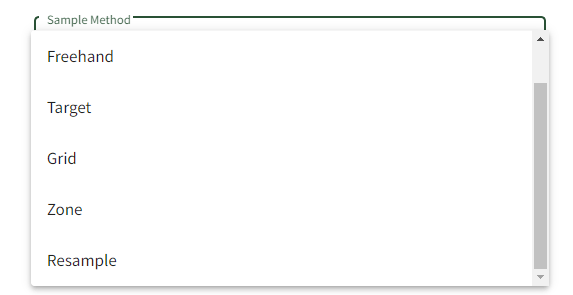 |
|
7. Complete Assign/ Notes Assignee - click in the box to choose from your users. Notes - Add any notes as needed for the samplers. Choose Save & Close if you are done with entering work orders. Choose Save & New if you have additional work orders to enter.
Note* A database is allowed 2 managers/users. If you need assistance setting up more managers/users for your database please reach out to our Traction Success team at (888) 305-3839 or success@tractionag.com. We will need the names and email addresses of the new managers/users. Please note these managers/users will have full access to the database. |
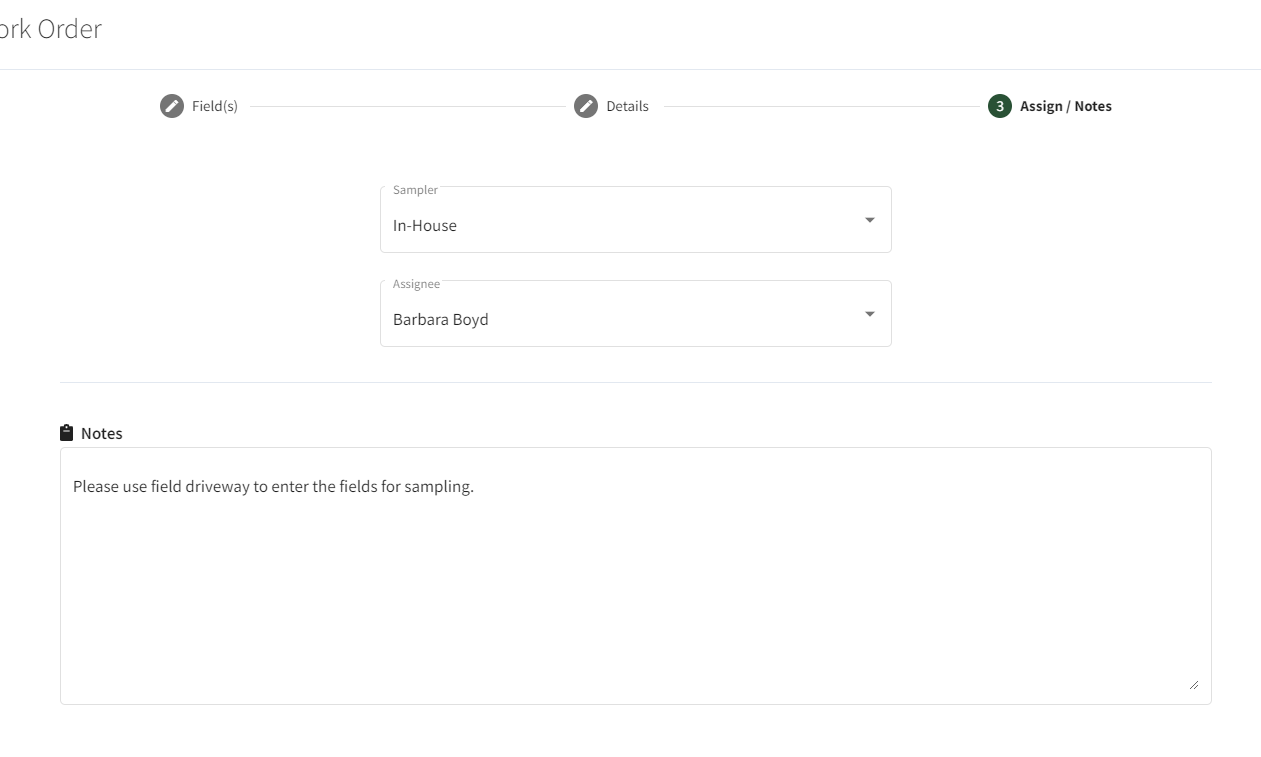 |
| The Work Order screen will now display the entered work orders. The work orders will default to a To Do status unless you go in and edit the work order. If no assignee was set in the setup these work orders will go to a Backlog status. | 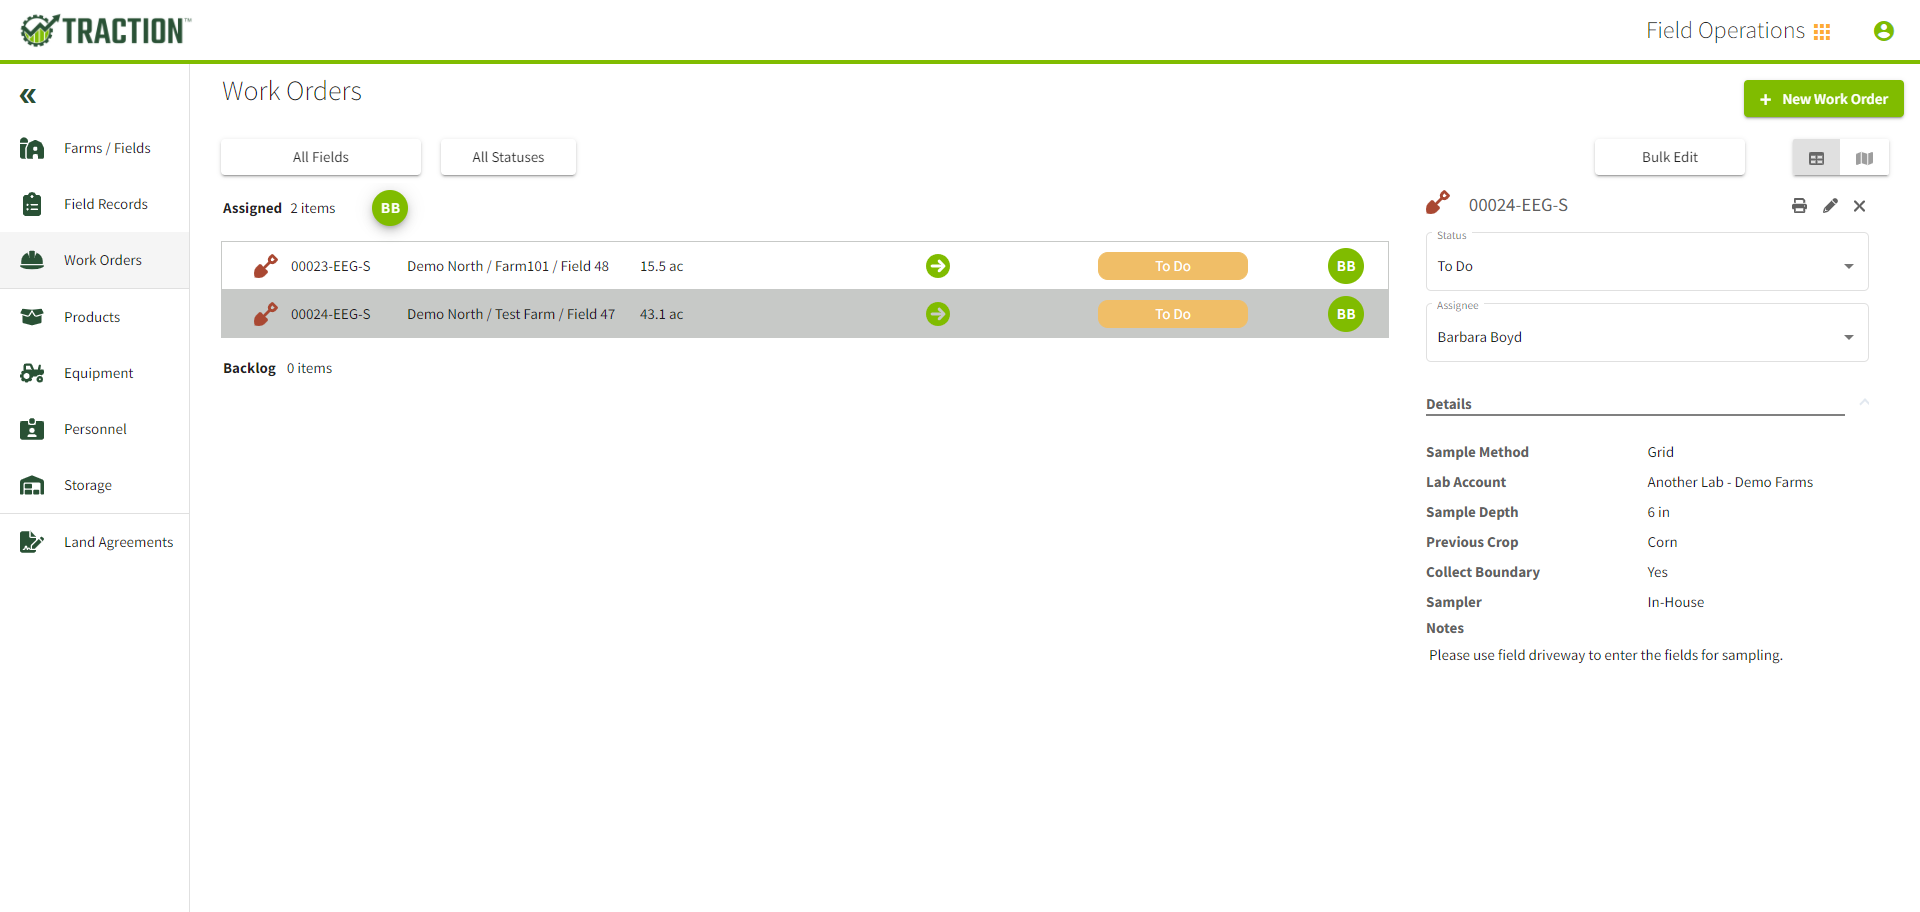 |
|
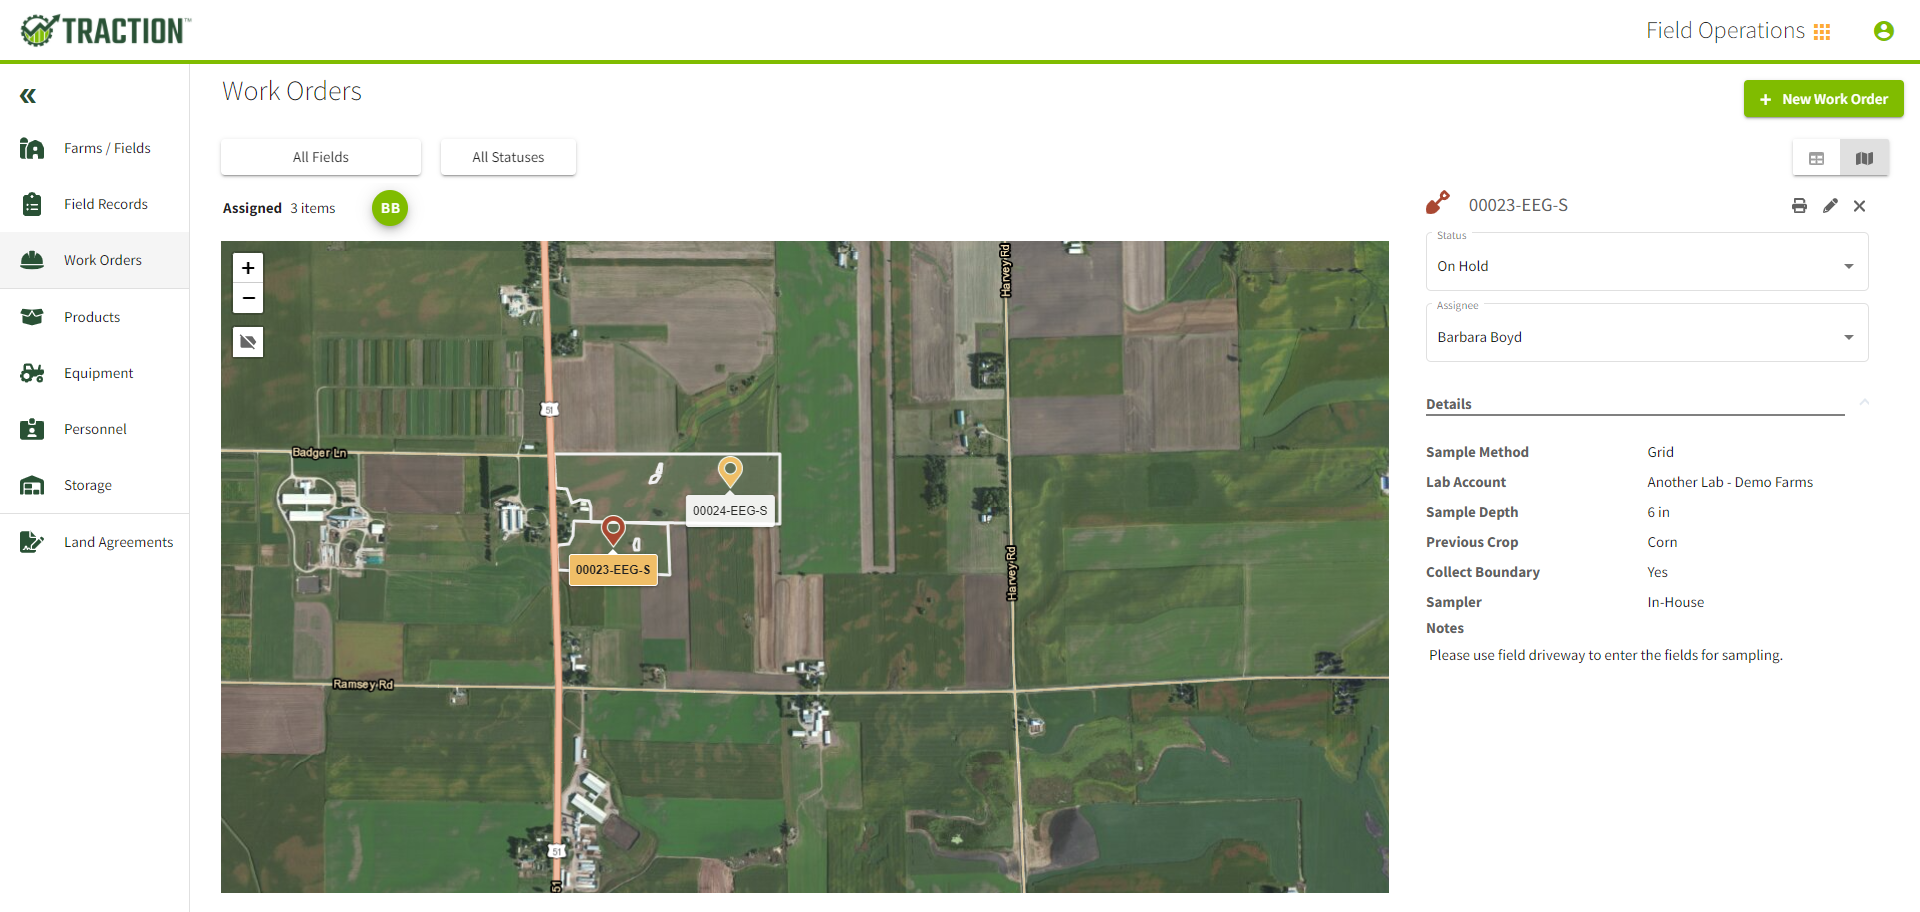
To see a map view of your work orders, click on the map icon in the upper right corner of your screen.
To see the tabular view, click on the table icon in the upper right corner of your screen.
|
 |

