| 1. Click on the Dashboard and select Field Ops. |  |
| 2. In order to allocate costs to crop zones you must make sure you have assigned crops in your Manage Crop Years. If you have already done this, skip to step 4. Click on Farms/Fields on the left of the screen and then on the |
|
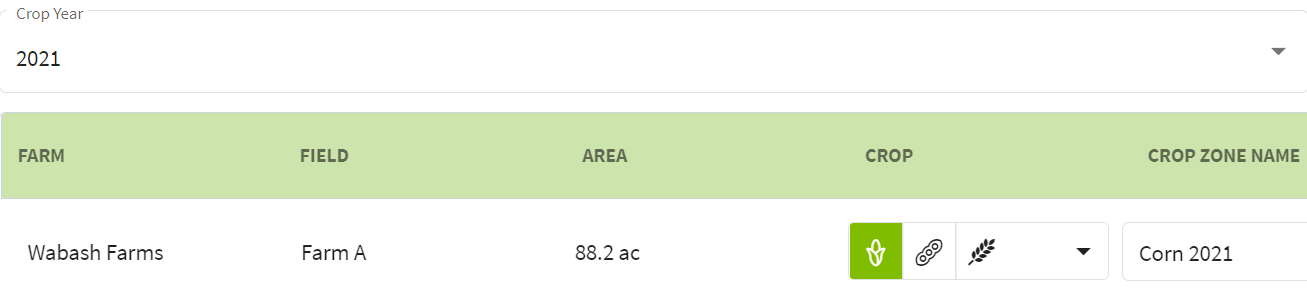
| 3. If you have not assigned fields for the 2021 Crop Year, you can do that in this screen. Select the Crop Year and choose the crop for that field. |
|
| 4. Click on Field Operations and select Accounting. You will be taken to the Account Register. |
|
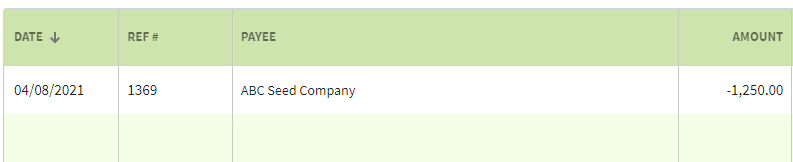
| 5. Click on the +Add New button and select Add New Payment |  |
| 6. Fill in the New Payment Transaction details. Click on the arrow to the right of No Allocation and select Crop Zone. |  |
| 7. The first time that you allocate a Crop Zone you will have to select the Grower. Select the Year, Crop(s), and field that you want to allocate costs. Click on the Save button when you are finished entering the details. | 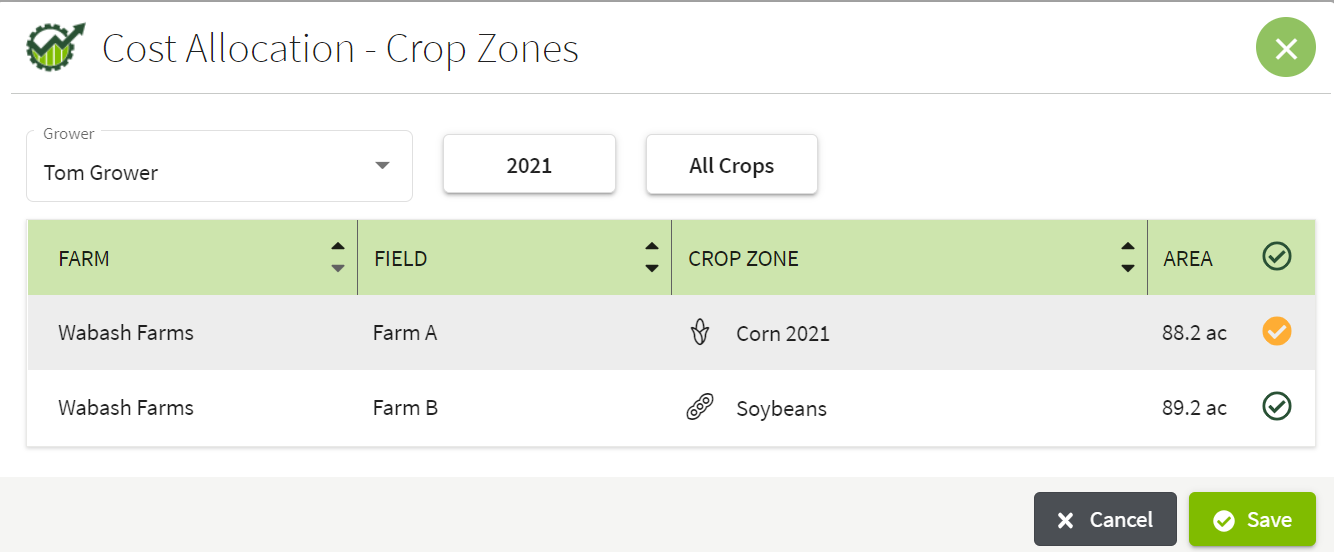 |
| 8. The transaction now has Crop Zones (1) listed in that row. When all entries have been entered click on the Save & Close button. The transaction has been added to the Account Register. |
|