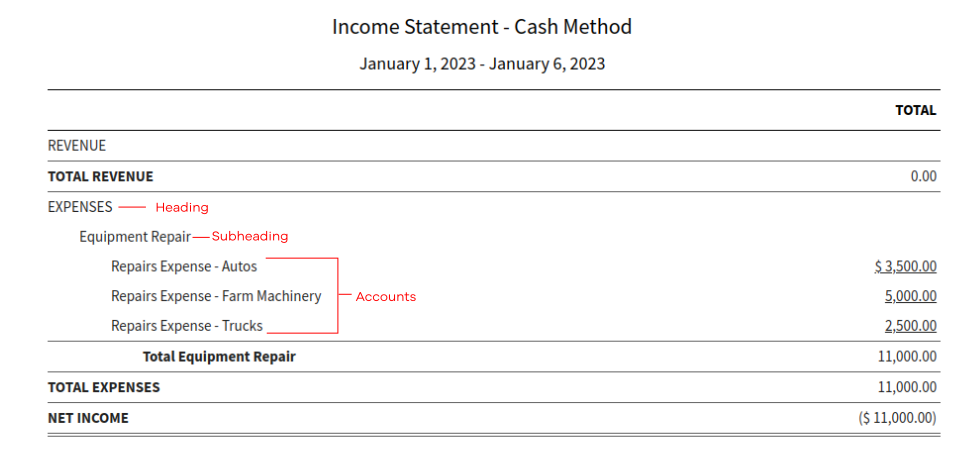
1. Expense Accounts
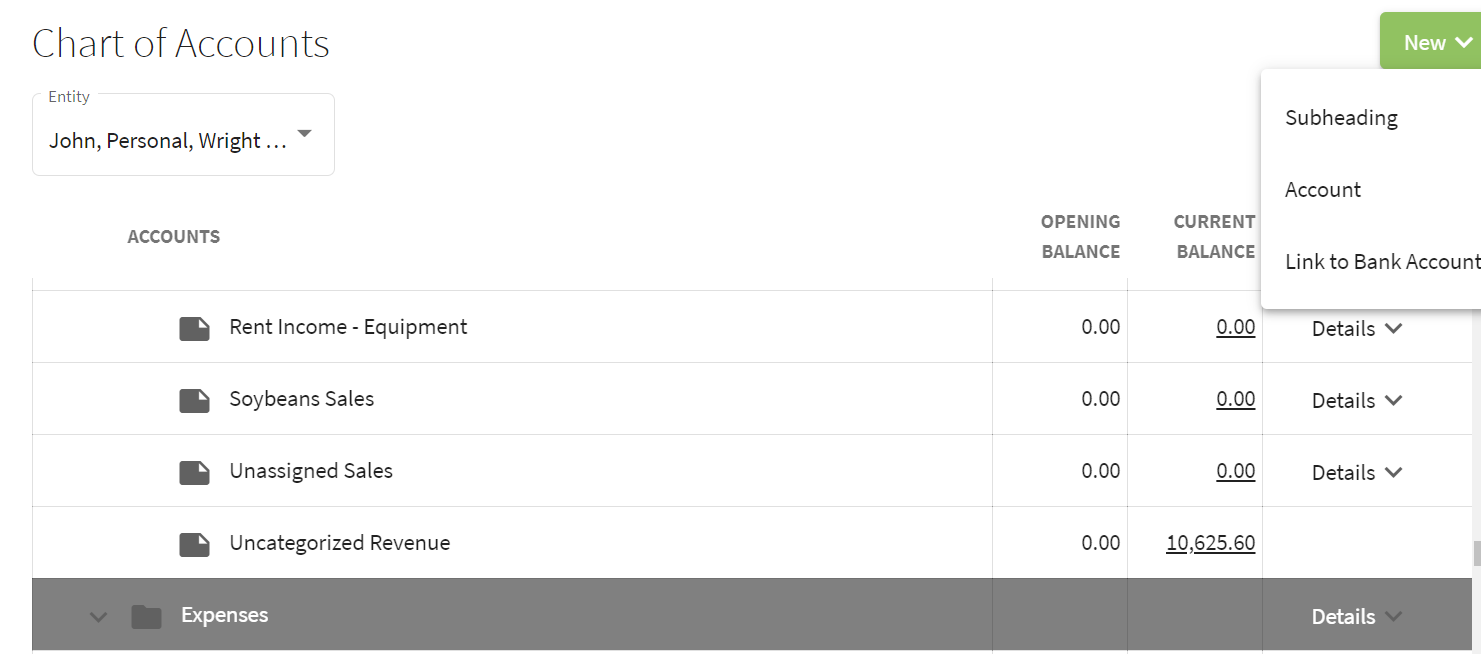
Click on the Dashboard button at the top of the screen and select Accounting. Go to the Chart of Accounts and click on the New button in the upper right corner and select Subheading.
2. In the Add Subheading screen select the Account Heading and enter the Name of the subheading. Then click Save & Close.

3. Option 1: Moving an Existing Account
Find the account that you wish to move to the subheading. Click on the Details at the far right of the row and select edit. In the Edit Account screen click on the Subheading (Optional) box and select an existing subheading or create a new subheading. Click on the Save & Close button. This will take you to the Chart of Accounts and the Interest Expense - short term is now under the Interest subheading.

3. Option 2: Adding a New Account to a Subheading
Find the subheading and click on the Details at the far right of the row and choose Add Account. Fill-in the boxes on the Add Account screen and click Save & Close.

4. The new account, Interest Expense - Intermediate, will now appear in the Chart of Accounts under the Interest subheading.
