Only one farming entity: While you can have multiple entities inside Traction, we currently only support having one farming entity inside a single Traction account. You cannot maintain completely separate farm related data (e.g. supply purchases/inventories, field operations, etc.)
Do not mix personal and business accounts: Entities are the baseline for how your financial data is segmented in Traction. For instance, if you run two businesses and want to keep both books inside Traction, you would setup one entity for each business. Otherwise, when you run your Balance Sheet and Income Statement, all of the financial data will be combined.
Ensuring that your entities are set up correctly is an essential step that allows Traction to best serve your operation. If you would like assistance with your initial setup strategy, please feel free to reach out to our Success Team at 1-888-466-6080, success@tractionag.com, or utilize the chat functionality in the application.
|
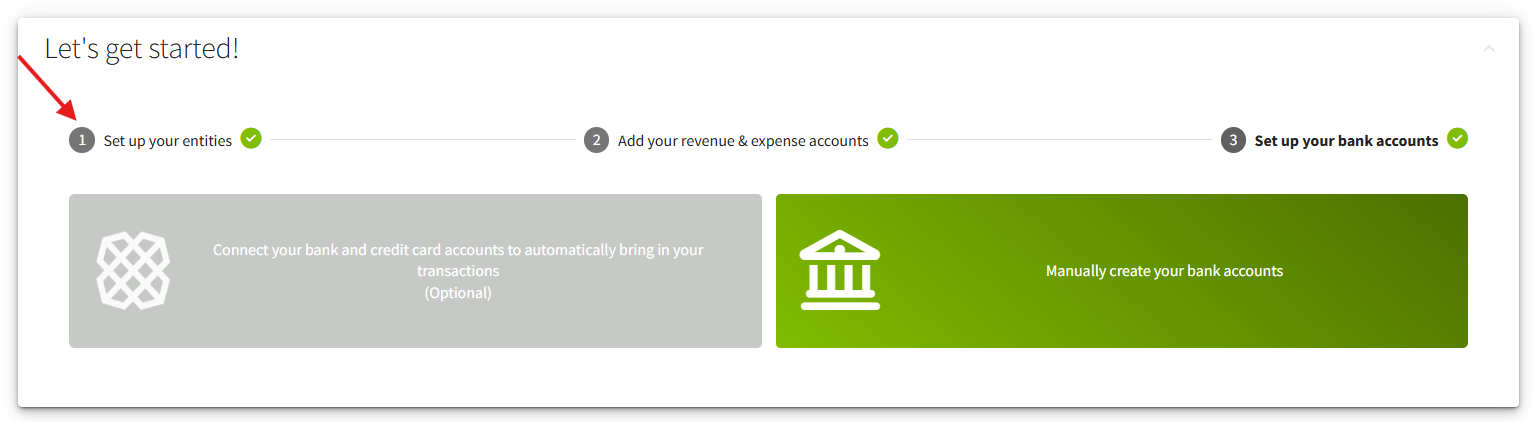
1. After first logging in to your Traction account, you will be greeted by our Let's get started! Dashboard widget. The first thing we need to do is create Entities inside your account. Click the orange button to start this process. |
 |
| 2. Click the + New Entity button | 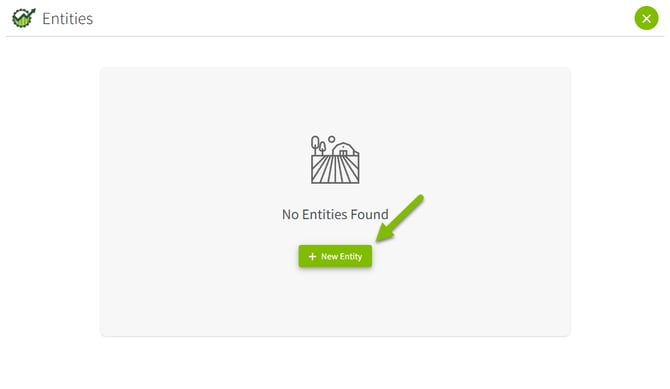 |
|
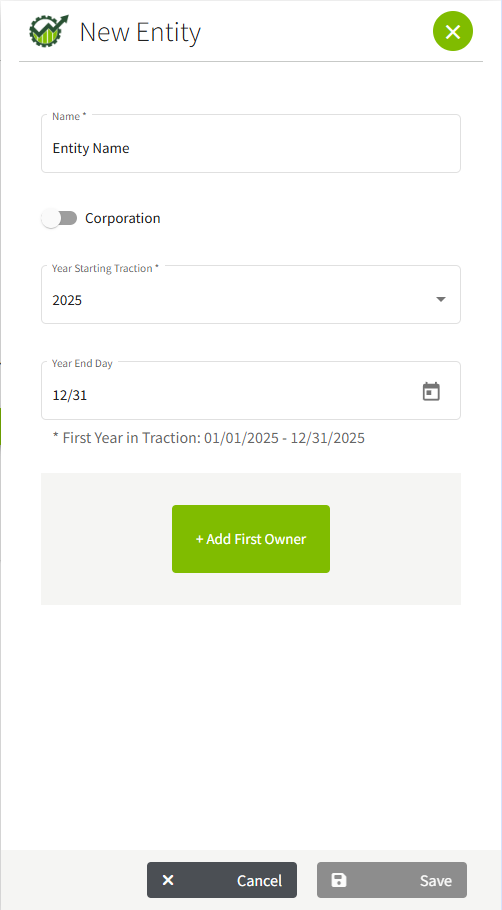
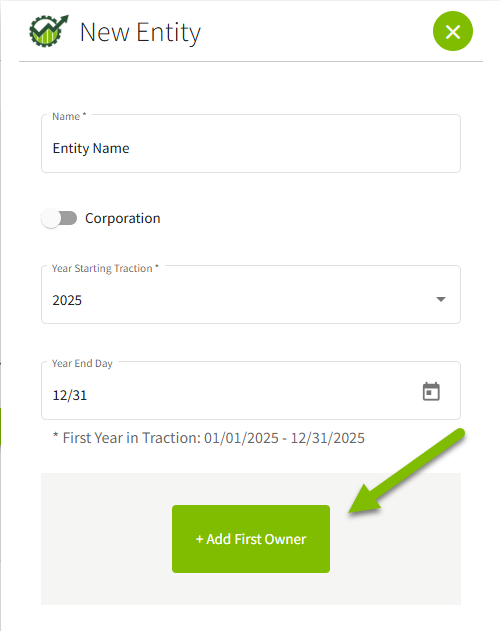
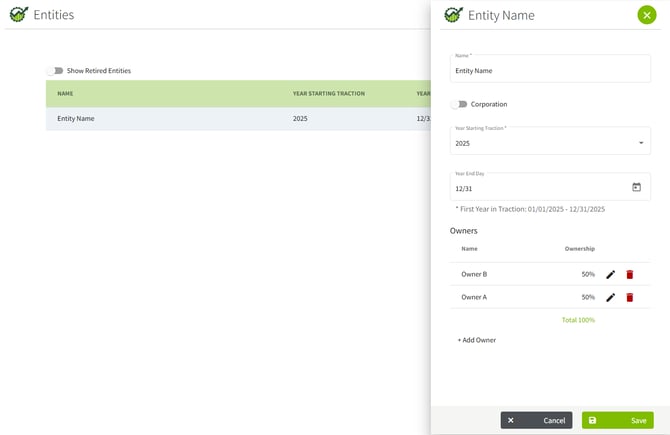
3. Traction's New Entity screen will appear. Fill out all of the fields as applicable. |
 |
|
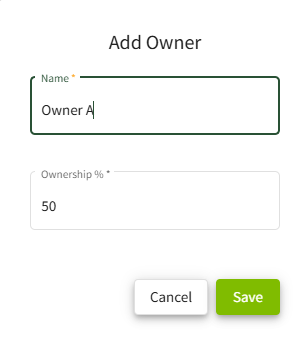
4. For the Ownership section, you can add multiple owners based on their percentage of ownership (assuming Corporation was not selected). Simply click on the +Add First Owner button, add an owner's name, and the percent they own. If adding multiple owners, click on the +Add Owner, add the owner's name, and the percent they own.
|
|
| 5. Review your information (it can be edited later) and then click the Save & New button. |  |
|
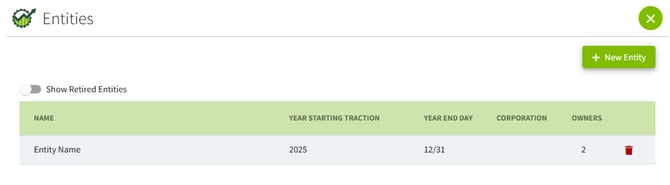
6. The entity will be displayed in your Entities list. |
 |
|
7. To edit an already existing entity, click on the entity in the list to bring up its summary page. You will now see the entity's information populated in the Entity screen. If you make any changes you would like to save, click the Save button. If you would like to discard your changes, click the Cancel button. |
 |
Updating Entity Start and End Date
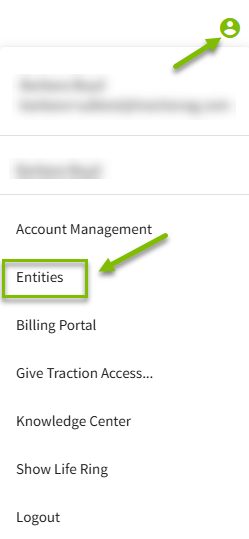
Users now have 2 ways to get to their Entities.
1. Navigate to the User Icon in the upper right hand corner of your screen and choose Entities in the menu.
or
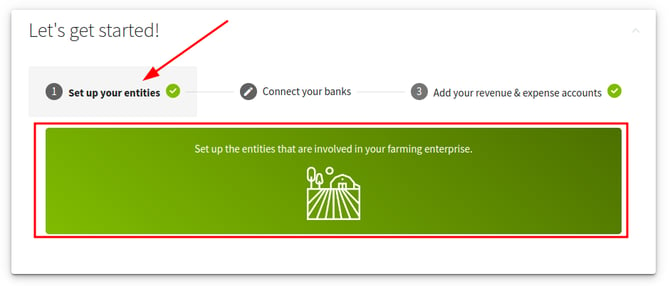
1. Navigate to the Dashboard, expand Let's Get Started, click on Step 1, followed by the big green button.
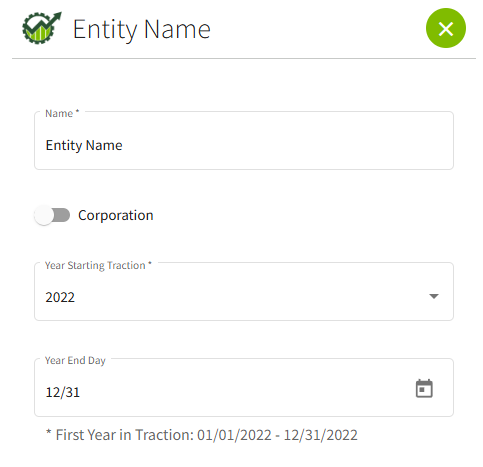
2. Click on the entity that is associated with the account you are trying to reconcile. A new panel will open. Edit the information as appropriate.
3. Update the Year End Date to the year that contains the missing transactions. In this example, I have transactions in 2022 that are not showing. I will enter 2022 in the drop down and leave 12/31 as the year end date. Click the Save button.
You are all set.