Crop Inventory Loads
Now, your Harvest Records can include Load Tickets (also known as Scale Tickets), allowing you to specify a variety of information about each load (e.g. Gross amount, tare, net wet, moisture percentage, foreign material percentage and more).
You can also add Loads within the Crop Inventory interface and have Traction automatically generate the appropriate corresponding Harvest Records.
Jump to a Section
Already Have Harvest Records In Your Account?
Need to add Load Tickets to already existing Harvest Records? This is common for those who previously entered total dry yield for each field and now want to go back and add Loads. We have two easy ways to do this.
OPTION 1: Editing Existing Harvest Records
1. Navigate to your Field Records. You can filter your list by Grower, Farm, Field, Crop Year, Harvest Products, Operation Type (Harvest), and Date Range.

Once you have your list filtered, click on a record to open its summary and then the Edit button.
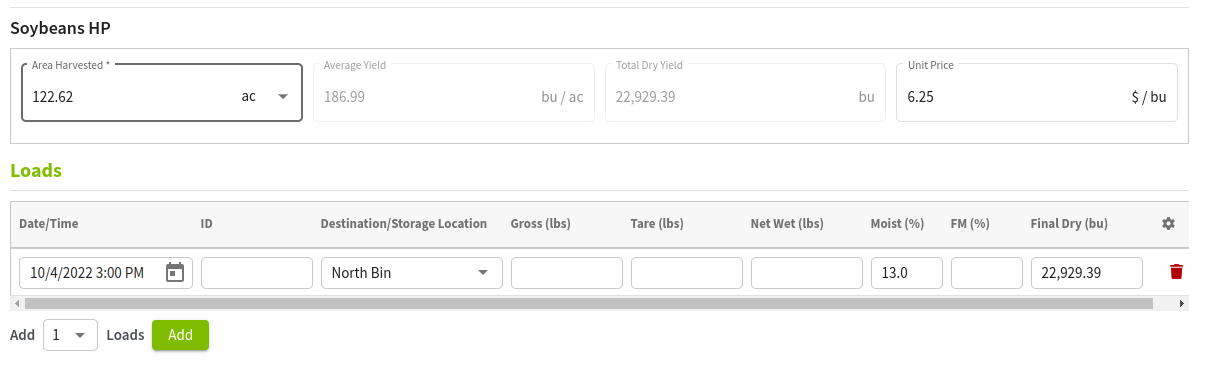
2. In your Harvest record, scroll down until you see the Harvest Product information that was previously entered.
WARNING: Note and write-down the Total Dry Yield as this value will clear once you add a Load.
You can click Cancel and re-open if you need to see the value after it has been cleared.
Click on the Add button under Loads and fill out the pertinent information. You need to at least include a Destination/Storage Location and the Final Dry yield.
3. Review your information. Once everything looks good, click Save.
OPTION 2: Creating Loads and Selecting Harvest Records
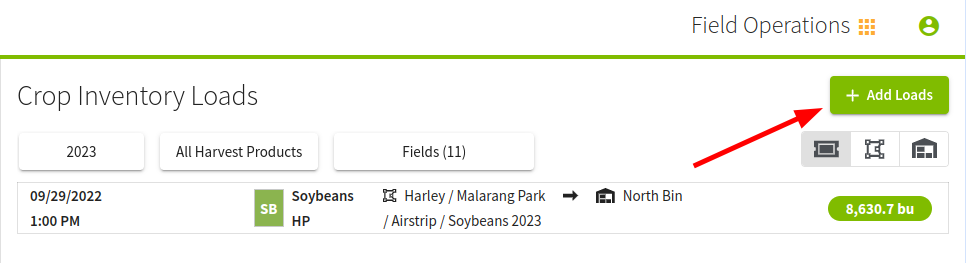
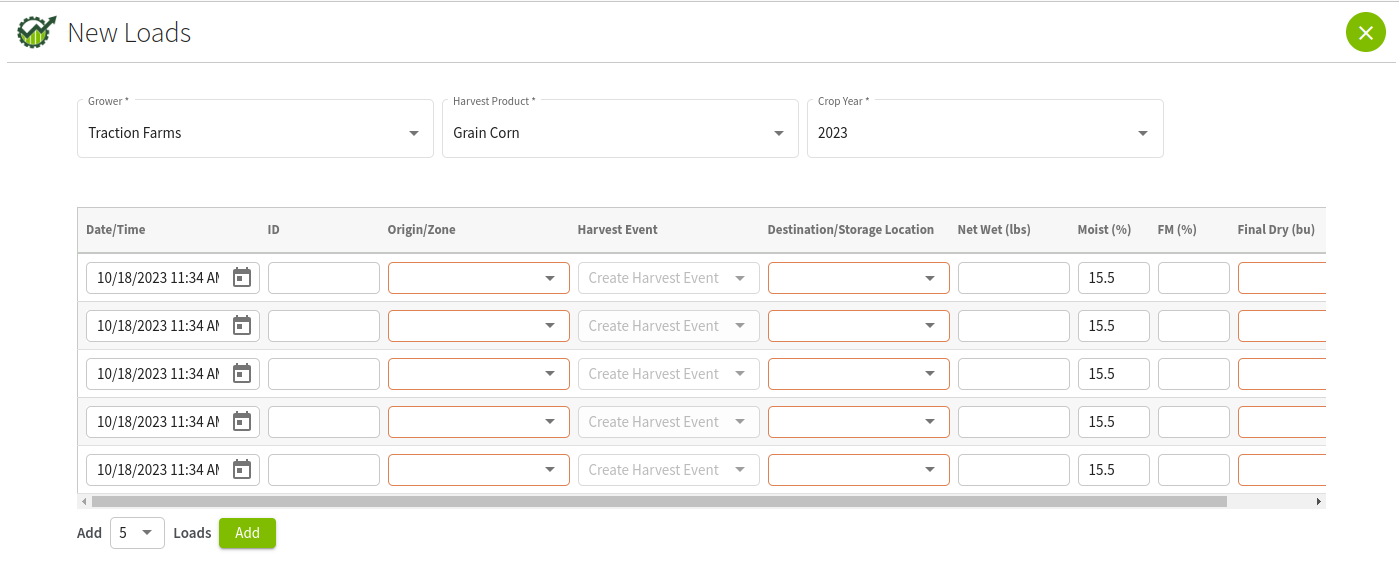
1. Navigate to Field Operations and select Crop Inventory. From here, click the + Add Loads button.
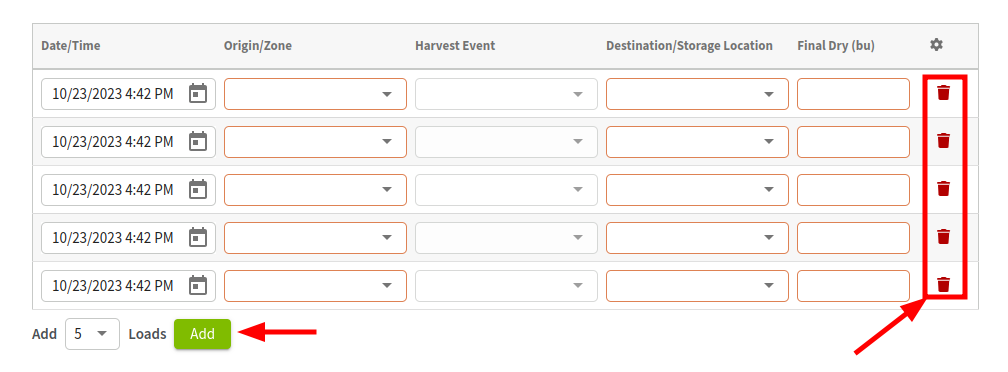
2. Select your Grower, Harvest Product, and Crop Year. The system will then automatically generate five rows you can enter for your loads. You can add or remove rows by clicking the respective Add and Delete (trash can icon).
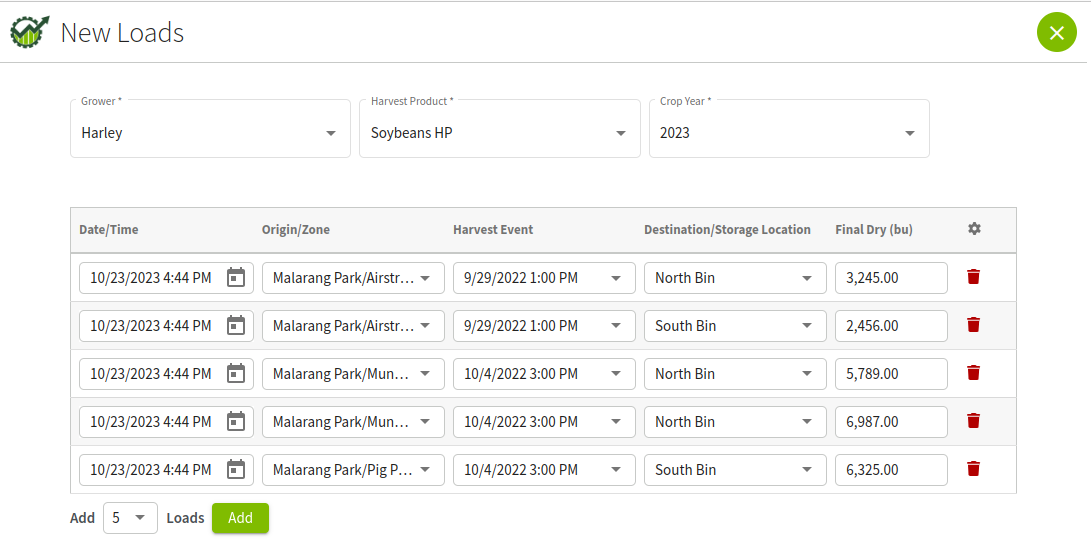
3. Fill in your information. You are required to enter in an Origin/Zone, Harvest Event, Destination/Storage Location, Final Dry amount.
Before entering numeric values for Net Wet and Moisture, a Destination/Storage Location must be selected to ensure the Final Dry calculation is accurate
You can add the same previous Harvest Record multiple times if you had multiple loads for the same event.
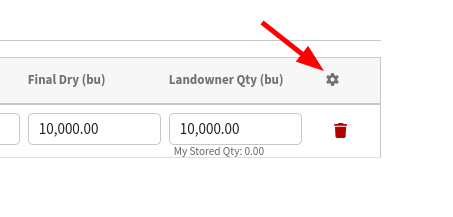
Do you need to enter additional Load attributes? Click the gear icon and add more information to your Loads. You can learn more here.
4. Review your information and click Save when everything looks good.
The respective Harvest Records will now be updated with the Load information you have entered.
Creating Your Harvest Field Records
Start a new Harvest Record. Once you have entered the information for the Harvest Product, you can add your Loads.
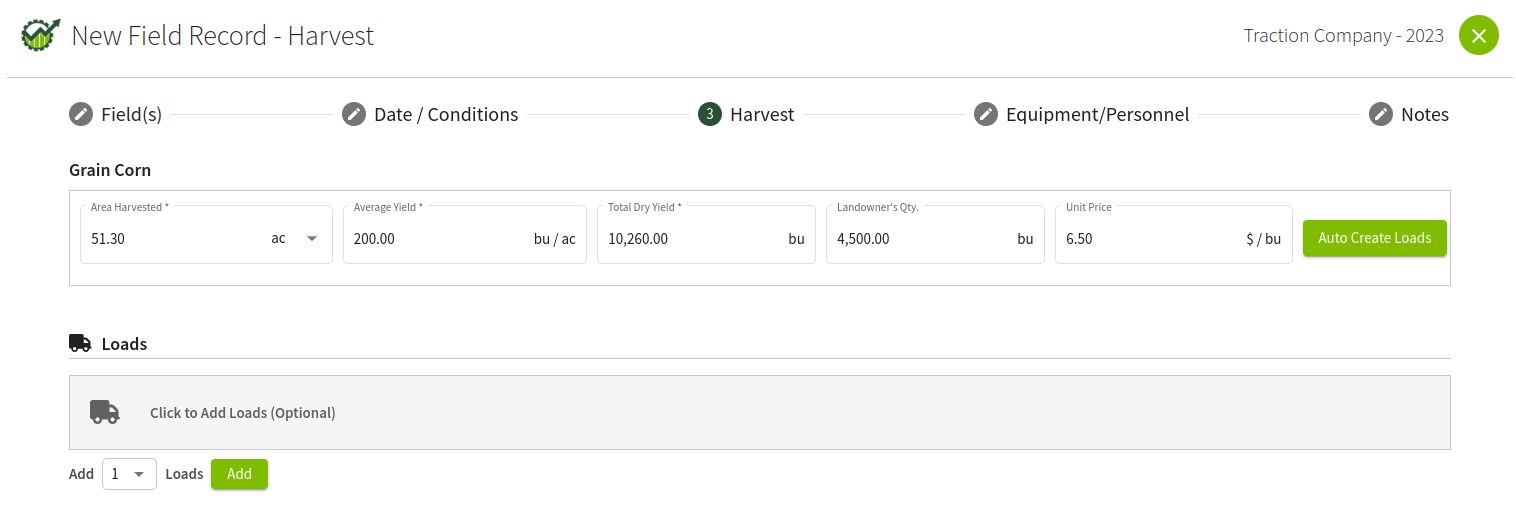
Auto Create Loads
You can easily create your loads once you enter your Total Dry Yield and click Auto Create Loads.
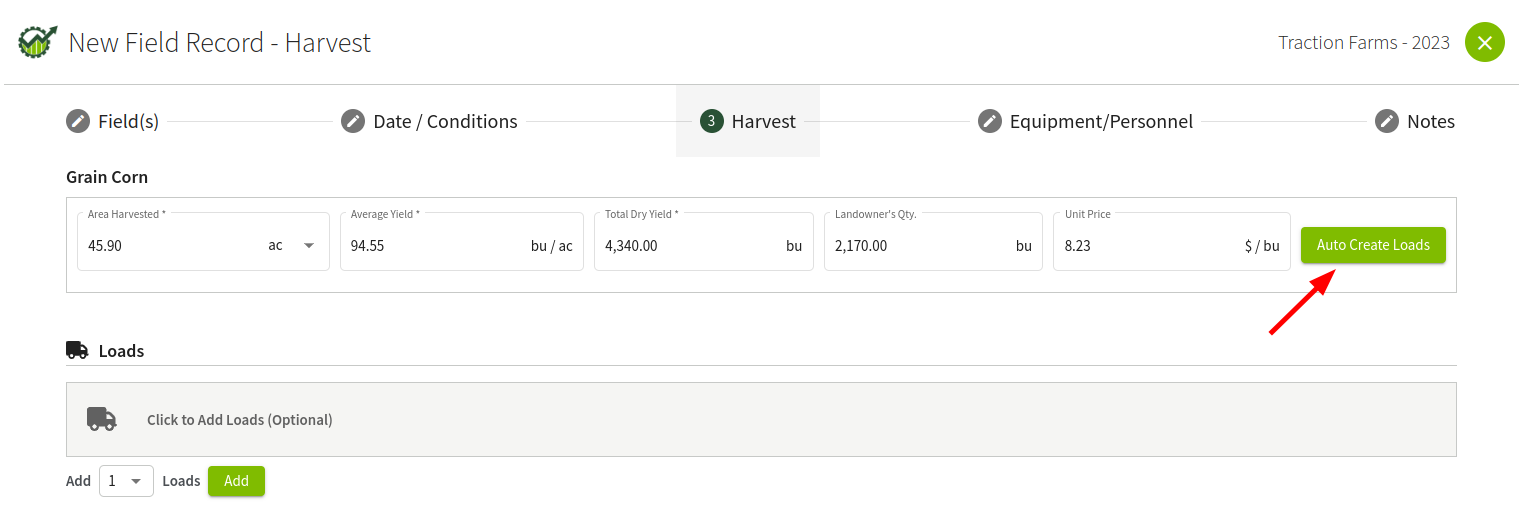
Traction will automatically evenly split the total dry yield based on the selection field(s) acreage. If there are more than one Storage Location for the currently selected Harvest Product, you will need to specify one for each row.
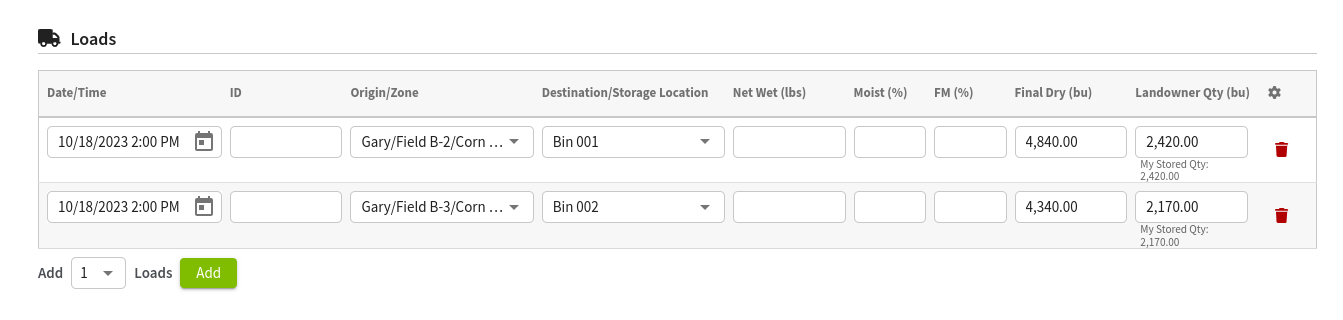
Complete the Harvest Record and you will now have this new information in your account.
Customize Your Load Attributes
You can customize the list of attributes in the Harvest Record Loads area. Simply click on the gear icon and toggle fields on and off.
The currently available attributes are:
ID, Gross, Tare, Net Wet, Moist, FM, Net Price, Target Moisture, Shrink, Protein, Damage, Test Weight, VOM, Heat Damage, Split, Musty, Equipment, Personnel, Photo, Note
Add the Net Price to each load and your average price will be calculated for the Harvest record.
Easily attach an image of your load ticket to each load by adding the Photo attribute.

After you have entered in all of your information, review the data, and then finish entering in your Equipment, Personnel, and Notes.
Creating Load Tickets
You can also create your Load Tickets directly in Crop Inventory. Doing so will allow you to either create the associated Harvest Records or attach them to existing Harvest Records that do not have loads currently assigned.
1. Navigate to Crop Inventory under Field Operations and then click + Add Loads.

2. Next, you will need to select the Grower, Harvest Product, and Crop Year you want to add Loads for. After you have made your selection, five rows of Loads will be available.
Simply fill out the required information (Origin/Zone, Destination/Storage Location, Final Dry)
Instead of creating a new record, you can also choose a previous Harvest Record that does not include any Loads to assign this load to.
3. After you have filled in your information, you can Save and Close to create/apply the information in your account.
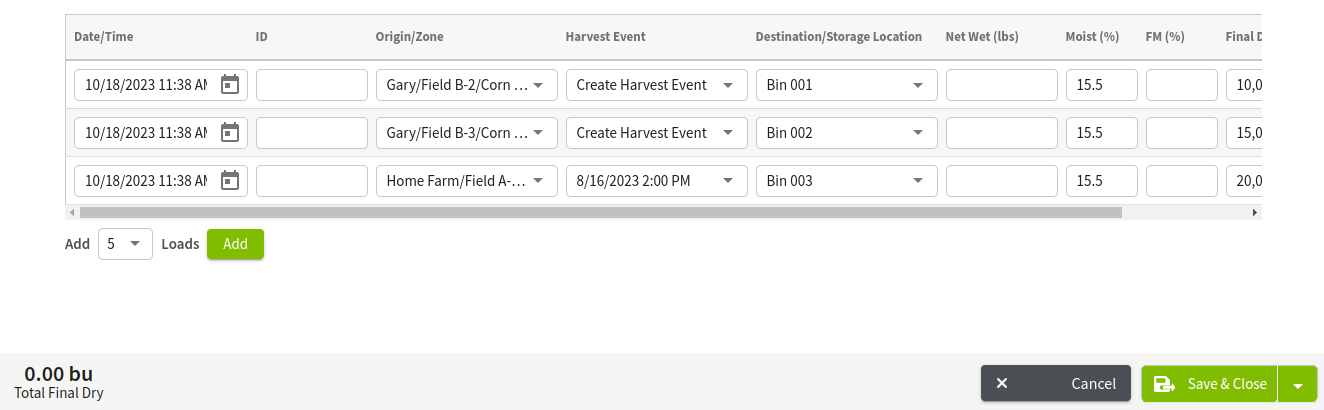
The tickets will be entered, along with the associated Harvest Records.
Three Views to Manage Your Crop Inventories
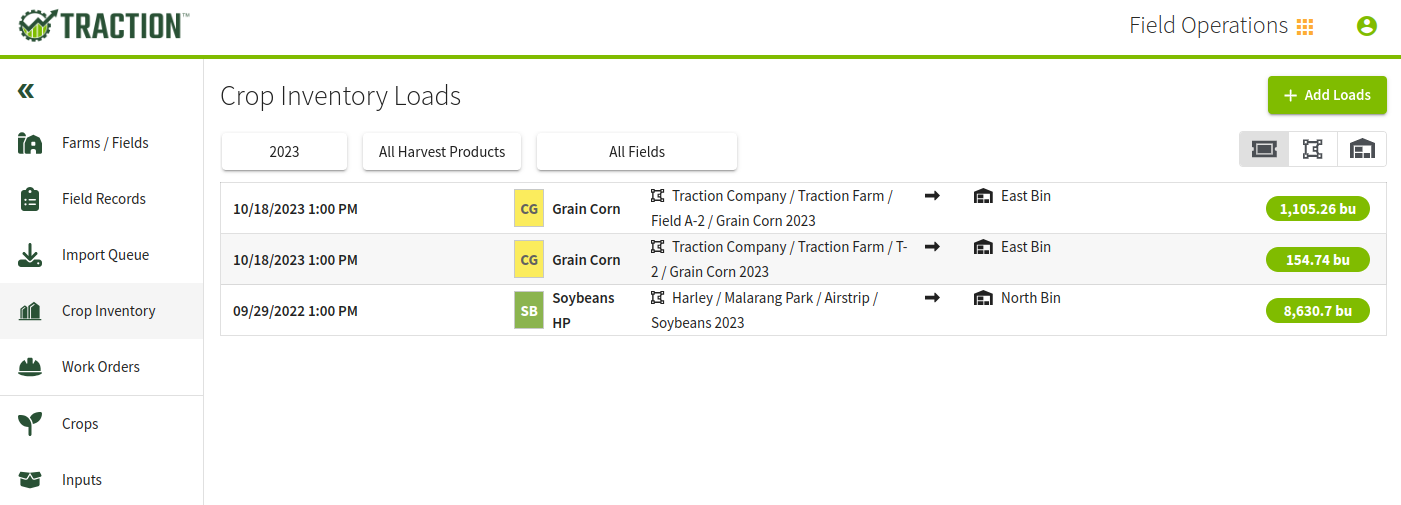
Load Ticket View
All of the Harvest Records that have included Load Tickets will be shown here grouped by Load Ticket.
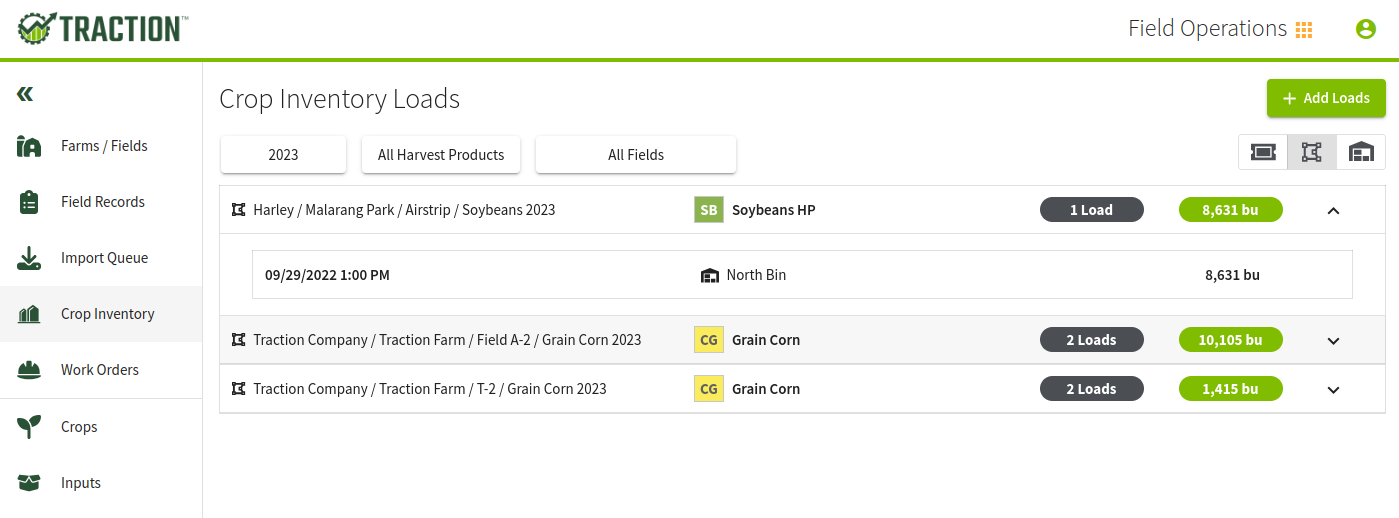
Field View
All of the Harvest Records that have included Load Tickets will be shown here grouped by Field.
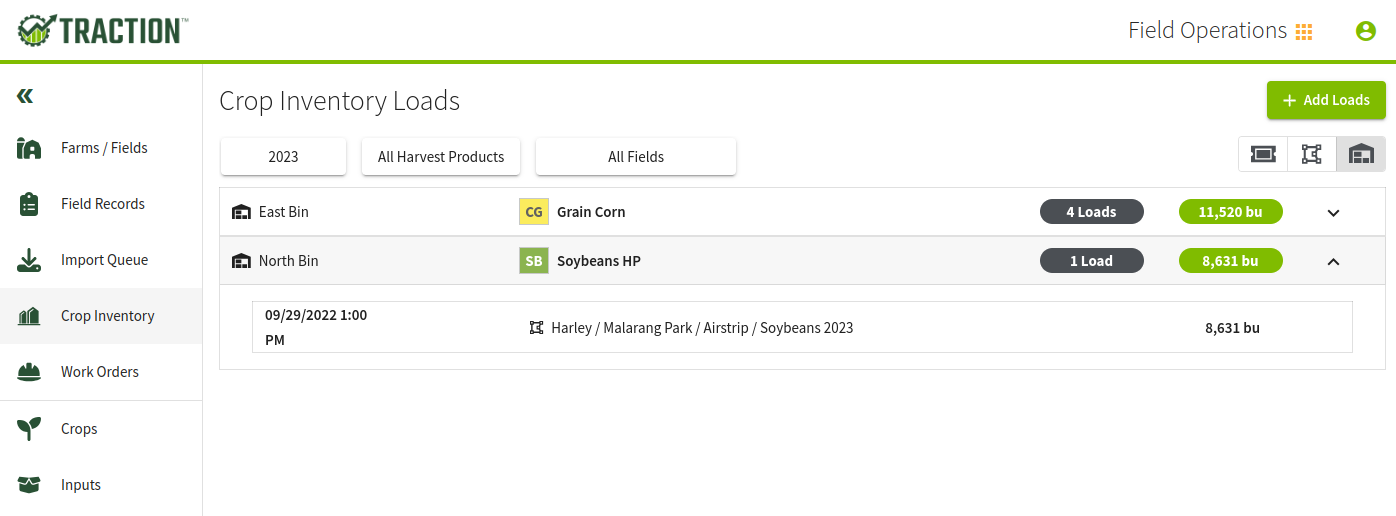
Storage Location View
All of the Harvest Records that have included Load Tickets will be shown here grouped by Storage Location.
Export and Print Load Information
In the Crop Inventory section, you can export the current view to either a CSV or generate a PDF for saving or printing.
