Jump to a Section
To get a price estimate for your Tax1099 submissions (if you choose to go that path), go to: https://www.tax1099.com/tax-1099-efile-pricing
Getting Started:
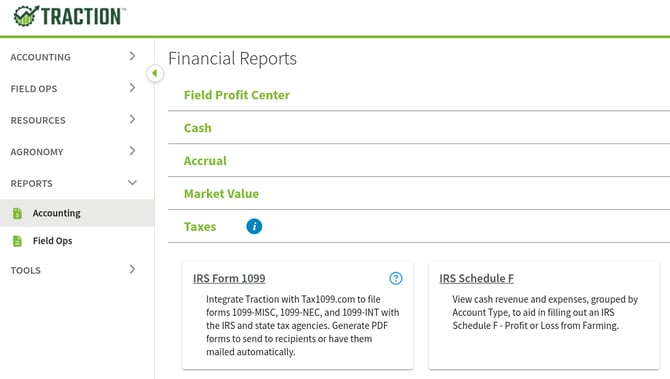
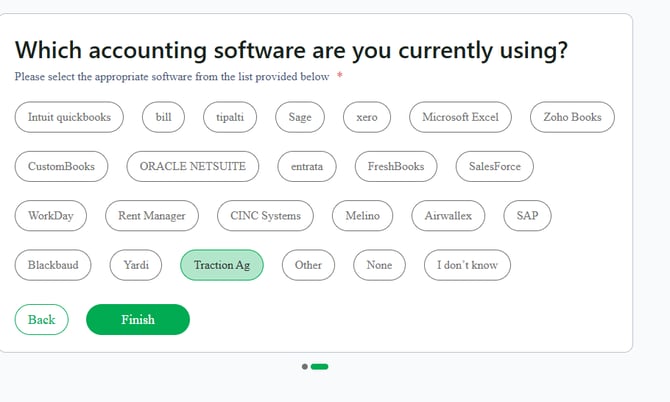
1. Navigate to Reports and click on Accounting in the side menu. Expand the Taxes section and click on the IRS From 1099 button.
- If you have used Traction with Tax1099.com in the past you will be taken to the tax1099.com login screen where you should logon with the same tax1099.com account as you used in the past. Jump to this section for your next steps.

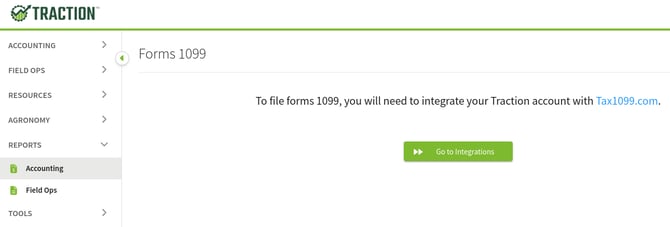
If you have not used Traction with Tax1099.com in the past, you will see a new screen, asking you to Go to Integrations. Click this button.
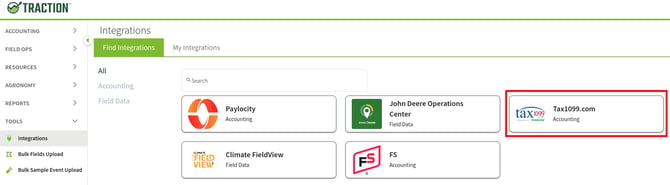
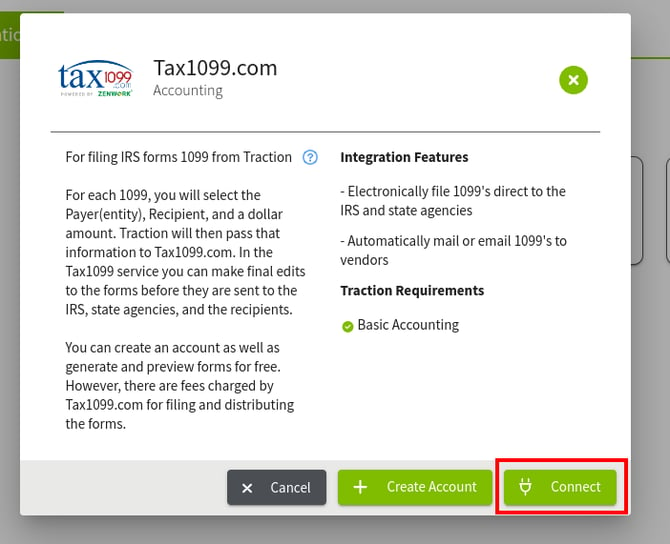
2. In the Integrations section, click the Tax1099.com button.
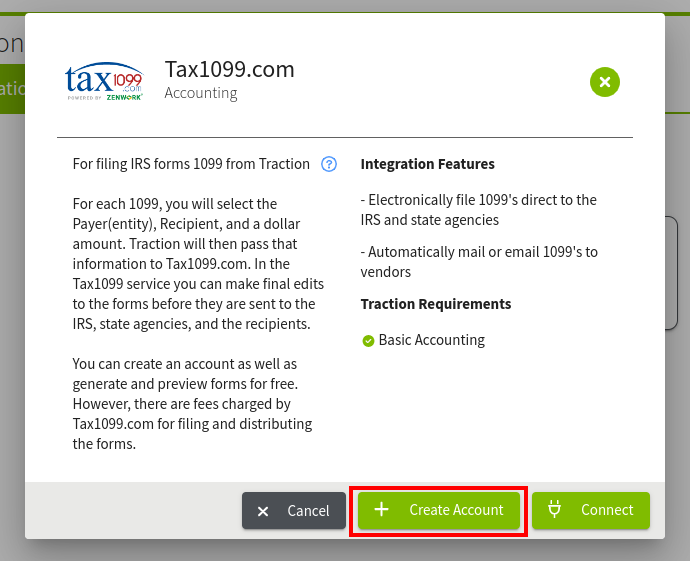
A new screen will appear. If you have not already created a Tax1099.com account, click the + Create Account button. If you already have an account with the same e-mail that you use for your Account Owner in Traction, click the Connect button and jump to this section.
Another screen will appear, walking you through the steps for when you create your account.
Click the Yes button to continue.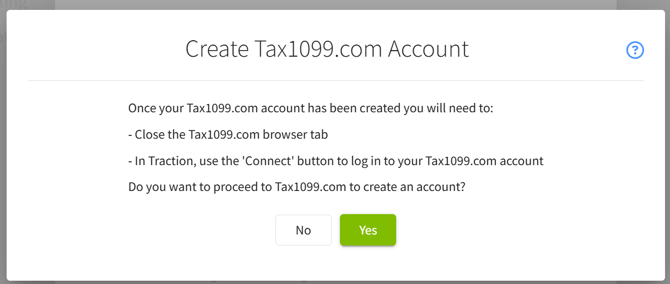
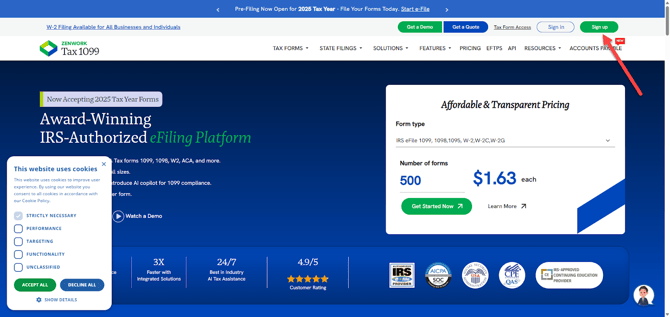
3. A new tab will open and take you to the Tax1099.com webpage. Click the Sign Up button to sign up for a new tax1099.com account.
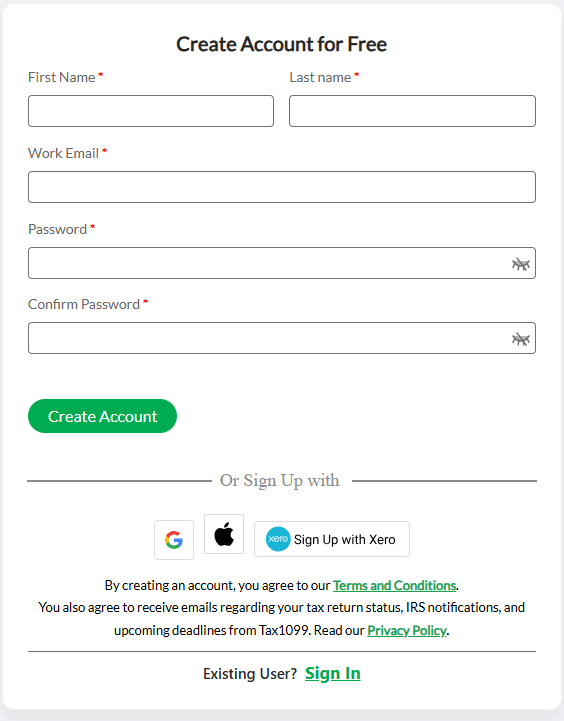
Enter the required information and click Create Account:
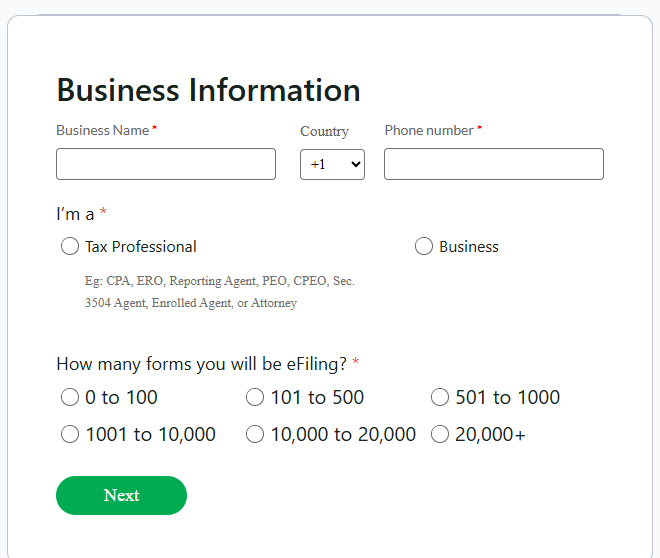
Another screen will appear asking for some basic information about your farm business. Complete the fields on this screen and click the Next button to proceed.
On the next screen select Traction Ag and click Finish to create your tax1099.com account.
Your account will now be created and you will be logged into tax1099.com
You can close the tax1099.com tab and return to your Traction tab.
4. With your Tax1099.com account creation complete, you can now click the Connect button.
You will be taken to a Tax1099.com login page. Use your Tax1099.com account information to login here.

Login to Tax1099:
1. With your Tax1099.com account creation complete, you can now click the Connect button.
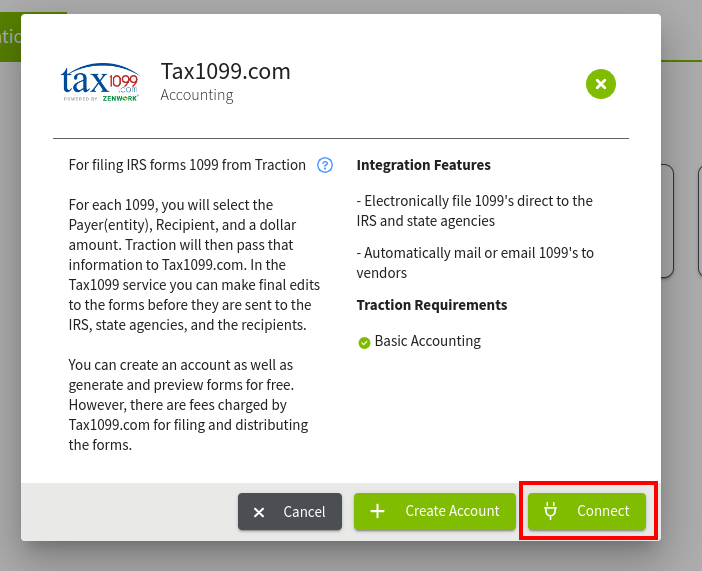
You will be taken to a Tax1099.com login page. Use your Tax1099.com account information to login here.
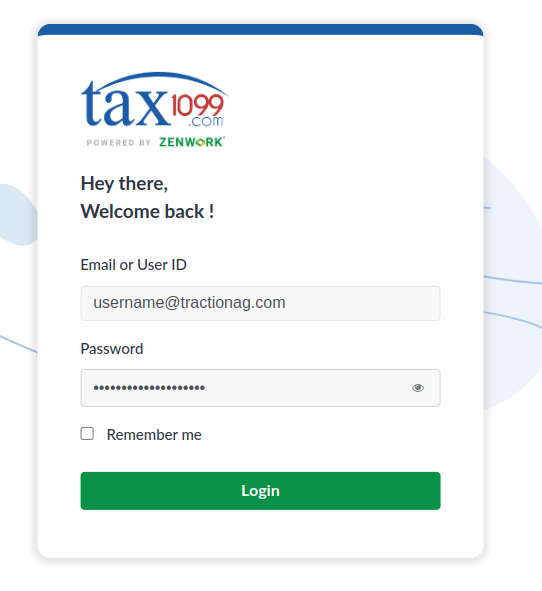
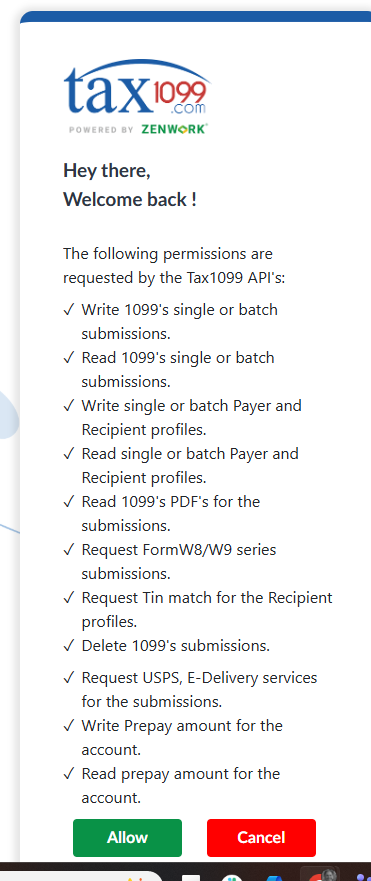
Next click “Allow” to allow Traction to connect to Tax1099.com
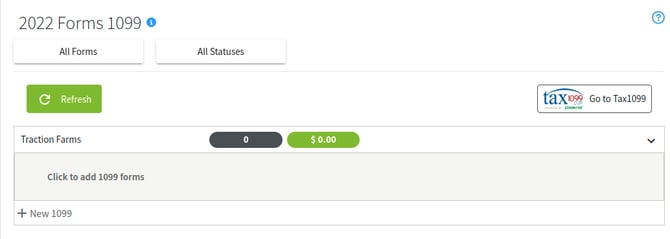
You will be taken to the Form 1099 section of Reports. If not, you can navigate here from Accounting->Reports->Taxes->IRS Form 1099.
Create a 1099 in Traction
1099 Best Practice Tip
For contact names on 1099s submitted to Tax1099.com, use only standard letters and numbers. Hyphens (–) and ampersands (&) are OK—avoid other special characters, including periods and apostrophes. Keep names under 40 characters to help prevent errors.
1. Now we will create a 1099. Each of your Entities will be listed in this screen. Simply expand the Entity's list that you want to add a 1099 for and click the + New 1099 button.
The New Form 1099 screen will appear. Fill out all of the fields on this screen. You have receive warnings about missing information. If this is the case, you can click the edit button next to each section and add the missing information.
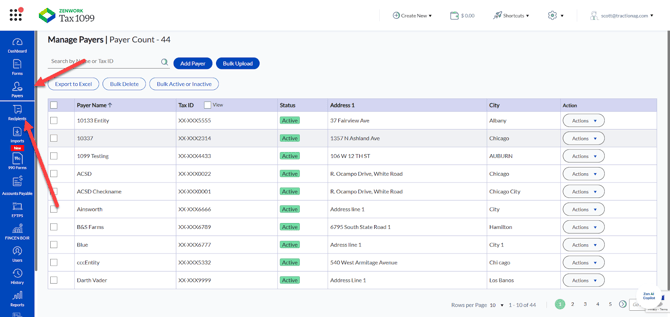
For security purposes, Traction no longer stores the Taxpayer Identification Numbers for Payers/Entities or Recipients as these IDs are already being stored by Tax1099.com
You can find previously entered Tax IDs in Tax1099.com by navigating to the “Payers” and “Recipients” areas.
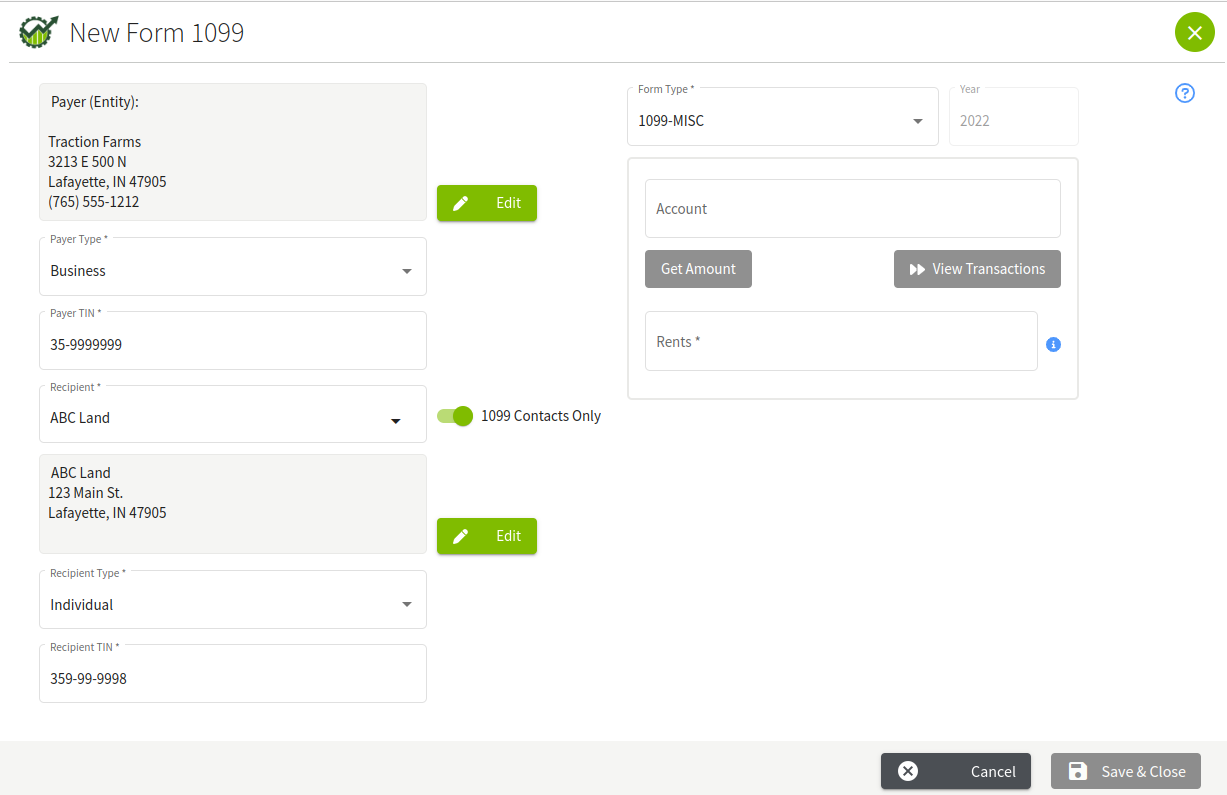
2. With your 1099 Payer and Recipient contacts chosen, you will now need to choose the type of 1099 and select the account that was used for payments to the recipient.
Once you have selected the account, you can click the Get Amount button to gather the total payments made to the recipient and assigned to the account..
If you would like to see the transactions that make up this total, click the View Transactions button.
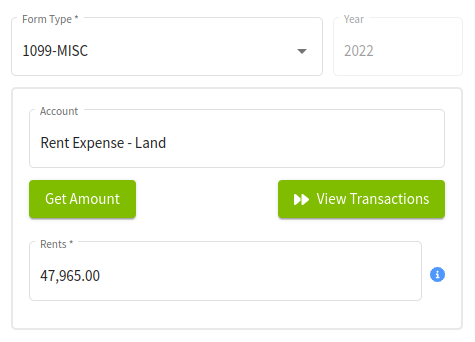
If the calculated amount is incorrect, it can be changed.
With all of your fields completed, review the information. If everything looks good, click the Save and Close button.
Once the 1099 has been saved, you can only edit its contents inside Tax1099.com
You should now see a new 1099 entry under the entity you were just with.

If you would like to re-create the 1099, you will need to delete the 1099 in your Tax1099.com account. This will allow you to create the 1099 for the contact again.
Using the Tax1099 Website
Tax1099.com has a full set of knowledge base articles to assist you with the process.
When editing a 1099, please note that any changes to the contact information here will not replicate back into Traction.