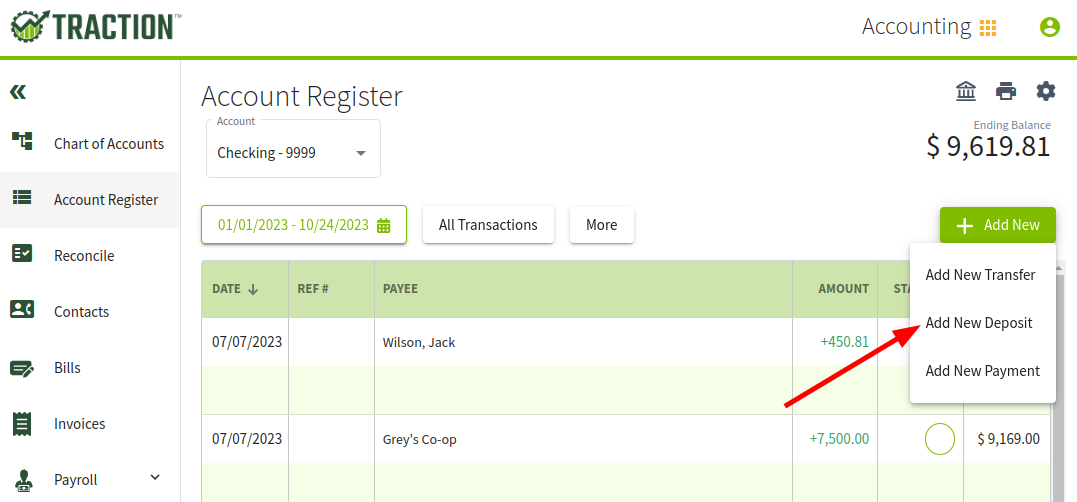
1. Click on the Dashboard and select Accounting. Next, select the proper account in the Account Register. Then click on the Add New button and select Add New Deposit.
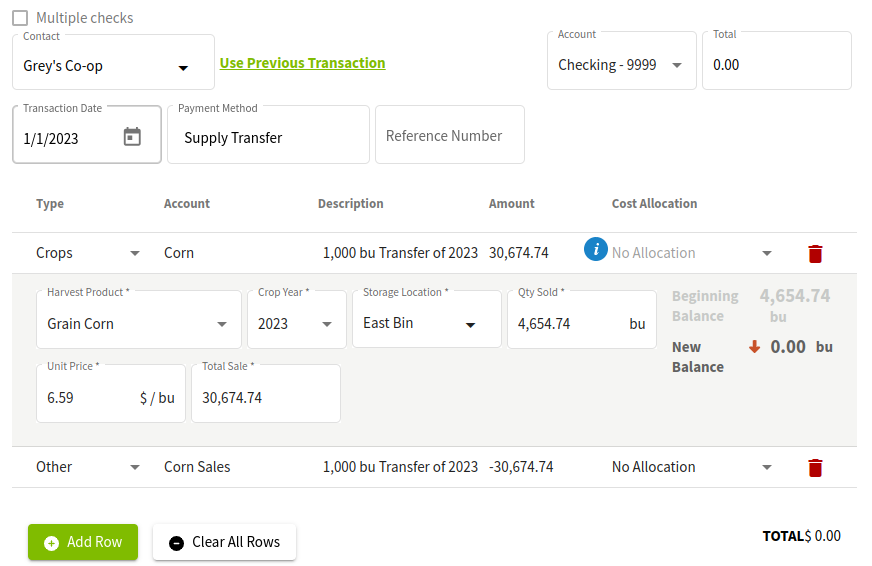
2. This transaction is for users who have inventory in Traction and need to audit or change their inventory balance.
-
- Transaction Date: Enter January 1st for the appropriate Crop Year
- One line will be a sale for the particular harvest product and storage location. In our case, we are selling our Central Valley storage location to a zero bushel balance for our 2023 crop year as an adjustment.
- The second line will be an Other transaction for the same Revenue account. In this example, we will use Corn Sales. The amount will be a negative of the dollar amount in the Crops sale line item. This will offset the expense and deduct the inventory from the specified location for the year.
Saving the Transaction
3. After you have reviewed the transaction, click the Save and Close button. You will receive a warning about the $0 payment transaction. This is expected, so click Yes.
4. Next, you will be asked if you want to update the average cost for the selected crop. You can click No since this is a transfer.
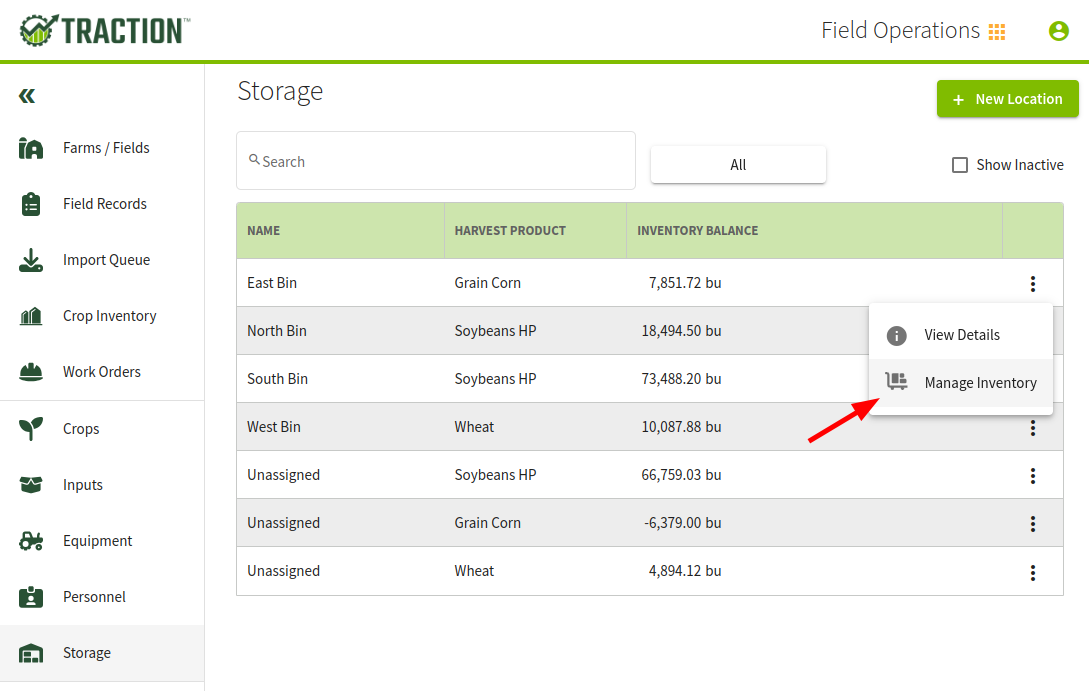
Review Your Updated Inventories
5. Click on the Dashboard and select Field Ops. Next, click on the Storage tab in the left margin to view the inventory. Click on the storage location row and select Manage Inventory to view the inventory.
If you look at the current year, the inventory balance should be 0.
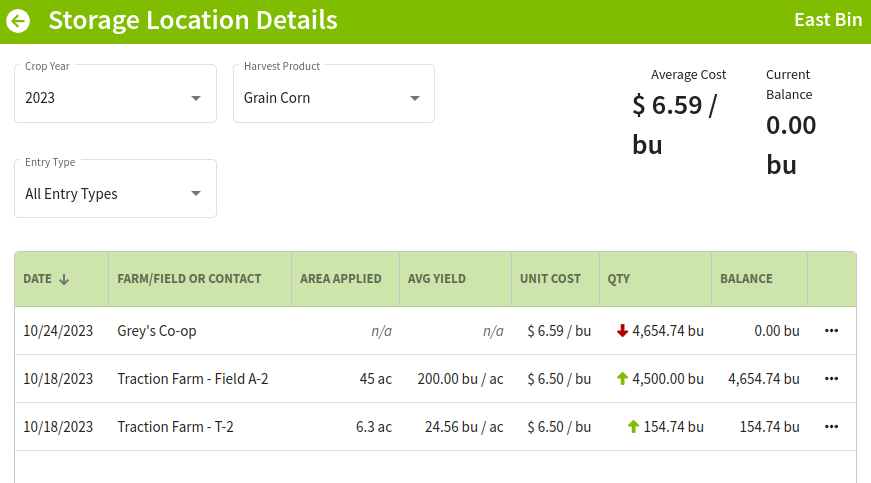
And that’s it. You have now successfully adjusted the inventory of your storage.