![Type=Full, Color=Light, Lockup=Default@2x.png]](https://info.tractionag.com/hs-fs/hubfs/Type=Full%2c%20Color=Light%2c%20Lockup=Default@2x.png?height=32&name=Type=Full%2c%20Color=Light%2c%20Lockup=Default@2x.png)
Field records on the Traction Mobile App makes it easier to capture field activities directly from your phone while you’re on the go.
You can add field records from the Import Queue or manually.
1. Create Manual Field Records in Traction Mobile
2. Import Field Records from My Import Queue on Traction Mobile
To manually enter Field Records, follow these steps:
1. Open the Traction Mobile App on your Apple or Android device.
2. Navigate to the Field Records section of the mobile app and select the green plus icon in the bottom right corner of the screen.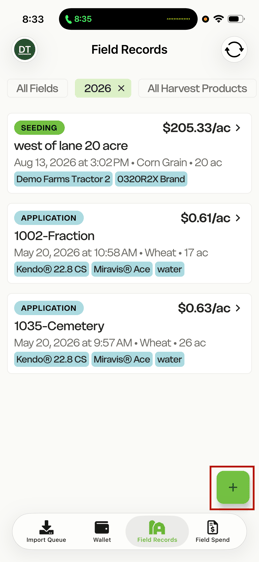
3. Select the crop zone you wish to create a record on.
If you would like to create multiple field records for the same activity type at once, you can click Select in the top right and then choose the fields you wish to create records on. You will then be prompted to click the green Next button that appears on the screen.
Note: You can use filters to narrow down your search by fields, year and harvest products. 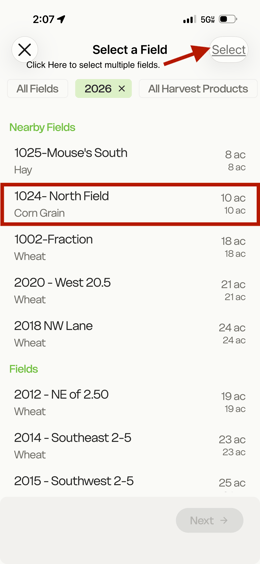
4. Click on the type of activity you wish to log a field record for. Choices are: Tillage, Seeding, Application and Harvest. 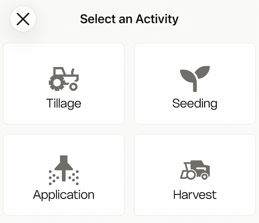
5. Once you have selected the activity type, begin entering in the activity details for the field you have chosen. Once completed, click the green save button in the bottom right to save the field record. 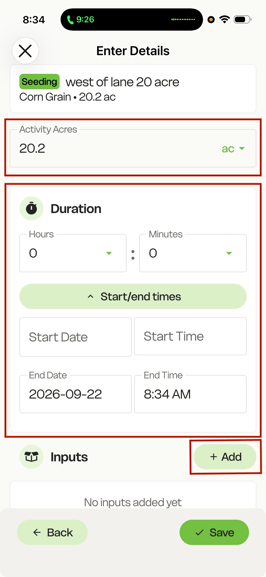
6. Once you have saved the field record, you can navigate to the Field Records tab on the bottom of your mobile device. This will show records that you have created.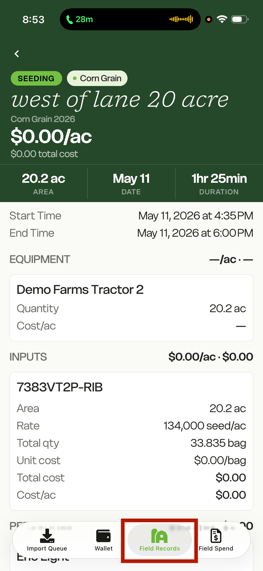
If your records are not showing in your Traction account on the desktop/laptop, be sure to make sure the app has synced.
Once Field records have been manually imported or added through the import queue, you can edit them further from your desktop platform.
To import Field Records from Import Queue on Traction Mobile:
1. Open the Traction Mobile App on your Apple or Android device.
2. Navigate to the Import Queue icon at the bottom of your screen.

3. Click on the field crop zone you wish to import from the list in your queue.
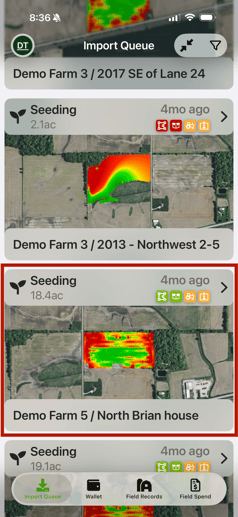
4. Review the field/zone, inputs, equipment and personnel details that are attached to the record by clicking the arrows to the right of each area to expand the details. Review the data present and check to make sure the field/zone and input icons are highlighted in green. Make any adjustments that are needed then select the green Import in the bottom right. If you would like to delete this record, click the yellow Archive button in the bottom left. (Once you have archived, you can not get this record back and manually importing would be the only option to do so.)
Note: If you are entering a task with inputs, be sure to look for the filtering options available to you when entering inputs. 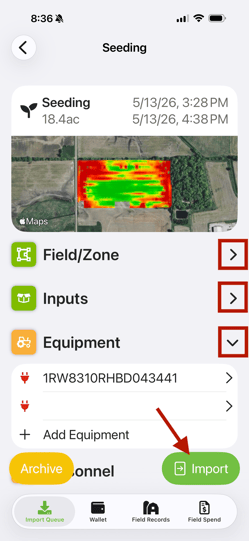
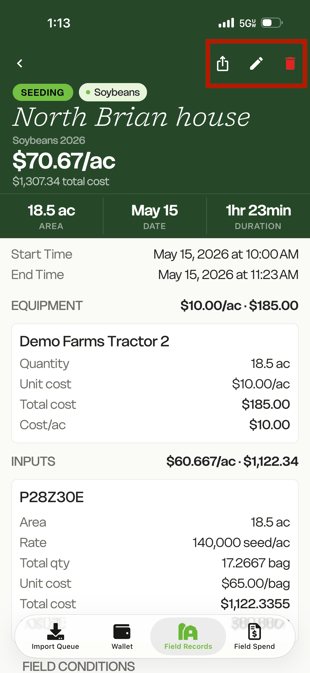
6. To see the field record details after importing, click on the Field Records tab and select the record you wish to view. From this screen you can also export field record details or select the circle sync icon in the top right corner. 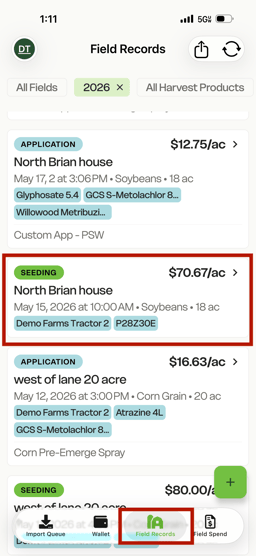
7. Review details of this import and either export, edit or delete by using the icons in the top right hand corner of the screen.