Before reconciling your imported field records in Traction, make sure you have completed the following steps.
1. Connect your Climate Field View Account in Traction
If you have not connected your Climate Field View account, please do so by following our How do I connect my Climate Field View account? KB article.
If you need assistance logging into your Climate Field View account, you can reach out to Climate Field View's Support Team.
2. Setup Crop Zones for each of your fields
It will be easier to assign crop zones for each of your fields before editing imported field records. If you have not done so already, you can go through our How do I manage my crop zones? KB article.
3. Setup favorite Products and costs associated with each
It will be more effective to have your favorite products selected (moving them to the top of the list) and having up to date details will improve your data quality. You can follow our KB article How do I add favorite products and assign costs? to learn more.
Note: It can take up to 24-48 hours for field records to appear in the Import Queue.
1. Using the navigation menu on the left hand side, open the Field Ops menu and look for Import Queue.

2. Click on Import Queue to view the imported field records. If you choose not to import a field record, click on the three dots to the right of the record and select Archive Record.
Archiving incomplete operations from the Import Queue will prevent updates to that field operation and will make the operation unavailable for future selection in the Import Queue. Do not archive incomplete operations if you want the operation to be available after completing field work.
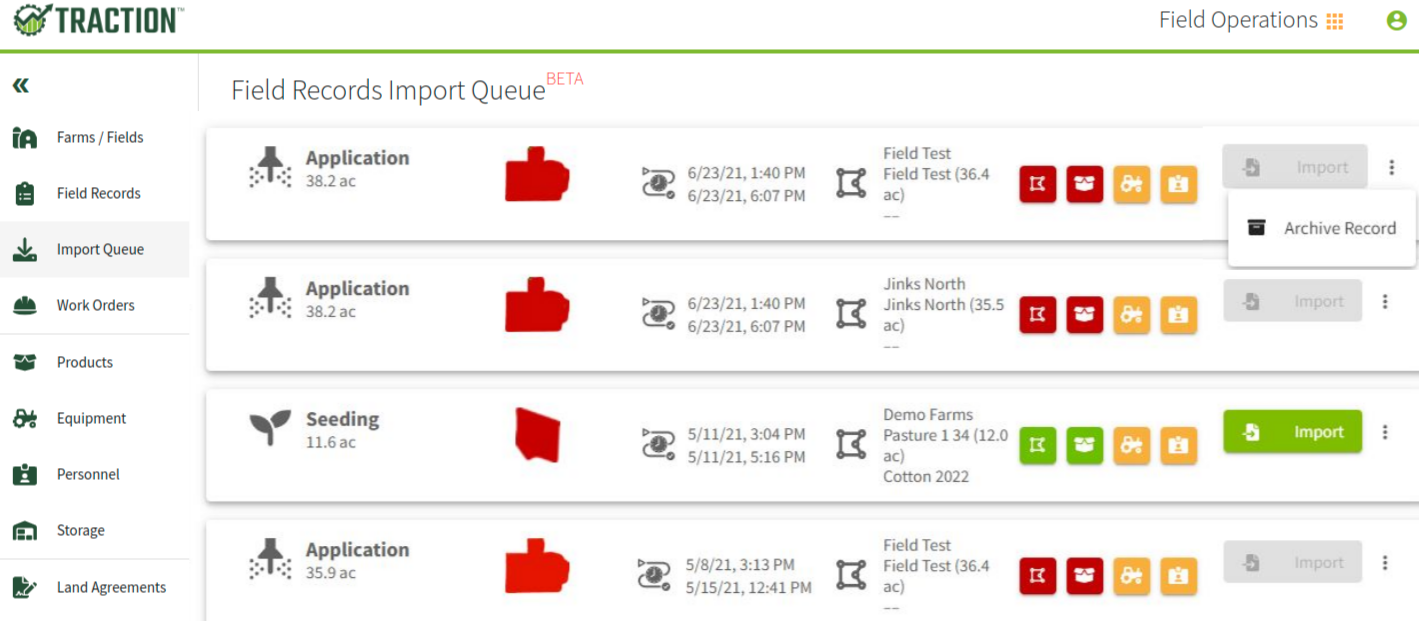
3. In the field record click on the field boundary icon ![]() and select the correct crop zone. Click on the Save button when you have made your selection.
and select the correct crop zone. Click on the Save button when you have made your selection.

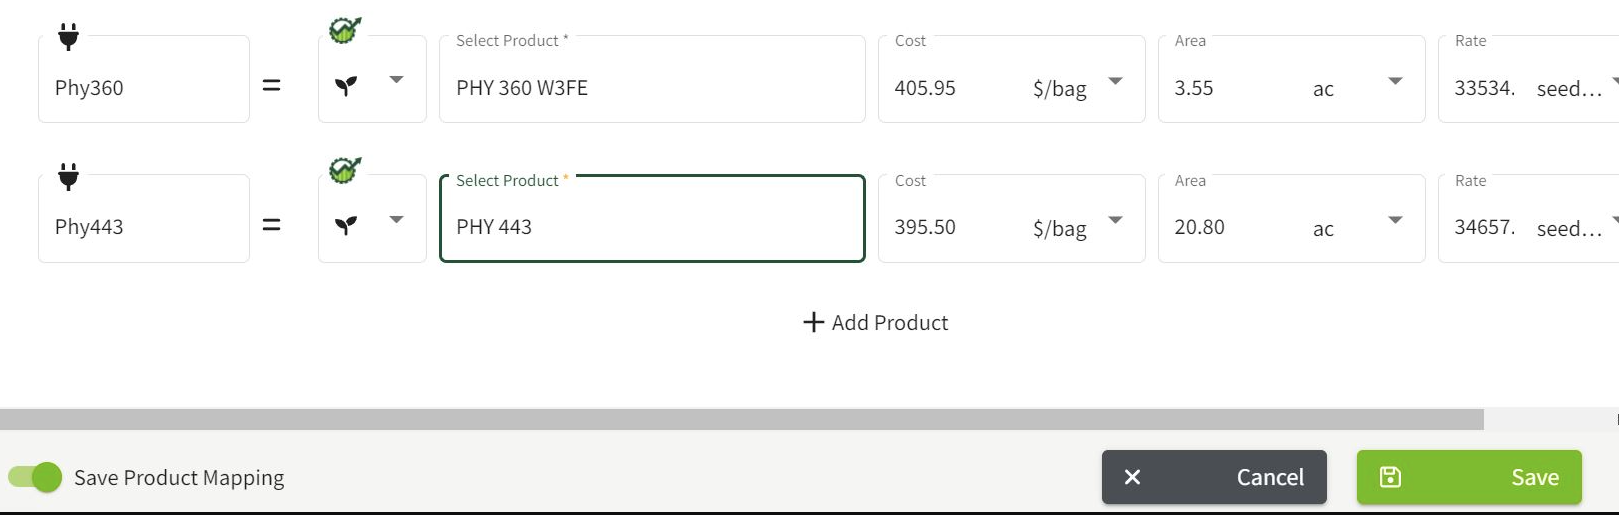
4. Click on the product icon ![]() . Select your products and confirm the entries.
. Select your products and confirm the entries.
NOTE: Once you have selected Save Product Mapping it will match and fill in the details of all other field records and future records using that product.
Next, click on the Save button when you have made your selections.
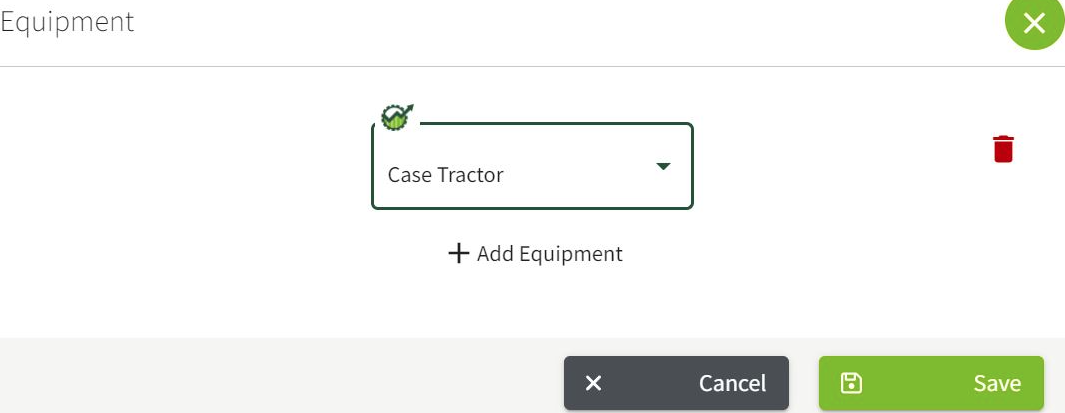
5. Click on the equipment icon ![]() . Select your equipment and confirm the entries. Next, click on the Save button when you have made your selections.
. Select your equipment and confirm the entries. Next, click on the Save button when you have made your selections.
6. Click on the personnel icon ![]() . Select your personnel and confirm the entries. Next, click on the Save button when you have made your selections.
. Select your personnel and confirm the entries. Next, click on the Save button when you have made your selections.

7. Once you have edited all of the information for the field record click on the Import button. The button will turn green when all of the entries have been edited and confirmed.

8. The field record will now be visible in the Field Record tab of Field Operations.
